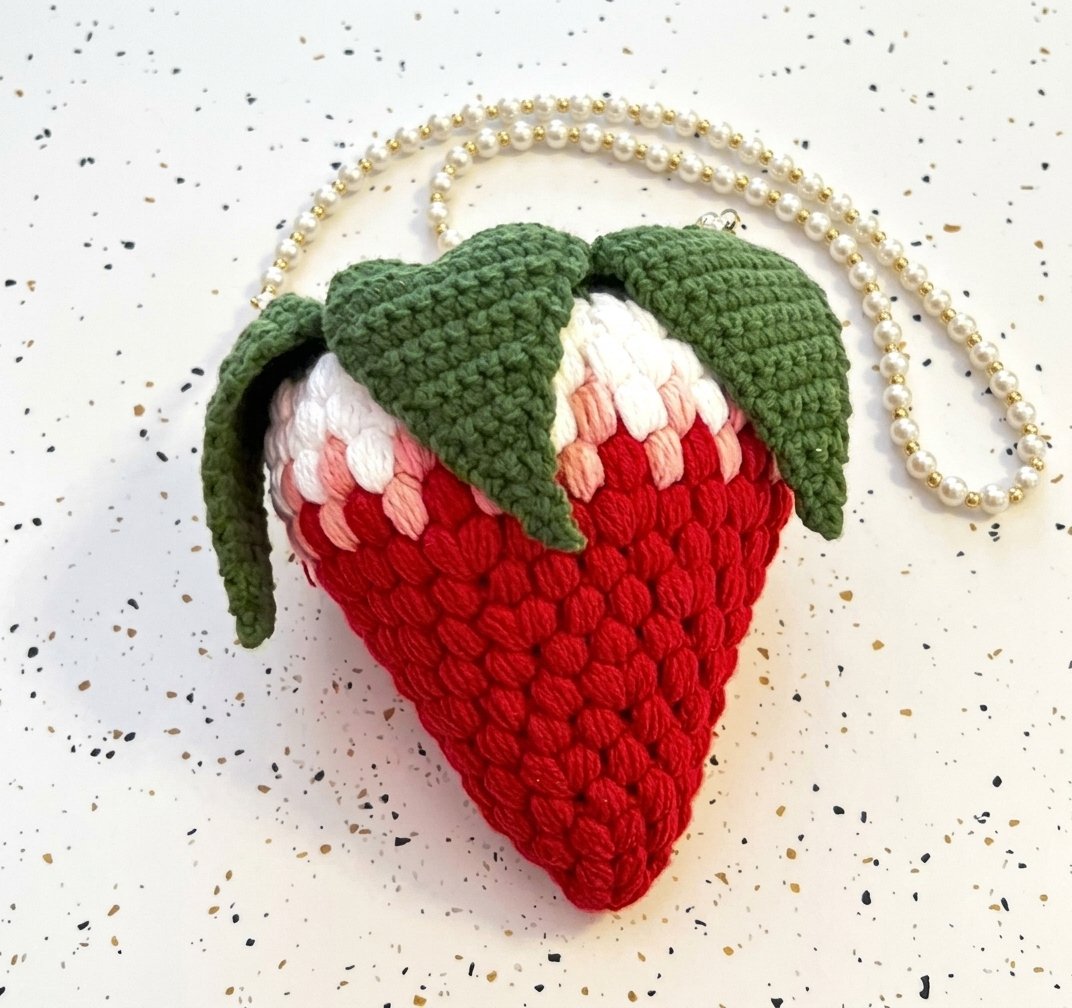
This project is a delightful strawberry-shaped crochet pouch. It features a vibrant gradient color transition, starting with dark red at the pointed base and shifting into light pink, finally finishing with a clean white near the top opening. The pouch has oversized green leaves on top, mimicking the look of a real strawberry. It’s perfect for holding small treasures like coins or lip balm.
In this guide, you will learn how to make this charming piece with simple steps. You will follow clear instructions to create each part of the pouch, including the puff stitches that give it its unique texture.
Reasons You’ll Want to Make This
Creating this lovely pouch involves easy steps that are fun and relaxing. The beautiful colors in the photo inspire creativity and add joy to your crochet time. You will enjoy changing colors as you work from red to pink and then white. This gradient effect is simple yet striking, making the pouch visually appealing while being practical for storing small items.
Skill Level and Stitches
This project is ideal for those with an intermediate skill level. You will learn how to do puff stitches, which create a rich texture. Each puff stitch requires you to yarn over and pull up loops several times before finishing it off. Expect to spend about 2-3 hours making this delightful pouch.
Materials You’ll Need
Here’s what you need to make this project.
- Yarn: Worsted weight cotton yarn in Dark Red, Light Pink, Cream White, and Forest Green (about 150-200 yards total)
- Crochet hook: 3.5 mm (Size E-4) crochet hook
- Pearl bead strap (approx. 20-25 cm with lobster clasps or wire ends)
- Metal jump rings or eyelets for handle attachment
- Yarn needle
- Scissors
- Stitch marker
How to Crochet the Puff Strawberry Pouch
1. Pouch Base: Start with a magic ring using Dark Red yarn. Chain 2 (this does not count as a stitch). Work 6 puff stitches into the ring, then slip stitch to the first puff stitch to join. You should have 6 puff stitches.
2. Puff Stitch Explanation: A puff stitch is made by yarning over, inserting your hook into a stitch, and pulling up a loop four times in the same stitch. You will end up with 9 loops on your hook. Yarn over again and pull through all 9 loops, then chain 1 to lock it in place.
3. Round 2: Chain 2, then work 2 puff stitches into each chain-1 space around the base. Slip stitch to join at the end of the round. You should have 12 puff stitches now.
4. Round 3: Chain 2 again. For this round, do [1 puff stitch in next space, then 2 puff stitches in next space] six times around. Slip stitch to join at the end of this round for a total of 18 puff stitches.
5. Round 4: Chain 2 once more and work one puff stitch into each space around this round. Slip stitch to join again; you should still have 18 puff stitches.
6. Round 5: Chain 2 again and do [1 puff stitch in next two spaces, then 2 puff stitches in next space] six times around for this round. Slip stitch to join at the end; now you have increased to 24 puff stitches.
7. Round 6: Chain 2 again and work one puff stitch into each space around once more; slip stitch to join at the end of the round still holding onto those 24 puff stitches.
8. Round 7: Chain 2 one last time for this color and work one puff stitch into each space around again; slip stitch to join at the end of this round before fastening off your red yarn.
9. Round 8 (Light Pink Yarn): Join Light Pink yarn in any space from your previous round by making a slip knot first if needed. Chain 2 and work one puff stitch into each space around again; slip stitch to join before fastening off your pink yarn now too.
10. Round 9 (Cream White Yarn): Join Cream White yarn in any space as you did before with light pink yarn by making another slip knot if needed! Chain 2 here too and work one last set of puff stitches around; slip stitch together after joining here too.
11. Round 10: Now chain just once instead of twice! Work two single crochets into each of those nice puffy spaces all around forming an even rim for your bag! Slip-stitch back up where you started from joining everything neatly together! Fasten off white yarn but leave a tail for weaving later!
12. Green Leaves (Make 4 using Forest Green Yarn): Start by chaining eleven stitches long! Then single crochet in that second chain from your hook followed by half double crochet next till five double crochets are made down along those chains; go back up doing half doubles followed by singles until you’ve reached that last chain! Here make three singles back down turning it around neatly! In total there should be twenty-two stitches per leaf!
13. Leaf Edge Round: After making all four leaves together—now it’s time for their edges! Simply sc across ten first ten left out stiches before doing (sc,ch2, sc) right on point where they all come together finishing off along last ten remaining stiches! Don’t forget fasten off leaving tails long enough though so we can sew them later!
14. Assembly and Handle: Position your four leaves evenly spaced around top rim right above where those cream sections ended pointing downward slightly as shown! Use your needle here sewing them securely together using leftover tails from earlier! Next attach metal jump rings onto opposite sides located just below these leafy sepals surrounding pearl strap directly using lobster clasps ensuring they’re attached well too!! Lastly weave away any remaining loose ends after everything feels secure enough!
Assemble and Finish
To complete your strawberry pouch, sew on each leaf securely if needed using some left-over threads from earlier rounds! Then attach that beautiful pearl handle snugly through metal jump rings placed properly so nothing falls apart while carrying it along wherever life takes you next!. Be sure also weave away any other loose ends sticking out until they’re gone completely while lightly blocking everything out gently shaping such adorable creations just right!
Now enjoy using your lovely new strawberry pouch that showcases both style and functionality perfectly!
Mastering the Technique
Tension is important for this piece. Make sure your stitches are even. If your stitches are too tight, try using a larger hook. If they are too loose, use a smaller hook. This will help keep the shape of your pouch neat and tidy.
Problems You Can Solve Fast
Common mistakes include messy color changes, floppy leaves, and weak pearl handles. For messy color changes, make sure to change yarn smoothly without leaving large gaps. For floppy leaves, check that you are working enough stitches in each leaf. To fix a weak handle, ensure the metal jump rings are securely attached to the pouch.
Make Your Project Unique
You can change the colors for a unique look while still using the same materials. Try using a darker shade of green for the leaves or mix in shades of pink for a more playful pouch. Adjusting the size is also possible by adding or reducing rounds.
Smart Care for Your Finished Piece
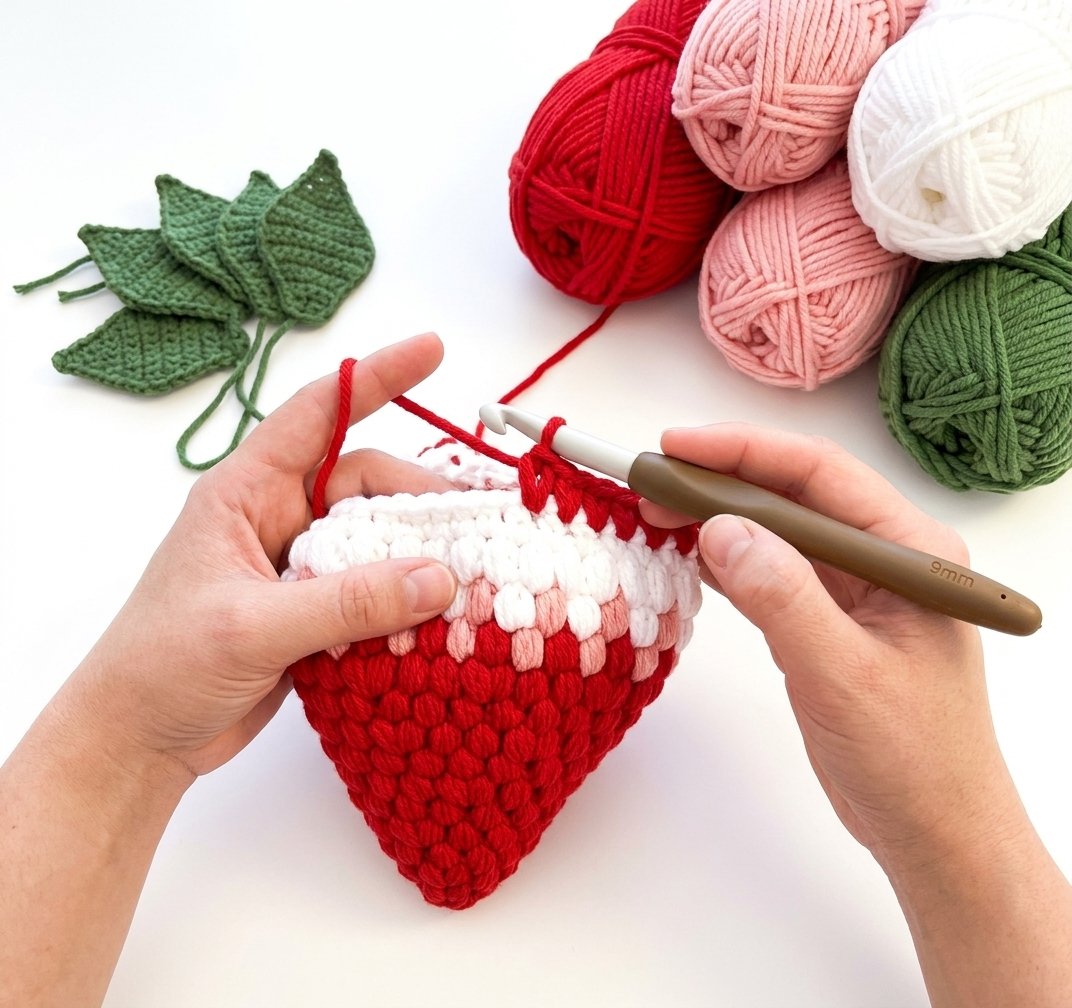
To care for your finished pouch, hand wash it gently with mild soap. Reshape it while damp to maintain its form. Always dry it flat to keep from losing its shape or structure.
The Maker’s Golden Tips
- Count your stitches carefully to keep your rounds even and avoid mistakes.
- When changing colors, remember to pull through both strands to keep tension even.
- Make sure leaves are sturdy by securing them well when sewing onto the pouch.
- Use strong jump rings for the handle attachment to ensure durability.
This project is fun and satisfying to make! Enjoy creating your puff stitch strawberry pouch that is perfect for holding small treasures or gifts.
Wrapping Up
You have completed your beautiful puff stitch strawberry pouch! This cute little bag features a lovely gradient from dark red to light pink and cream white, topped with charming green leaves. It’s perfect for storing small treasures or lip balm, and the pearl beaded handle adds a stylish touch. Now that you know how to crochet this adorable pouch, pick up your hook and start creating more! Enjoy making these delightful pouches for yourself or as gifts.
FAQs
Is this good for beginners, and which stitches do I need?
This pattern is suited for intermediate crocheters since it involves puff stitches. You will learn how to create 4-loop puff stitches, which give the pouch its textured look. If you’re comfortable with basic crochet techniques and ready to try something new, this project will help you build your skills.
How long does it take to finish?
The total time to complete the puff stitch strawberry pouch is estimated at 2-3 hours. This can vary based on your skill level and how quickly you work. Set aside some time to enjoy the process!
What yarn and hook should I use, and can I change them?
For this project, use worsted weight cotton yarn in dark red, light pink, cream white, and forest green. A 3.5 mm (Size E-4) crochet hook is recommended for this pattern. While you can choose different colors, using similar yarn weight ensures that your finished pouch looks consistent.
How do I get the right size, and how do I make the handle?
To achieve the correct size of approximately 5 inches tall by 4 inches wide, follow the pattern steps closely without skipping rounds. The handle is made from a pearl beaded strap that is attached using metal jump rings to secure it to the top rim of the pouch.
Why do my stitches or color changes look uneven, and how do I fix that?
Uneven stitches can occur if your tension varies throughout the project. To fix this, try to maintain consistent tension while working each stitch. When changing colors, ensure you pull tight on both color ends to create a smooth transition between shades.
How do I wash, dry, and store it?
To clean your strawberry pouch, hand wash it gently with mild soap and cold water. Avoid wringing out excess water; instead, lay it flat on a towel to dry. Store it in a cool place away from direct sunlight to maintain its vibrant colors.
Can I change the colors or leaf count?
Yes, you can change the colors as desired! However, keep in mind that altering the leaf count may change the overall look of your pouch. Sticking with four leaves gives it a balanced appearance resembling an actual strawberry.
How do I start cleanly and finish the last end so it does not unravel?
Start with a magic ring for a neat beginning. When finishing off at the end of your project, fasten off securely by pulling through the last loop tightly. Weave in all loose ends using a yarn needle so they stay hidden inside your pouch.