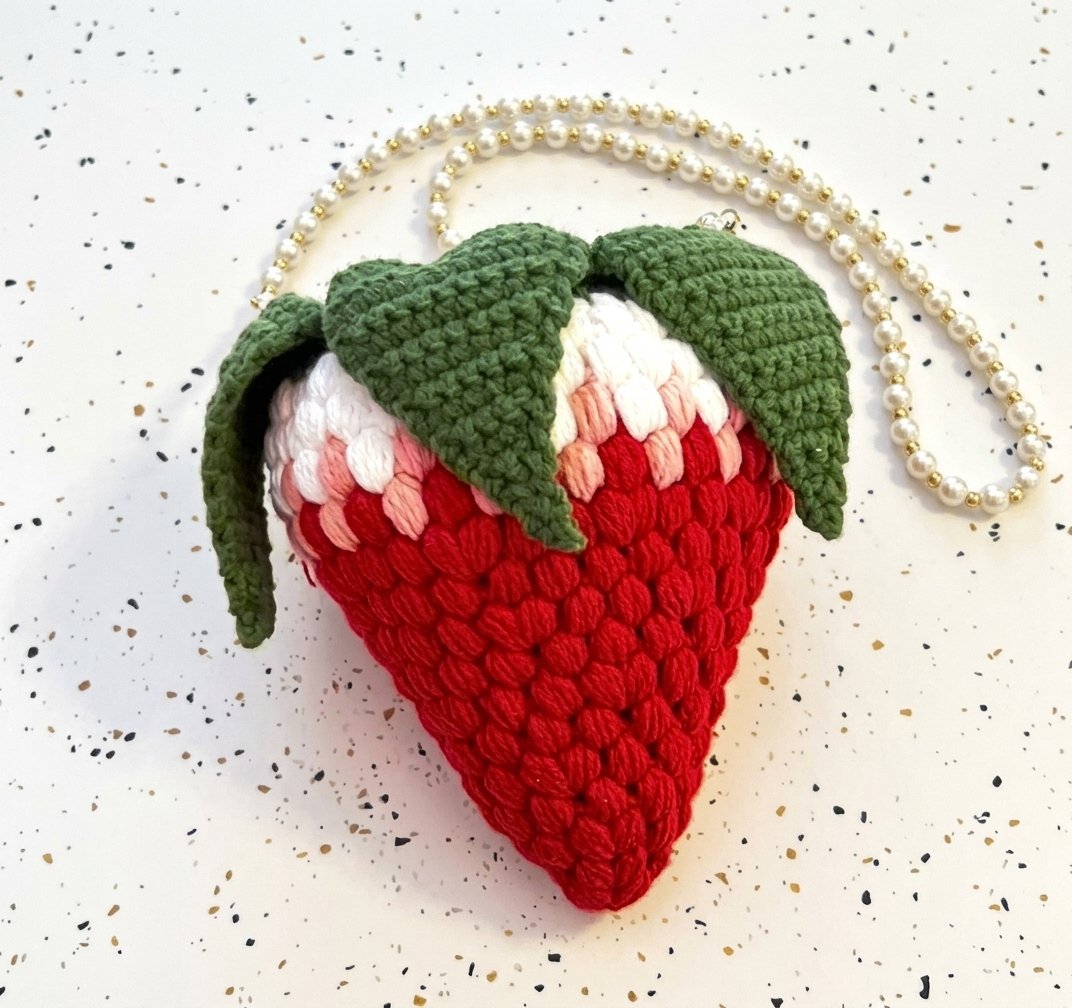
This delightful project features a charming gradient tote bag and a fun puff strawberry motif. The tote bag has a beautiful blend of colors, creating a stylish accessory perfect for anyone who loves unique crafts. It’s an ideal gift for friends or family who appreciate handmade items.
In this pattern, you will learn how to crochet a gradient tote bag and a puff strawberry. Each step is simple to follow, making it easy for beginners to create both pieces. You will learn the essential stitches and techniques needed to complete your lovely projects.
What Makes This Pattern Special
This pattern combines easy steps with a stunning finished look. You will enjoy the relaxing process of crocheting while creating something beautiful and functional. The gradient effect adds depth to the bag, while the puff strawberry is a playful touch. You can easily change the colors or size by adjusting your yarn choices or stitch counts.
Before You Begin
This project is suitable for intermediate crocheters. You will learn how to make puff stitches, single crochet stitches, and how to join rounds. Expect this project to take about 2 to 3 hours from start to finish.
Materials You’ll Need
Here’s what you need to make this project.
- Yarn: Worsted weight (#4) yarn in Crimson Red, Light Pink, White, and Forest Green (about 1 skein of each color)
- Crochet hook: 3.5 mm (US E-4) or 4.0 mm (US G-6)
- Other tools: scissors, yarn needle, stitch markers, and strong nylon thread or thin yarn for stringing pearls
How to Crochet the Main Piece
Let’s start with the tote bag.
Create the Base
1. **Start with Magic Ring**: With Crimson Red yarn, make a magic ring.
2. **First Round**: Round 1: Work 1 puff stitch into the ring by yarning over, inserting your hook into the ring, pulling up a loop four times (you will have 9 loops on your hook). Yarn over again and pull through all loops, then chain 1 to lock your stitch. Repeat this step three more times into the ring. Slip stitch into the top of the first puff stitch to join. You should have 4 puff stitches.
3. **Increase Rounds**: Round 2: Chain 1. Work 2 puff stitches into each chain-1 space around. Slip stitch to join. Now you’ll have 8 puff stitches.
4. **Continue Increasing**: Round 3: Chain 1. *Work 1 puff stitch in next chain-1 space; work 2 puff stitches in next chain-1 space; repeat from * around. Slip stitch to join for a total of 12 puff stitches.
5. **Repeat for More Size**: Round 4: Chain 1. *Work 1 puff stitch in next two chain-1 spaces; work 2 puff stitches in next chain-1 space; repeat from * around for a total of 16 puff stitches.
6. **Final Increase**: Round 5: Chain 1. *Work 1 puff stitch in next three chain-1 spaces; work 2 puff stitches in next chain-1 space; repeat from * around for a total of 20 puff stitches.
7. **Complete Base Rounds**: Rounds 6–8: Chain 1 and work one puff stitch in each chain-1 space around for three rounds total before finishing off with slip stitch at the end of round eight.
Create the Body with Gradient
8. **Change Color**: Round 9: Join Light Pink yarn in any chain-1 space from previous round. Chain 1 and work one puff stitch in each chain-1 space around before joining with slip stitch (20 total).
9. **Keep Going with Pink**: Round 10: Chain 1 and repeat working one puff stitch in each chain-1 space around before joining with slip stitch (20 total).
10. **Switch to White**: Round 11: Join White yarn in any chain-1 space from previous round and repeat working one puff stitch in each chain-1 space around before joining with slip stitch (20 total).
11. **Finish Body Rim**: Round 12: Chain 1, then single crochet (sc) into the top of each puff stitch and into each chain-1 space around before joining with slip stitch (40 sc).
Make Handles
12. **Create Handles**: To add handles later, you’ll want to leave some long tails when finishing off so they can be stitched securely later.
How to Crochet the Extra Motif
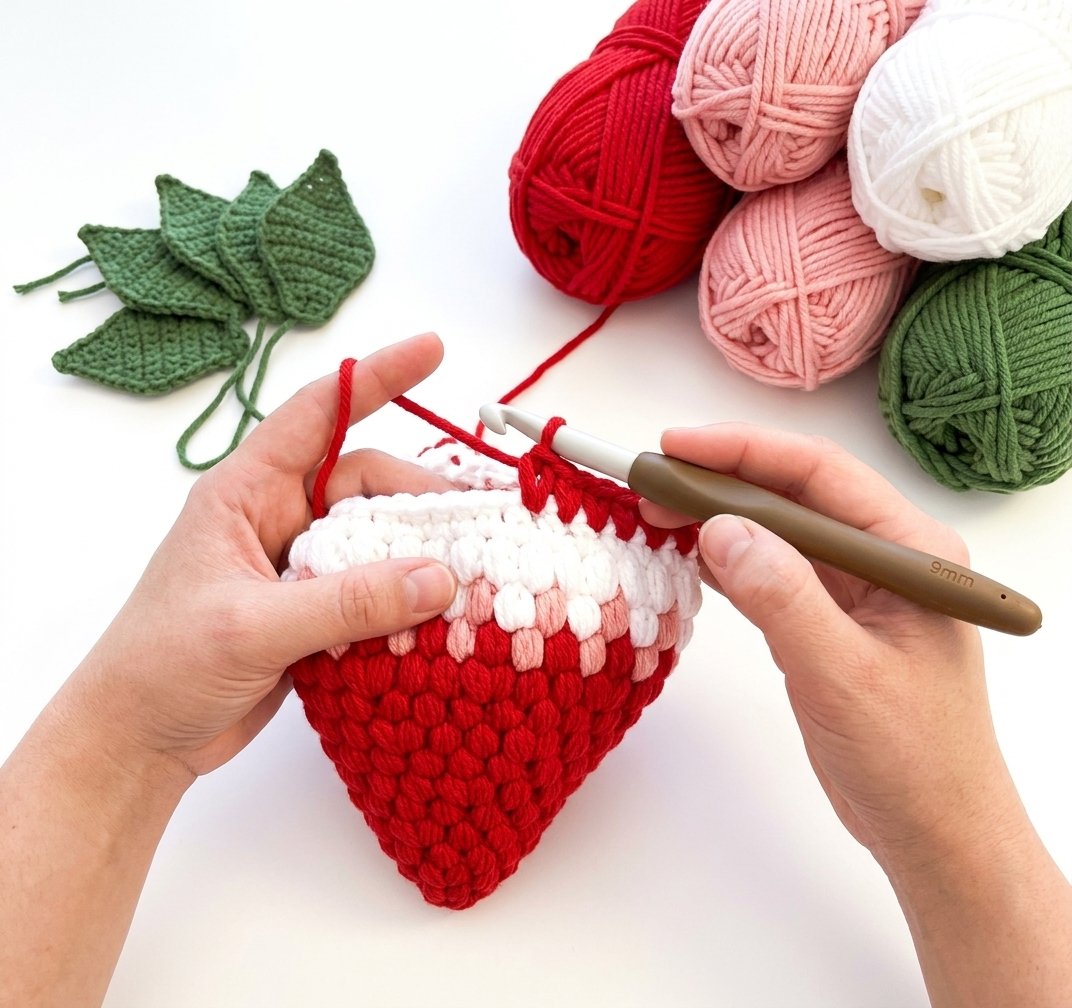
Now we will create your lovely puff strawberry.
Make Strawberry Body
13. **Start Puff Strawberry**: With Crimson Red yarn, make a magic ring.
14. **Work Puff Stitches**: Repeat steps above as follows:
– Round 3 has four rounds of increasing numbers of puff stitches until you reach round five where you end up with twenty total.
– From rounds six through eight continue working only one puff stitch per ch-1 until all are done.
Gradient Bands
15. **Change Colors Again**:
– Round nine starts back again using light pink as described earlier and ends after round eleven where white is introduced.
Create Strawberry Leaves
16. **Make Leaves**:
– With Forest Green yarn, ch8 then sc along back down creating leaves that taper at top.
– Follow exact rounds as indicated until you are left with small leaf pieces that can be sewn on later.
17. **Add Leaf Edging**:
– Join green yarn at leaf base and sc evenly along sides before fastening off leaving long tail.
Assembly & Pearl Handle
18. **Position Leaves**:
– Place leaves around top white rim securely stitching them down so they flare out like real strawberry leaves.
19. **Attach Pearls**:
– String on pearl beads and attach securely on either side of opening using remaining tails from leaves.
Assemble and Finish
Join any remaining parts together carefully as instructed above while ensuring all edges are neat and secure them well using tapestry needle if necessary where components meet together nicely without gaps showing through seam lines! Make sure ends are woven neatly back into project base!
With these instructions completed you now have successfully created your own unique gradient tote bag AND adorable little strawberry pouch! Enjoy crafting more vibrant creations ahead!
How to Get Neat, Even Stitches
To keep your stitches neat and even, check your tension while crocheting. Hold the yarn gently but firmly. If your stitches are too tight, try using a larger hook or loosening your grip on the yarn. For stitches that are too loose, pull the yarn tighter as you work or switch to a smaller hook. This project requires consistent puff stitches, so practice until you feel comfortable.
Common Mistakes and Easy Fixes
One common mistake is skipping the handles. Always attach pearl beads securely on opposite sides of the bag opening. Another mistake is messy color changes; make sure to change colors cleanly at the back seam for a smooth transition. Lastly, if your strawberry motif does not sit flat, adjust the leaf placement to ensure they overlap slightly for better support. These fixes will help maintain a polished look.
Add Your Personal Touch
You can customize the size of your tote bag by adding more rounds to the body or adjusting the number of puff stitches in each row. For colors, consider trying different shades of pink or green for a unique twist while still using Crimson Red, Light Pink, White, and Forest Green from the original materials list.
Care and Storage
To care for your tote bag and strawberry motif, wash gently by hand with mild soap. Reshape while damp to maintain its form and let it dry flat on a towel. This method helps preserve the plush texture of the puff stitches and keeps your bag looking fresh.
Helpful Maker Tips
- Count your puff stitches regularly to avoid losing track of your work.
- When changing colors, keep an eye on how you carry the yarn to avoid tangling.
- Use a stitch marker to mark the beginning of each round for easier tracking.
- For sewing on leaves, ensure they are securely attached to prevent any lifting or flopping.
Making this project is fun and rewarding! You will enjoy creating a lovely gradient tote bag with a charming strawberry motif that is perfect for everyday use or as a gift. Happy crocheting!
Wrapping Up
You have now completed your delightful project: the gradient tote bag and the puff strawberry! The tote bag features a beautiful color transition from deep crimson red to soft pink and white, using puff stitches that give it texture. Meanwhile, the puff strawberry pouch is topped with four charming green leaves and adorned with pearl beads for a lovely handle. Each piece showcases your crochet skills beautifully. So pick up your hook and start creating, because you now have everything you need to make these fun and functional items!
FAQs
Is this good for beginners, and which stitches do I need?
Yes, this project is suitable for beginners who are ready to try new techniques. You will need to know how to make puff stitches, single crochet, and slip stitches. The puff stitch creates the textured body of the bag and the strawberry pouch. If you can work in rounds and follow simple instructions, you’ll enjoy making these items.
How long does it take to finish both parts of the project?
Finishing both the gradient tote bag and the puff strawberry pouch typically takes about 2 to 3 hours. This time may vary depending on your crochet speed and comfort level with the stitches used. Taking breaks while working can help keep your hands relaxed as you create these fun items.
What yarn and hook should I use, and can I change them?
For this project, use worsted weight (#4) yarn in crimson red, light pink, white, and forest green. A 3.5 mm (US E-4) or 4.0 mm (US G-6) crochet hook is recommended. While you can change yarns or hooks if desired, stick to worsted weight for similar results in size and texture.
How do I get the right bag size, and how long should the handles be?
The finished size of the gradient tote bag is approximately 7 inches wide by 8 inches long. To ensure proper sizing, follow the pattern steps closely without skipping rounds. For the handles made from pearl beads, string about 12–15 beads onto strong nylon thread or thin yarn; this length creates a comfortable handle for carrying.
Why do my stitches or color changes look uneven, and how do I fix that?
Uneven stitches or color changes can happen if tension varies across your work or if you don’t change colors cleanly at the back seam. To fix uneven tension, practice keeping your yarn consistent as you work each stitch. When changing colors, remember to pull tight at the back seam for a neat transition.
How do I wash, dry, and store the bag and motif?
To care for your gradient tote bag and puff strawberry pouch, hand wash them gently in cold water with mild detergent. Lay them flat to dry away from direct sunlight to maintain their shape and colors. Store them in a cool place when not in use to prevent any damage.
Can I change the colors or move the strawberry?
Absolutely! Feel free to customize colors based on your style preferences; just ensure they are still worsted weight yarns for consistency in texture. If you’d like to reposition the strawberry motif on another project or surface, simply attach it securely using a tapestry needle.
How do I start cleanly and finish the last end so the bag does not unravel?
To start cleanly with a magic ring is essential for a tidy beginning on your projects like these bags. When finishing off at the end of your project, weave in all loose ends securely using a tapestry needle through several stitches before cutting any excess yarn. This prevents unraveling while ensuring durability in your creations.