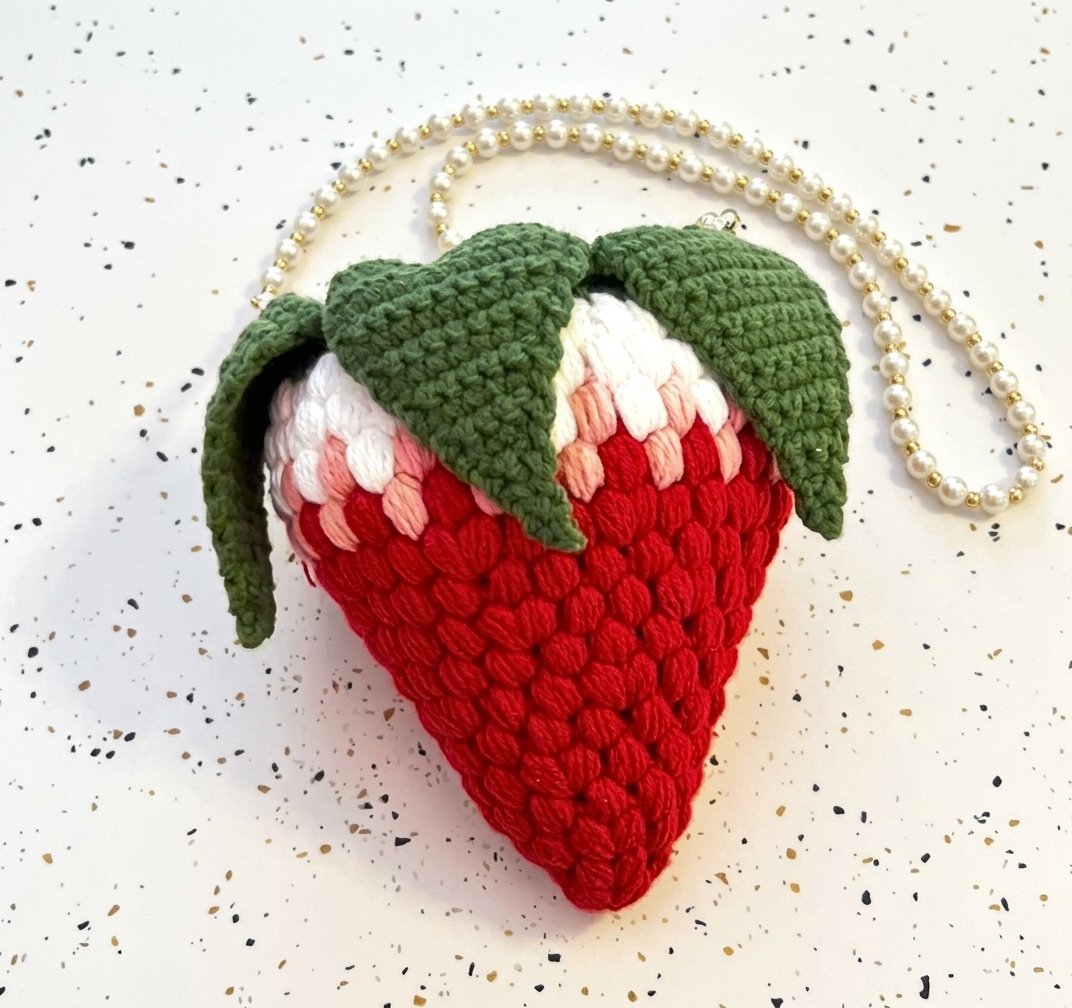
This cute crochet pouch looks like a plump strawberry. It has a deep red base that swells outwards, transitioning into soft light pink puff stitches. At the top, there is a clean white rim. Four dark green leaves sit naturally around the upper edge, adding detail and charm. The pouch includes a lovely pearl strap that makes it easy to carry on your shoulder or across your body.
In this guide, you will learn how to create this delightful strawberry pouch using simple steps. The process is relaxing and enjoyable, perfect for anyone looking to add a fun accessory to their collection.
What Makes This Pattern Special
This pattern features easy steps that create a beautiful gradient effect. The combination of colors gives the pouch its strawberry shape, while the puff stitches add texture and dimension. You will find the process soothing as you watch your piece come to life with each stitch change.
Before You Begin
This pattern is suitable for intermediate crocheters. You will learn how to work puff stitches, create color changes, and construct leaves to complete the design. Expect to spend about three hours making this charming pouch.
Materials You’ll Need
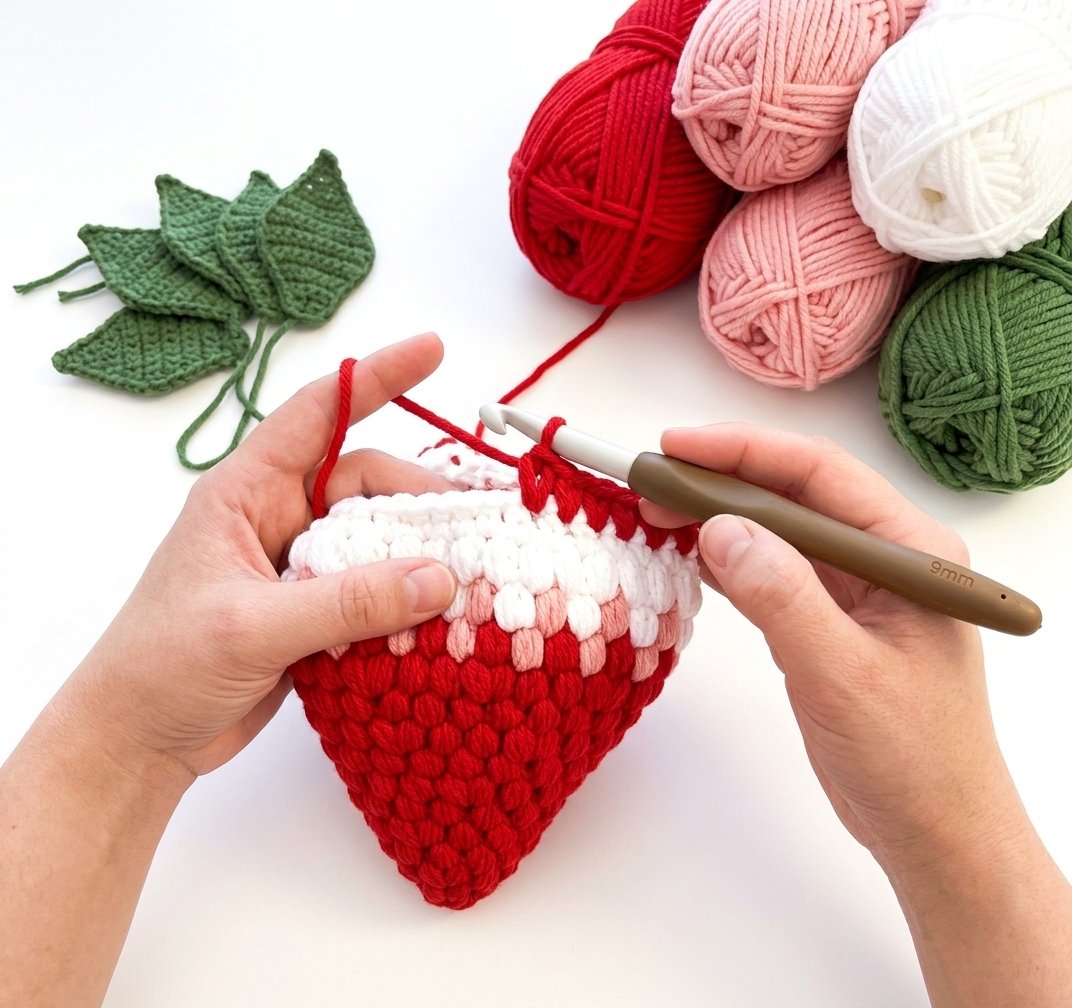
Here’s what you need to make this project.
- Worsted weight yarn in Red, Light Pink, White, and Dark Green
- 4.0 mm crochet hook
- Pearl bead strap with secure end connectors or loops
- Tapestry needle
- Stitch marker
- Scissors
How to Crochet the Puff Strawberry Pouch
1. Start with a Magic Ring: Make a magic ring and chain 1.
2. Create Puff Stitches: Work 4 puff stitches into the ring and join with a slip stitch to the first puff stitch. You now have 4 puff stitches.
3. Round 2: Chain 1 and work 2 puff stitches into each chain-1 space around; join with a slip stitch. You will have 8 puff stitches.
4. Round 3: Chain 1 and work (1 puff stitch in next space, 2 puff stitches in next space) four times around; join with a slip stitch for a total of 12 puff stitches.
5. Round 4: Chain 1 and work (1 puff stitch in next 2 spaces, 2 puff stitches in next space) four times around; join with a slip stitch for 16 puff stitches.
6. Round 5: Chain 1 and work (1 puff stitch in next 3 spaces, 2 puff stitches in next space) four times around; join with a slip stitch for 20 puff stitches.
7. Rounds 6-8: For rounds six through eight, chain 1 and work one puff stitch in each space around; join with a slip stitch at the end of each round. You will maintain 20 puff stitches for these rounds.
8. Round 9 Gradient Row: Join Light Pink yarn in any chain-1 space, chain 1, work one puff stitch in each space around; join with slip stitch. Fasten off light pink yarn when done.
9. Round 10 Rim Base: Join White yarn in any chain-1 space, chain 1, work one puff stitch in each space around; join with slip stitch for another set of 20 puff stitches.
10. Round 11 Rim Edge: Chain one and work one single crochet in the top of each puff stitch and one single crochet in each chain-1 space around; join with slip stitch when finished. You should have completed a total of 40 single crochets here.
11. Make Leaves: With Dark Green yarn, make four leaves by chaining ten and working various stitches along the chain as directed—scs, hdcs, dc until completing the leaf shape—and fasten off leaving long tails for sewing.
12. Assembly and Strap Attachment: Position your four green leaves evenly around the white rim so they drape down over the pink gradient row naturally. Use yarn tails and tapestry needle to sew each leaf securely onto the rim before attaching your pearl strap ends inside opposite sides of the opening.
Assemble and Finish
After completing all steps, ensure that your leaves are sewn on firmly and that your pearl strap is attached well inside the top rim using sturdy thread or yarn matching your color scheme. Weave in any loose ends from your project carefully so it looks neat and tidy before enjoying your new strawberry pouch!
Improving Your Technique
For this puff strawberry pouch, maintaining even tension is important. If your stitches are too tight, try using a larger hook or yarn. If they are too loose, ensure you are not pulling the yarn too far when making puff stitches. Keeping consistent tension will help the project hold its shape well.
If Something Looks Off
If your color changes look messy, ensure you are joining new colors neatly at the end of each round. For floppy leaves, make sure to stitch them securely to the rim. If the pearl strap feels weak, double-check that it’s attached firmly using sturdy thread or yarn for support. Each of these fixes will improve the overall look and stability of your pouch.
Customize the Look
You can change colors by selecting different shades of red, pink, or green while still matching the original materials. You may also adjust the size slightly by adding or removing rounds in the main body for a larger or smaller pouch.
Care, Washing, and Storage
To care for your strawberry pouch, wash it gently with mild soap and cold water. Reshape it while damp to maintain its form and let it dry flat. This method ensures your pouch stays plump and retains its beautiful gradient.
Practical Crochet Advice
- Count your stitches carefully in each round to avoid missing any increases.
- When changing colors, always attach new yarn neatly to prevent gaps.
- For leaves, secure them well to ensure they drape nicely without flopping.
- The pearl strap should be attached securely to withstand daily use.
Making this puff strawberry pouch is a fun project! Enjoy creating a unique piece that is both stylish and functional. Happy crocheting!
Final Thoughts
You have now completed your very own puff strawberry gradient pouch. This textured bag features a lovely color transition from deep red to soft pink and finally to white, topped with charming green leaves. The bag’s unique shape and pearl strap make it perfect for carrying your essentials in style. Pick up your hook, enjoy the satisfaction of creating this delightful piece, and show off your handmade accessory!
FAQs
Is this good for beginners, and which stitches do I need?
This pattern is labeled as intermediate due to the use of puff stitches and the construction method. You will need to know how to create puff stitches and work in rounds. The puff stitch requires yarn over and pulling through multiple loops, so some practice may be needed if you are new to it.
How long does it take to finish?
On average, finishing the puff strawberry gradient pouch takes about 3 hours. The time may vary depending on your experience level with the puff stitch and how quickly you can follow the pattern steps.
What yarn and hook should I use, and can I change them?
You should use worsted weight yarn in red, light pink, white, and dark green as specified in the pattern. A 4.0 mm crochet hook is recommended for best results. While you can experiment with other yarn weights or hooks, it may change the size and look of your pouch.
How do I get the right size, and how do I make the handle?
To achieve the right size of 7 inches wide at the top by 8 inches long, follow the rounds carefully as outlined in the pattern. The handle is made from a pearl bead strap that is attached inside the top rim of the pouch using secure end connectors.
Why do my stitches or color changes look uneven, and how do I fix that?
Uneven stitches often result from inconsistent tension or height in your puff stitches. To fix this issue, focus on keeping your loops uniform in height while working through each round. This helps maintain an even texture throughout your pouch.
How do I wash, dry, and store it?
To clean your pouch, hand wash it gently with mild soap in cool water. Avoid machine washing as it may distort its shape. Lay it flat to dry completely before storing it in a cool, dry place to maintain its structure.
Can I change the colors or leaf count?
Yes, you can change colors based on your preference! However, keep in mind that changing leaf count may affect how they sit around the opening of the pouch. The original design uses four leaves for a balanced look.
How do I start cleanly and finish the last end so it does not unravel?
Start by making a magic ring for a neat beginning. When finishing off each color or round, make sure to securely fasten off by weaving in all ends tightly with a tapestry needle to prevent unraveling over time.