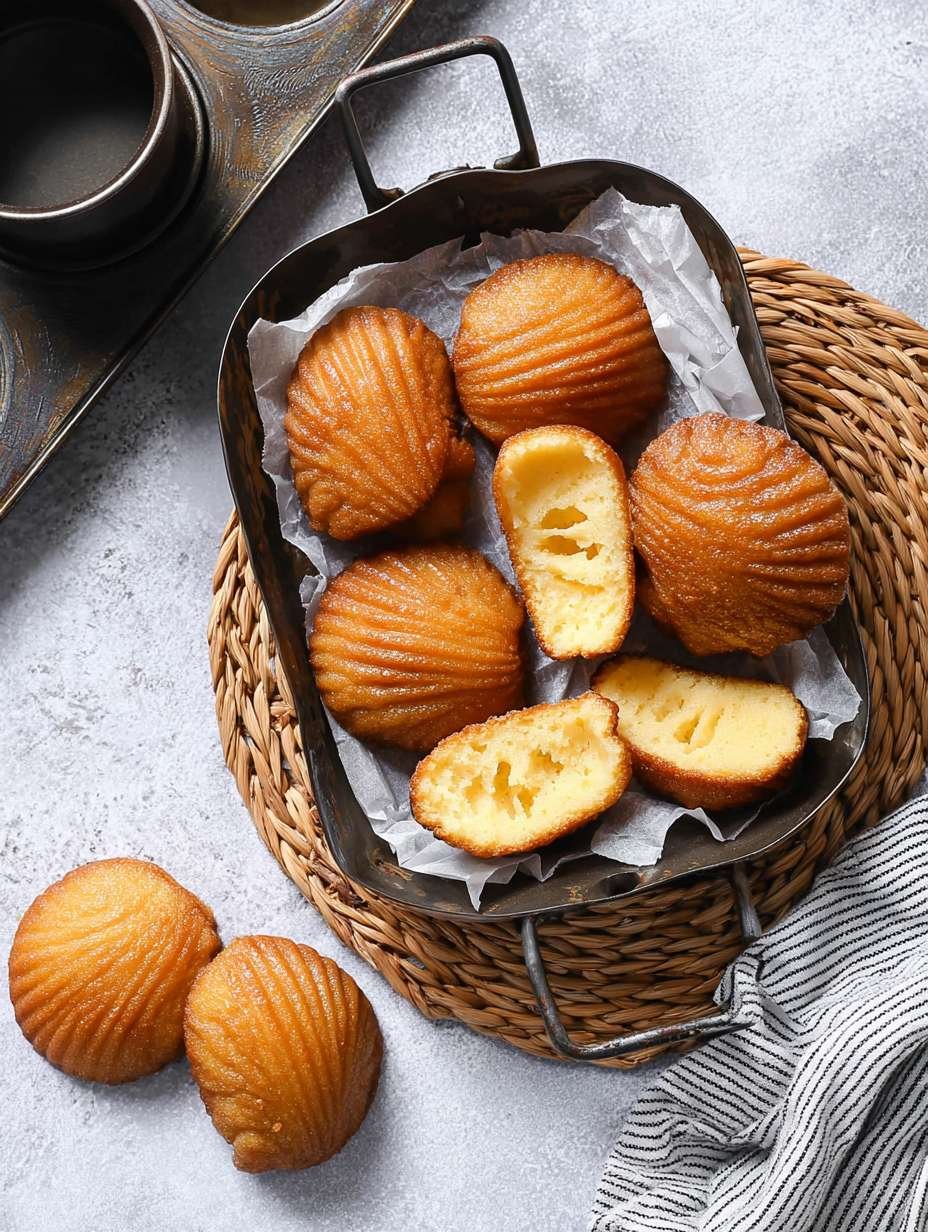
Imagine biting into a cloud, but a cloud made of pure, sweet sunshine, drenched in an aromatic, tender embrace. That’s the exquisite delight of these delicate shell cakes, promising a truly unforgettable experience for your taste buds. This recipe takes me straight back to my grandmother’s kitchen, where a gentle hum of baking always meant something magical was about to emerge, and usually, it involved a delicate little treat.
Why You’ll Love This Recipe
Get ready to fall head over heels for these golden-hued shell cakes! They are surprisingly simple to whip up, making gourmet baking accessible even on a weeknight. Each bite delivers a unique flavor profile, a symphony of tender crumb and aromatic syrup that dances on your palate. Beyond their incredible taste, their charming shell-like appearance makes them an absolute showstopper, perfect for impressing guests or simply elevating your afternoon tea. Plus, they offer delightful versatility, allowing you to easily adjust the syrup flavor to your heart’s desire.
Ingredients
Here’s what you need for this delicious dish:
- **For the Shell Cakes:**
- **1/2 cup (113g) unsalted butter, melted and cooled** This golden liquid gold is crucial for richness and moisture, ensuring your cakes achieve that wonderfully tender texture we’re aiming for. Make sure it’s melted and then cooled slightly so it doesn’t scramble your eggs.
- **2 large eggs, at room temperature** Eggs bind the ingredients, add structure, and contribute to the beautiful color and airy crumb of your madeleines. Room temperature eggs emulsify better with the butter and sugar, leading to a smoother batter.
- **1/2 cup (100g) granulated sugar** This provides the essential sweetness and helps create a delicate crust. For these softest syrupy madeleines, sugar is key to both the cake and the delicious soak.
- **1 teaspoon vanilla extract** A classic flavor enhancer that adds warmth and depth, complementing the other ingredients perfectly. Use a good quality extract for the best aroma.
- **1 cup (120g) all-purpose flour** The structural backbone of our little cakes, providing the necessary body while still allowing for a light and tender crumb. Measure it by weight for the most accurate results.
- **1 teaspoon baking powder** This leavening agent is responsible for the lovely rise and characteristic “hump” of the cakes, contributing to their airy lightness.
- **Pinch of salt** A tiny but mighty ingredient that balances the sweetness and enhances all the other flavors, making them pop.
- **For the Syrup:**
- **1 cup (200g) granulated sugar** This generous amount creates the lusciously thick and sweet syrup that transforms these cakes into the syrupy madeleines you’ll adore.
- **1 cup (240ml) water** The liquid base for our magical syrup, dissolving the sugar and helping it infuse into the cakes.
- **1 tablespoon fresh lemon juice** A splash of citrus brightens the syrup, cutting through the sweetness with a zesty tang and adding a delightful freshness.
- **1/2 teaspoon orange blossom water (optional)** This floral essence is a secret weapon for an elevated, aromatic syrup, adding an exotic and perfumed note that is simply divine. It’s optional, but highly recommended for a truly special flavor experience.
The complete ingredient list, including quantities, can be found directly under the recipe card.
Step-by-Step Instructions
Follow these simple steps to prepare this delicious dish, yielding approximately 12 to 15 cakes:
Step 1: **Combine Wet Ingredients for a Smooth Base**
In a large bowl, whisk together the melted and cooled unsalted butter, large eggs (at room temperature), granulated sugar, and vanilla extract. Continue whisking until the mixture is well combined and slightly pale in color, indicating that the sugar has started to dissolve and the ingredients are emulsified.
Step 2: **Gently Fold in Dry Ingredients for a Tender Batter**
Carefully sift the all-purpose flour, baking powder, and a pinch of salt directly into the wet ingredients in the bowl. Using a spatula, fold the dry ingredients into the wet ones very gently until they are just combined. It is crucial not to overmix at this stage; a thick batter is perfectly normal, and overmixing can lead to tough cakes.
Step 3: **Chill the Batter for the Perfect Hump**
Cover the bowl containing your thick batter securely with plastic wrap. Place it in the refrigerator for at least 30 minutes. For even better results and a more pronounced “hump” on your madeleines, you can chill it for up to 2 hours. This chilling process helps firm up the butter and allows the flour to fully hydrate.
Step 4: **Prepare Your Molds and Preheat the Oven**
Preheat your oven to 375F (190C). While the oven heats, lightly grease your shell-shaped cake pan (often called a Madeleine pan) thoroughly. After greasing, lightly flour the pan, ensuring every cavity is coated. Gently tap out any excess flour to prevent a thick, pasty coating.
Step 5: **Bake the Shell Cakes to Golden Perfection**
Spoon approximately 1 tablespoon of the chilled batter into each prepared mold. Aim to fill each cavity about two-thirds full, as the cakes will rise. Place the pan in the preheated oven and bake for 8 to 12 minutes. The cakes are done when their edges are beautifully golden brown and their centers are set, having developed that distinctive, charming slight hump.
Step 6: **Simmer the Aromatic Syrup**
While your madeleines are baking, prepare the glorious syrup. In a small saucepan, combine 1 cup of granulated sugar, 1 cup of water, and 1 tablespoon of fresh lemon juice. Bring the mixture to a boil over medium heat, stirring continuously until all the sugar has completely dissolved. Once boiling, reduce the heat and let the syrup simmer for 5 minutes without stirring. Remove the saucepan from the heat and, if using, stir in the 1/2 teaspoon of orange blossom water. Allow the syrup to cool slightly.
Step 7: **Soak the Warm Cakes in Syrupy Goodness**
Immediately after baking, carefully remove the warm cakes from their molds and place them onto a wire rack set over a baking sheet. While the cakes are still warm, generously brush or spoon the slightly cooled syrup over each one, allowing it to soak in thoroughly. For a more intense syrupy experience, you can briefly dip each warm cake directly into the syrup.
Step 8: **Allow to Cool and Serve with Delight**
Allow the soaked shell cakes to cool completely on the wire rack before serving. This crucial step allows the syrup to fully absorb and set within the tender crumb, creating the softest syrupy madeleines you’ll ever bake. Serve these elegant treats with your favorite tea or coffee for a truly comforting experience.
Tips for Achieving the Softest Syrupy Madeleines
Crafting these delicate shell cakes is an art, but with a few pointers, you’ll master them in no time. For that signature “hump” on your madeleines, remember that a well-chilled batter is your best friend. This temperature contrast with a hot oven causes the batter to rapidly expand, pushing up that lovely dome. So, don’t rush the chilling process – it’s worth the wait for the beautifully softest syrupy madeleines.
Another critical note for a tender crumb is to avoid overmixing the batter. Once the dry ingredients are added, fold them gently with a spatula until they are *just* combined. Overworking the gluten in the flour can lead to tough, dense cakes, and we’re aiming for light and airy perfection here. Furthermore, ensure your shell molds are not just greased, but also thoroughly floured. This dual approach prevents sticking and helps preserve the intricate shell pattern, ensuring your madeleines look as good as they taste.
Finally, for optimal absorption and to achieve that wonderfully syrupy texture, make sure you’re soaking your warm cakes in slightly cooled syrup. If the syrup is too hot, it can make the cakes soggy, while syrup that’s too cold won’t penetrate as effectively. This technique ensures that each cake becomes wonderfully moist and succulent without being oversaturated. Once baked and soaked, these delightful cakes are best enjoyed within 2 to 3 days. To keep them at their peak, store them in an airtight container at room temperature.
A Delightful Treat for Any Occasion
There’s something incredibly charming about these little shell-shaped cakes, isn’t there? They whisper of Parisian cafes and quiet moments of indulgence, yet they’re surprisingly approachable to make in your own kitchen. The tender, airy crumb readily absorbs the sweet, aromatic syrup, resulting in a wonderfully moist and succulent bite that’s utterly irresistible. This makes them not only a beautiful centerpiece for an elegant dessert spread but also a comforting companion for your morning coffee or a special tea-time treat. Their delicate structure and comforting sweetness are a testament to simple ingredients coming together to create something truly extraordinary. Whether you’re baking for a special gathering or simply treating yourself, these will quickly become a cherished recipe.
Fueling Your Sweet Tooth Sensibly
You might be wondering about the nutritional aspects of such a delicious treat. Good news! Each of these delightful syrupy madeleines comes with a manageable profile. With approximately 180 calories per cake, they offer a sweet indulgence that fits well into a balanced diet. You’ll also find about 2 grams of protein, 35 grams of carbohydrates (contributing to that satisfying sweetness and energy), and 4 grams of fat. It’s a delightful balance, allowing you to enjoy the full flavor and joy of these cakes without overthinking it. So go ahead, treat yourself to the softest syrupy madeleines you’ll ever bake, knowing you’re enjoying a thoughtfully crafted dessert.
Now that you have all the secrets to creating the softest syrupy madeleines you’ll ever bake, it’s time to preheat that oven! Trust me, the aroma alone will be enough to get your mouth watering, and the first bite will confirm that all your efforts were absolutely worth it. Don’t be shy – dive into this recipe, embrace the charming process, and share your delightful creations with friends and family. They’ll thank you, and you’ll find yourself reaching for this recipe again and again.
Mastering the Secrets of Cooking
Optimal results require careful sequencing. Chill your batter for the signature hump, then preheat the oven and prepare molds. Begin the syrup while the cakes bake. This ensures warm cakes meet slightly cooled syrup, guaranteeing perfect absorption for exquisitely moist and tender shell cakes.
Make Your Recipe Unique
Make these shell cakes unique! Swap vanilla extract for almond extract in the batter. For the syrup, use lime juice instead of fresh lemon juice for a zippier note. Alternatively, choose rose water over orange blossom water for a distinct floral aroma. Simple changes, delightful results!
Smart Storage & Reheating
Maintain the delightful, syrupy moistness of your soft shell cakes by storing them in an airtight container at room temperature. This prevents them from drying out, preserving their succulent, tender texture. Best enjoyed within 2-3 days, they retain their incredible, fresh-baked softness.
The Chef’s Golden Tips
The first time I achieved that perfect “hump” on these shell cakes was pure joy. The aroma filled my kitchen, and the tender, syrupy bite instantly brought a huge smile. Magical!
Final Thoughts
You’ve now uncovered the secret to creating **The Softest Syrupy Madeleines You’ll Ever Bake**. Imagine the delicate golden-hued shells, each bite offering a tender, airy crumb saturated with a sweet, aromatic syrup. These delightful treats aren’t just a dessert; they are an experience, transforming a simple tea time into an elegant occasion. The blend of rich butter, fragrant vanilla, and the bright zest of lemon juice in the syrup creates a harmonious flavor profile that is utterly irresistible. Don’t just dream of these perfect shell cakes; gather your ingredients, follow these simple steps, and fill your kitchen with the joyous aroma of freshly baked bliss. Your taste buds will thank you!
Print
The Softest Syrupy Madeleines You’ll Ever Bake
- Total Time: 0 hours
- Yield: 12-15 cakes 1x
Description
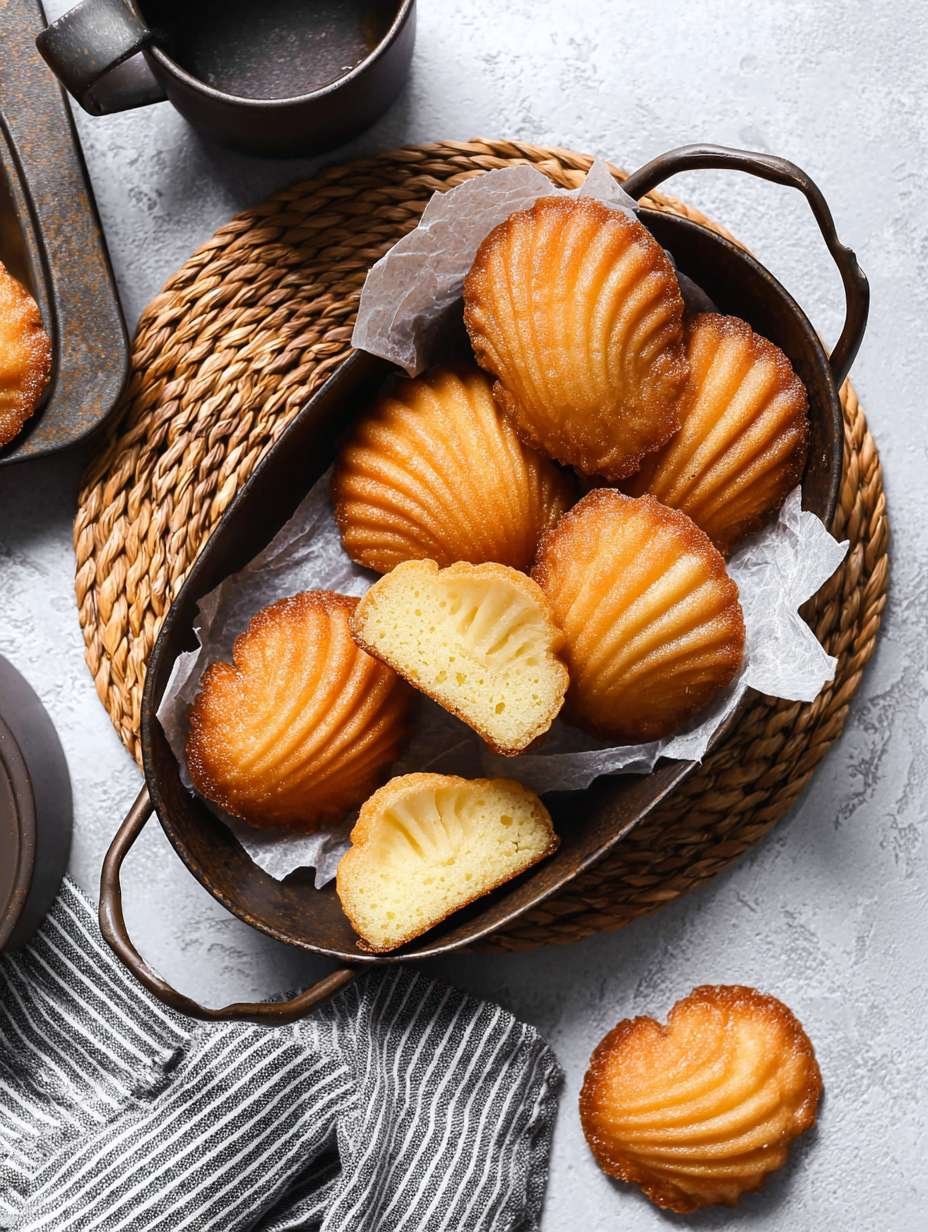
These golden-hued shell cakes offer a delightful balance of textures and flavors. Each cake features a tender, airy crumb that readily absorbs a sweet, aromatic syrup, resulting in a wonderfully moist and succulent bite. The exterior maintains a delicate structure, providing a subtle contrast to the soft interior. Baked to perfection in distinctive shell molds, these cakes present a comforting sweetness, ideal for an elegant dessert or a special tea-time treat.
Ingredients
- **For the Shell Cakes:**
- 1/2 cup (113g) unsalted butter, melted and cooled
- 2 large eggs, at room temperature
- 1/2 cup (100g) granulated sugar
- 1 teaspoon vanilla extract
- 1 cup (120g) all-purpose flour
- 1 teaspoon baking powder
- Pinch of salt
- **For the Syrup:**
- 1 cup (200g) granulated sugar
- 1 cup (240ml) water
- 1 tablespoon fresh lemon juice
- 1/2 teaspoon orange blossom water (optional)
Instructions
- **Prepare the Batter:** In a large bowl, whisk together the melted and cooled butter, eggs, granulated sugar, and vanilla extract until well combined and slightly pale.
- **Add Dry Ingredients:** Sift the all-purpose flour, baking powder, and salt into the wet ingredients. Fold gently with a spatula until just combined, being careful not to overmix. The batter will be thick.
- **Chill the Batter:** Cover the bowl with plastic wrap and refrigerate for at least 30 minutes, or up to 2 hours. This helps achieve the characteristic "hump" on the cakes.
- **Preheat Oven and Prepare Molds:** Preheat your oven to 375F (190C). Lightly grease and flour a shell-shaped cake pan (like a Madeleine pan). Tap out any excess flour.
- **Bake the Cakes:** Spoon about 1 tablespoon of batter into each mold, filling it about two-thirds full. Bake for 8-12 minutes, or until the edges are golden brown and the centers are set and have developed a slight hump.
- **Prepare the Syrup:** While the cakes are baking, combine the sugar, water, and lemon juice in a small saucepan. Bring to a boil over medium heat, stirring until the sugar dissolves. Reduce heat and simmer for 5 minutes without stirring. Remove from heat and stir in the orange blossom water, if using. Let the syrup cool slightly.
- **Soak the Cakes:** Once baked, immediately remove the cakes from the molds and place them on a wire rack set over a baking sheet. While the cakes are still warm, generously brush or spoon the slightly cooled syrup over each cake, allowing it to soak in. You can also dip the cakes briefly into the syrup for a more thorough soaking.
- **Serve:** Allow the cakes to cool completely on the wire rack before serving, allowing the syrup to fully absorb and set.
Notes
* For the best “hump” on your shell cakes, ensure your batter is well-chilled and your oven is preheated to the correct temperature.
* Do not overmix the batter; this can lead to tough cakes. Mix until just combined.
* Ensure your shell molds are thoroughly greased and floured to prevent sticking and preserve the intricate shell pattern.
* Soaking warm cakes in slightly cooled syrup allows for optimal absorption without making the cakes soggy.
* These cakes are best enjoyed within 2-3 days. Store them in an airtight container at room temperature.
- Prep Time: 20 minutes
- Cook Time: 10-15 minutes
Nutrition
- Calories: 180
- Fat: 4g
- Carbohydrates: 35g
- Protein: 2g
FAQs
Why is chilling the batter an important step for these shell cakes?
Chilling the batter is a crucial step that contributes significantly to the characteristic “hump” on top of these delightful shell cakes. When the cold batter hits the hot oven, the temperature difference causes the edges to set quickly while the center continues to rise, pushing upwards to form that iconic dome. The refrigeration period, for at least 30 minutes up to 2 hours, also allows the flour to fully hydrate, which can lead to a more tender and flavorful crumb. This patience ensures a perfect texture and appearance.
What happens if I overmix the shell cake batter?
It is important to mix the batter gently and only until the dry ingredients are just combined. Overmixing the batter can lead to the development of gluten, which will result in shell cakes that are tough and chewy rather than having the desired light, tender, and airy crumb. The goal is to achieve a thick but smooth consistency without excessive agitation. Use a spatula to fold the all-purpose flour, baking powder, and salt into the wet ingredients until no dry streaks remain, then stop.
Should the syrup be hot or cold when it’s applied to the baked shell cakes?
For optimal absorption and to achieve the perfect syrupy texture, the instruction is to generously brush or spoon the slightly cooled syrup over the cakes while they are still warm. If the syrup is too hot, it might make the delicate cakes soggy. If it’s too cold, it won’t be absorbed as effectively. The slight warmth of the cakes combined with the slightly cooled syrup creates ideal conditions for the cakes to soak up all that wonderful sweetness without compromising their delicate structure.
How should I store these syrupy shell cakes to maintain their freshness?
To best preserve the delightful texture and flavor of these syrupy shell cakes, it is recommended to store them in an airtight container at room temperature. This method helps to keep them wonderfully moist and prevents them from drying out. While they are tempting to eat immediately, storing them properly ensures that you can enjoy their deliciousness for several days. For the best quality and enjoyment, consume these perfectly sweetened treats within 2 to 3 days of baking.