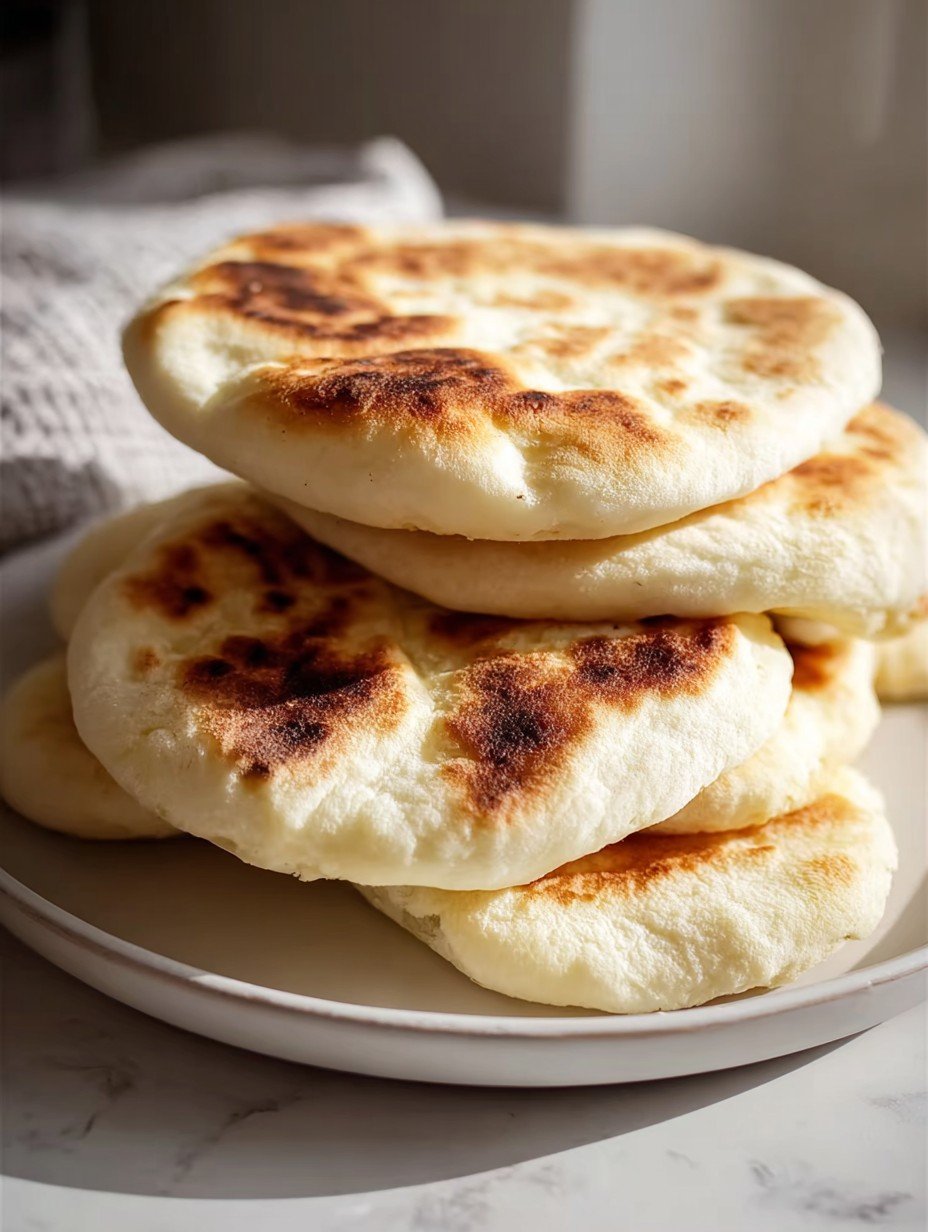
Imagine biting into a warm, pillowy cloud of bread, its subtle yeasty aroma filling your senses, with a tender interior perfect for soaking up every delicious drop. This is the simple joy of truly soft homemade pita.
My first attempt at making pita bread involved something resembling hardened frisbees, but with a few hilarious explosions of flour and a lot of patience, I finally unlocked the secret to perfect, pliable discs.
Why You’ll Love This Recipe
Get ready to fall in love with a recipe that brings restaurant-quality pita right to your kitchen, without the fuss. This recipe for soft homemade pita bread is surprisingly simple, transforming basic ingredients into a unique flavor profile that’s subtly yeasty and wonderfully complementary to a vast array of dishes. Visually, you’ll be captivated as each round magically puffs up, showcasing its beautiful golden-brown spots and creating that irresistible pocket. More than just a pretty face, these tender flatbreads offer incredible versatility, whether you’re dipping them into hummus, stuffing them with grilled chicken, or enjoying them alongside a vibrant salad.
Unveiling the Secrets to Exceptionally Soft Pita

Here’s what you need for this delicious dish:
- **Warm water (105-115°F / 40-46°C)** It’s the essential wake-up call for your yeast, ensuring it’s active and ready to create that wonderful lift and airy structure crucial for a soft interior.
- **Granulated sugar** This sweet treat isn’t just for flavor; it’s the vital food source for your active dry yeast, kickstarting its fermentation process and contributing to the pita’s tender crumb.
- **Active dry yeast (1 standard packet)** The magical leavening agent responsible for giving your pita its characteristic rise, airy texture, and the delightful subtle yeasty flavor that defines classic flatbread.
- **Gluten-free all-purpose flour blend (with xanthan gum)** This is the cornerstone of achieving The Softest Homemade Pita Bread You’ll Love. Unlike traditional wheat flours, a good gluten-free blend, especially one with xanthan gum, is formulated to create a wonderfully tender and pliable dough without the elasticity that can lead to toughness, ensuring a genuinely soft texture.
- **Salt** A pinch of salt does more than just season; it balances the flavors beautifully and helps regulate the yeast activity, ensuring a controlled and consistent rise.
- **Olive oil, plus more for greasing** This liquid gold adds richness and essential moisture to the dough, significantly contributing to its pliability, making it easier to work with, and playing a key role in the soft mouthfeel of the finished pita.
The complete ingredient list, including quantities, can be found directly under the recipe card.
Crafting Your Perfect Pita: A Step-by-Step Journey
Follow these simple steps to prepare this delicious dish:
Step 1: Activate the Yeast for a Bubbly Start
Begin by grabbing a large bowl. Into this bowl, pour your precisely measured warm water and the granulated sugar. Gently sprinkle the active dry yeast over the top of this mixture. Now, comes the waiting game – allow it to sit undisturbed for about 5 to 10 minutes. You’re looking for a beautiful foamy layer to appear on the surface; this is your visual cue that the yeast is alive, well, and ready to work its magic.
Step 2: Combining Ingredients for a Pliable Dough
With your yeast now vigorously bubbling, it’s time to bring in the main players. Add the gluten-free all-purpose flour blend, the salt, and the 2 tablespoons of olive oil directly into the yeast mixture. Using a sturdy spoon or the paddle attachment of a stand mixer, mix everything together until a soft, slightly sticky dough forms. Remember, gluten-free dough will inherently behave differently than traditional wheat dough – it won’t develop that elastic stretch, so a gentle mix until just combined is exactly what you’re aiming for.
Step 3: The Gentle Rise to Perfection
Find a clean bowl and lightly grease it with a touch of olive oil. Carefully transfer the freshly mixed dough into this greased bowl, turning it over once to ensure it’s fully coated with the oil. This prevents sticking and keeps the dough supple. Cover the bowl snugly with plastic wrap or a clean kitchen towel. Now, place it in a warm, draft-free spot and let it rise for a dedicated 60 to 90 minutes. The goal here is for the dough to visibly double in size, indicating a successful fermentation and promising a light, airy pita.
Step 4: Shaping Your Pita Wonders
Once your dough has majestically risen and doubled, it’s time for the next exciting stage. Gently punch down the risen dough, deflating it slightly. Turn the dough out onto a surface that you’ve lightly dusted with gluten-free flour. Divide the dough carefully into 8 equal pieces. Take your time with this, as even portions will ensure even cooking and consistently soft pita rounds.
Step 5: Flattening for Fluffy Puffs
Take each of your 8 dough pieces and roll it gently into a small ball. Then, either using your hands or a rolling pin, flatten each ball into a circular shape. Aim for a diameter of approximately 6 to 7 inches and a thickness of about ¼ inch. Consistency in thickness is key here, as it directly impacts how well your pita bread will puff up in the pan, contributing to that desirable soft texture.
Step 6: Skillet Magic: Watching Them Puff
Now for the truly enchanting part! Place a large cast-iron skillet or a good quality non-stick pan over medium-high heat. Allow the pan to get properly hot before you proceed. Once adequately heated, carefully place one of your flattened pita breads into the dry skillet – no oil in the pan needed for this step. Cook each side for about 2 to 3 minutes. Keep a keen eye out for those beautiful golden-brown spots to appear, and watch in amazement as the pita miraculously puffs up, forming its iconic pocket.
Step 7: Keep Them Warm for Optimal Enjoyment
As each pita bread finishes cooking and gracefully puffs in the skillet, remove it and immediately transfer it to a clean kitchen towel. Fold the towel over or cover the cooked pita to keep it wonderfully warm and pliable while you continue cooking the remaining pitas. This step helps maintain that desired softness and prevents them from drying out, ensuring every piece of the homemade pita is as good as the last.
Step 8: Serving Up Your Homemade Delight
Your patience and effort have paid off! Serve your freshly made pita bread warm or at room temperature. These tender, soft circles of bread are perfect for dipping into your favorite hummus, filling with a vibrant falafel or grilled chicken, or simply tearing and savoring on their own.
Essential Tips for Pita Perfection
To ensure The Softest Homemade Pita Bread You’ll Love every single time, keep these crucial notes in mind. First, always make sure your gluten-free flour blend already contains xanthan gum. If your specific blend doesn’t list it, simply add ½ teaspoon to the dry ingredients yourself; this is vital for the dough’s structure and pliability. Secondly, resist the urge to overwork the gluten-free dough. Unlike traditional doughs, a gentle mix until just combined is sufficient to achieve that tender crumb. Over-mixing can result in a less desirable texture.
If you find that your pita bread isn’t puffing up during cooking, there are usually two common culprits to check. Your skillet might not be hot enough; ensure it reaches a medium-high temperature before placing the dough in. Alternatively, the dough might be rolled too thick, preventing the steam from creating that wonderful pocket. Experiment with slightly thinner dough next time if this happens. Finally, storing any leftover pita bread is simple. Keep them in an airtight container at room temperature, where they will remain fresh and soft for up to 3 days. For longer enjoyment, these versatile flatbreads also freeze beautifully.
Your Pita’s Nutritional Snapshot
Enjoying this delightful homemade pita bread doesn’t mean sacrificing your dietary awareness. Each serving of this soft and tender flatbread provides a clear picture of its nutritional value, making it easier to integrate into your meal planning. Per serving, which is one pita, you can expect the following:
- **Calories:** 180 kcal
- **Protein:** 4g
- **Carbs:** 35g
- **Fat:** 3g
These values demonstrate that your homemade pita bread offers a satisfying and relatively light addition to any meal, providing essential energy and contributing to a balanced diet.
Final Thoughts: Savoring Your Soft Homemade Creation
There’s something uniquely satisfying about pulling a warm, puffy disc of pita bread from your own skillet. It’s a small victory in the kitchen, a testament to simple ingredients coming together to create something truly delicious. This recipe for The Softest Homemade Pita Bread You’ll Love isn’t just about mixing and baking; it’s about experiencing the joy of crafting something incredibly tender, versatile, and utterly delicious with your own hands. Whether you’re a seasoned baker or just dipping your toes into the world of homemade bread, this recipe is designed for success, promising tender, pliable results every single time. So, go ahead, gather your ingredients, follow these straightforward steps, and get ready to impress yourself and everyone around your table with these remarkable, soft circles of bread. Your journey to incredible homemade flatbread starts now!
Mastering the Secrets of Cooking
Achieving the perfect pliable texture for this pita bread starts with precise yeast activation; optimal water temperature is key. After the dough rises, gently handle and roll it to an even ¼ inch thickness. Cook each piece on a medium-high skillet until golden and puffed, ensuring that tender, soft finish.
Make Your Recipe Unique
Make your soft pita bread truly your own! Substitute the granulated sugar with coconut sugar for a nuanced sweetness. You could also swap the olive oil for a light, neutral-tasting vegetable oil if you prefer a less pronounced flavor. Small changes like these can subtly transform the overall taste.
Smart Storage & Reheating
Keep your soft pita bread perfectly pliable by storing cooled rounds in an airtight container at room temperature for three days. Freeze for longer. Reheat gently in a warm skillet or microwave to revive their tender texture, ensuring they taste fresh from the pan.
The Chef’s Golden Tips
I remember pulling a beautifully puffed pita from the pan, feeling its warmth. My kitchen filled with a cozy aroma, reminding me of simple joys shared around a table. Pure magic.
Final Thoughts
Imagine sinking your teeth into a warm, pillowy pocket, perfectly soft and ready for your favorite fillings or dips. This recipe for homemade pita bread doesn’t just promise; it delivers that exact experience. You’ll love the tender interior and lightly browned, slightly chewy exterior that makes each bite a delight. Whipping up a batch of The Softest Homemade Pita Bread You’ll Love is simpler than you might think, offering a rewarding culinary adventure with delicious, gluten-free results. Don’t wait to bring this incredible aroma and taste into your kitchen; gather your ingredients and start baking this wonderful bread today!
Print
The Softest Homemade Pita Bread You’ll Love
- Total Time: 40 minutes
- Yield: 8 pitas 1x
Description
This recipe yields soft and pliable gluten-free pita bread, perfect for dipping or filling. Each round features a tender interior and a lightly browned, slightly chewy exterior from being cooked on a hot surface. The subtle yeasty flavor complements a variety of meals, offering a versatile bread option for those avoiding gluten.
Ingredients
- 1 cup warm water (105-115°F / 40-46°C)
- 1 tablespoon granulated sugar
- 2 ¼ teaspoons active dry yeast (1 standard packet)
- 2 ½ cups gluten-free all-purpose flour blend (with xanthan gum)
- 1 teaspoon salt
- 2 tablespoons olive oil, plus more for greasing
Instructions
- In a large bowl, combine the warm water and sugar. Sprinkle the active dry yeast over the top and let it sit for 5-10 minutes until foamy, indicating the yeast is active.
- Add the gluten-free flour blend, salt, and 2 tablespoons of olive oil to the yeast mixture. Mix with a spoon or a stand mixer with a paddle attachment until a soft, sticky dough forms. Gluten-free dough will not be as elastic as traditional wheat dough.
- Lightly grease a clean bowl with olive oil. Transfer the dough to the greased bowl, turning it once to coat. Cover the bowl with plastic wrap or a clean kitchen towel and let it rise in a warm place for 60-90 minutes, or until doubled in size.
- Gently punch down the risen dough. Turn it out onto a lightly floured surface (using gluten-free flour). Divide the dough into 8 equal pieces.
- Roll each piece into a ball, then flatten it with your hands or a rolling pin into a circle about 6-7 inches in diameter and ¼ inch thick.
- Heat a large cast-iron skillet or non-stick pan over medium-high heat. Once hot, place one pita bread into the dry skillet. Cook for 2-3 minutes per side, or until golden brown spots appear and the pita puffs up.
- Remove the cooked pita bread from the skillet and place it on a clean kitchen towel to keep warm while you cook the remaining pitas.
- Serve warm or at room temperature.
Notes
Ensure your gluten-free flour blend contains xanthan gum, or add ½ teaspoon if it does not.
Do not overwork the gluten-free dough; a gentle mix is sufficient.
If the pita bread isn’t puffing, your skillet might not be hot enough, or the dough might be too thick.
Store leftover pita bread in an airtight container at room temperature for up to 3 days, or freeze for longer storage.
- Prep Time: 20 minutes
- Cook Time: 20 minutes
Nutrition
- Calories: 180 kcal
- Fat: 3g
- Carbohydrates: 35g
- Protein: 4g
FAQs
How do I ensure the yeast is active and ready for this pita bread recipe?
To ensure your yeast is active, start by combining 1 cup of warm water, specifically between 105-115°F (40-46°C), with 1 tablespoon of granulated sugar in a large bowl. Sprinkle the 2 ¼ teaspoons of active dry yeast over this mixture. It’s crucial to let this sit undisturbed for about 5-10 minutes. During this time, the mixture should become foamy on the surface. This foam indicates that the yeast is alive and ready to help your pita dough rise beautifully, contributing to its soft texture. If it doesn’t foam, your yeast may be old or the water temperature was incorrect, and it’s best to start again.
What kind of gluten-free flour blend works best for these pitas?
For this recipe, it’s essential to use a gluten-free all-purpose flour blend that already contains xanthan gum. Xanthan gum acts as a binder in gluten-free baking, mimicking the elasticity that gluten provides in traditional wheat flour, which is vital for the dough’s structure and pliability. If your chosen gluten-free flour blend does not list xanthan gum in its ingredients, the recipe notes advise adding ½ teaspoon separately to your dry ingredients. This ensures the dough will have the right consistency to form pliable pitas, preventing them from being too crumbly or stiff.
What should I do if my pita bread isn’t puffing up during cooking?
If your pita bread isn’t puffing up as expected in the skillet, there are a couple of common reasons. First, the most frequent issue is that your cast-iron skillet or non-stick pan might not be hot enough. Ensure you’ve preheated it over medium-high heat until it’s properly hot before placing the dough. Secondly, the dough might be too thick. The instructions suggest rolling each piece to about ¼ inch thick. If it’s thicker, it can prevent the steam from building up and creating that characteristic pocket. Adjusting your pan temperature or rolling the dough a bit thinner should help achieve that satisfying puff.
How should I store the homemade pita bread after baking?
Storing your freshly baked pita bread properly helps maintain its softness and freshness. Once cooled, place any leftover pita bread in an airtight container. At room temperature, these pitas will stay fresh and delicious for up to 3 days. For longer storage, you have the excellent option of freezing them. Simply transfer them to a freezer-safe bag or container, and they will keep well for an extended period. When you’re ready to enjoy them again, you can thaw them at room temperature and gently warm them for that fresh-from-the-skillet taste.