Imagine a spoonful gliding through velvety, aromatic sweetness, melting on your tongue with hints of spice and a cooling sensation that transports you straight to a bustling Bangkok street. This isn’t just ice cream; it’s a dream.
I once tried to make ice cream without a machine using a blender and a prayer, which mostly resulted in a sad, icy slush. That was before I discovered the magic of no-churn recipes, specifically this delightful Thai tea creation.
Reasons Why You’ll Love This Recipe
This recipe is a true game-changer, delivering an effortless path to a unique dessert experience. Its preparation is surprisingly simple, requiring no specialized equipment and minimal fuss, making it perfect for even the most hesitant home cooks. You’ll adore the distinctive flavor profile, a harmonious blend of sweet, robust black tea, and subtle spices that truly sets it apart from conventional ice cream. With its vibrant orange hue, this frozen treat boasts a stunning appearance that will impress guests and elevate any dessert spread. Plus, it offers versatility, allowing for easy customization with various garnishes or a slight adjustment in tea strength to perfectly suit your palate.
Ingredients
Here’s what you need for this delicious dish:
- **Strong brewed Thai tea, chilled** This is the heart of our flavor, derived from the unique Thai tea mix. Brewing it strong and chilling it thoroughly ensures a concentrated, vibrant taste that stands out in your frozen dessert.
- **Sweetened condensed milk** This magical ingredient is key to achieving that incredibly smooth, creamy texture in our no-churn recipe. It provides both sweetness and a low freezing point, preventing ice crystals and giving us the luscious mouthfeel we crave.
- **Heavy cream, very cold** The undisputed champion of creaminess in this no-churn delight! Whipped to stiff peaks, this creates the airy, rich body of the ice cream, eliminating the need for an ice cream maker and giving us the luxurious, melt-in-your-mouth experience of The Creamiest No-Churn Thai Tea Ice Cream. Make sure it’s very cold for the best whipping results.
- **Vanilla extract (optional)** A touch of vanilla can enhance the overall sweetness and round out the tea’s aromatic notes, adding another layer of comforting flavor.
- **Pinch of salt (optional, to balance sweetness)** Just a tiny bit of salt works wonders to brighten flavors and cut through the richness, preventing the ice cream from being overly sweet.
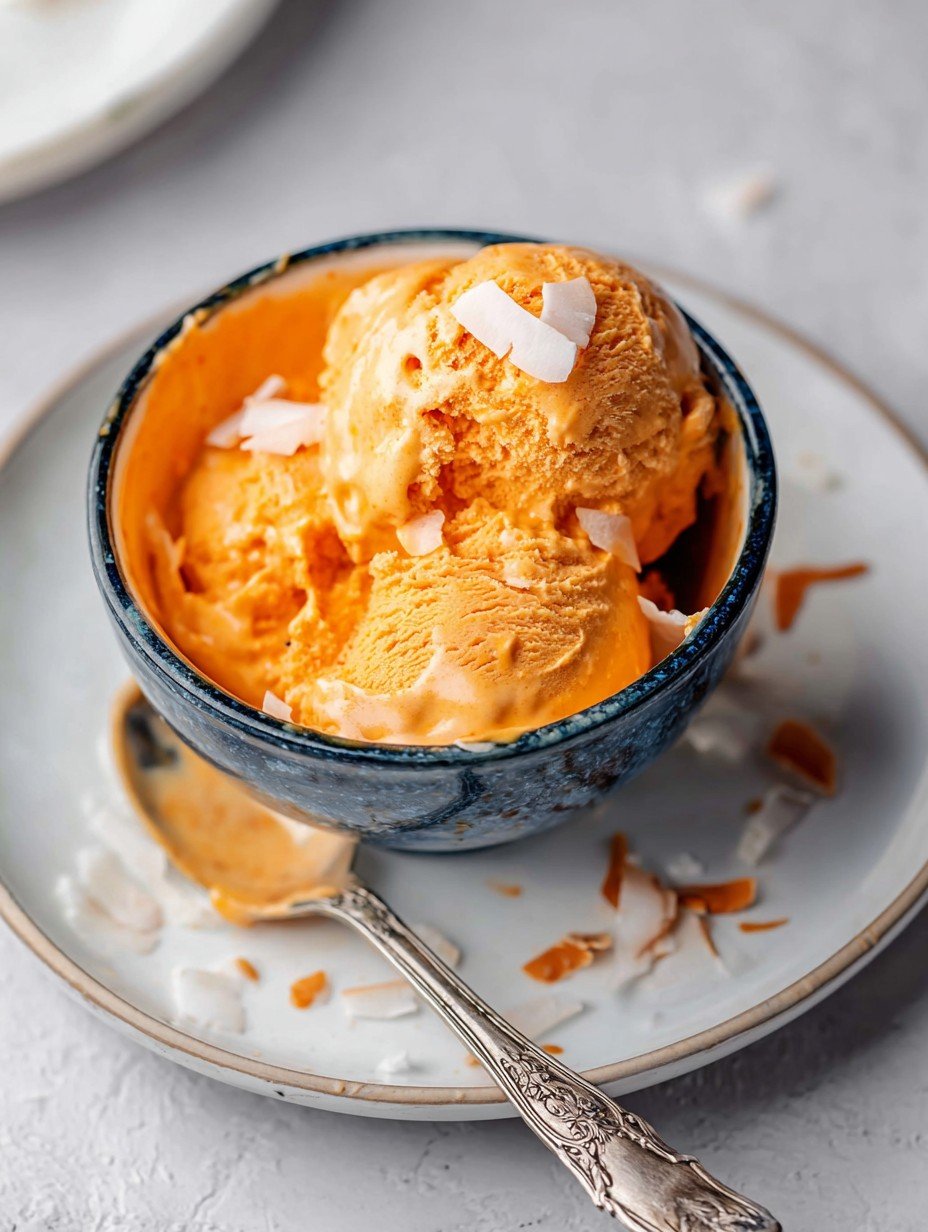
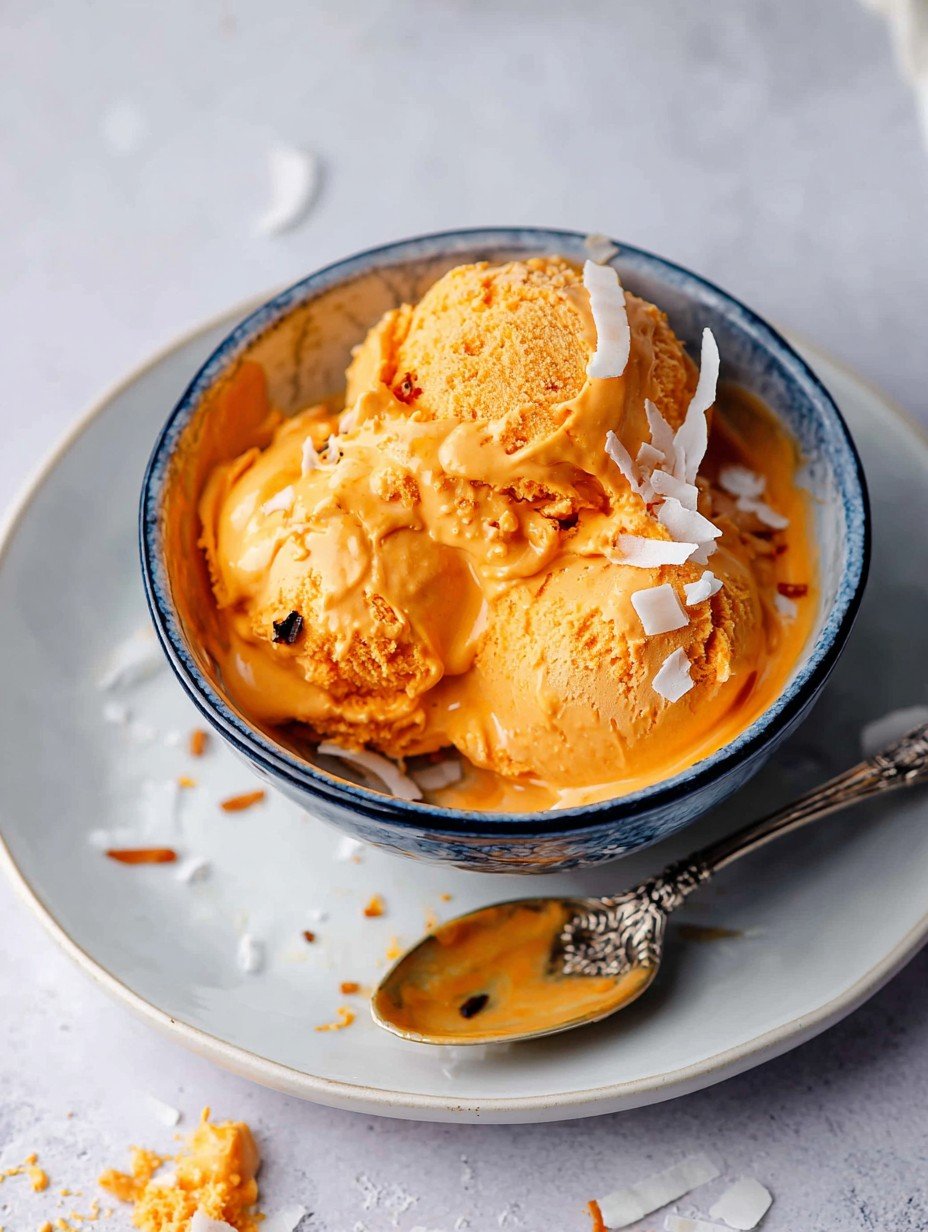
- **Coconut flakes, for garnish (optional)** These add a lovely textural contrast and a subtle tropical aroma, making each scoop feel even more special and visually appealing.
All ingredients with their exact quantities can be found in the recipe card below.
Step-by-Step Instructions
Here’s a simple guide to help you prepare this delicious recipe:
Step 1: **Brew and Chill the Thai Tea**
In a heatproof pitcher or a sturdy bowl, combine 4 tablespoons of Thai tea mix with 1 cup of hot water. Allow this mixture to steep for 5 to 7 minutes to ensure a robust flavor. After steeping, strain the tea leaves, pressing them firmly to extract every last drop of the rich liquid. It is crucial to let this tea concentrate cool completely before chilling it in the refrigerator for at least 1 hour, or until it is very cold. This cold base is essential for the ice cream’s texture.
Step 2: **Create the Flavorful Base**
In a large mixing bowl, combine the thoroughly chilled Thai tea concentrate, 14 ounces of sweetened condensed milk, the optional 1/2 teaspoon of vanilla extract, and a pinch of salt (if using). Use a whisk to mix these ingredients until they are thoroughly combined and the mixture is uniform. This forms the sweet, aromatic foundation of our no-churn dessert.
Step 3: **Whip the Heavy Cream to Stiff Peaks**
In a separate, very cold large bowl, using an electric mixer fitted with a whisk attachment, beat the 2 cups of very cold heavy cream. Begin on medium speed and gradually increase to medium-high speed. Continue beating until stiff peaks form, indicating that the cream is airy and holds its shape. Exercise caution not to overbeat the cream, as it can turn grainy. This whipped cream provides the essential lightness and volume for The Creamiest No-Churn Thai Tea Ice Cream.
Step 4: **Gently Fold the Mixtures Together**
To lighten the rich Thai tea base, gently fold about one-third of the whipped cream into the Thai tea and sweetened condensed milk mixture. Use a spatula to incorporate it without deflating the cream. Once partially lightened, carefully fold in the remaining whipped cream. Continue folding until no streaks of either mixture are visible and the entire concoction is uniform and delightfully airy. Remember, a gentle hand is key; avoid overmixing to preserve the fluffy texture.
Step 5: **Prepare for Freezing**
Pour the prepared ice cream mixture into a freezer-safe container. A loaf pan works wonderfully for this purpose, providing an ideal shape for scooping later. Once transferred, cover the container tightly with plastic wrap. It is vital to press the plastic wrap directly onto the surface of the ice cream mixture. This technique helps prevent the formation of undesirable ice crystals, ensuring a smooth result for this Thai tea treat.
Step 6: **Freeze to Perfection**
Place the covered container in the freezer. Allow the ice cream to freeze for at least 6 to 8 hours. For optimal firmness and a truly satisfying texture, it is preferable to freeze it overnight. This extended freezing time ensures the ice cream sets properly and achieves its characteristic dense yet creamy consistency.
Step 7: **Scoop and Enjoy**
Once firm, the ice cream is ready to be served. Scoop generous portions into bowls or cones. If desired, garnish each serving with 2 tablespoons of coconut flakes to add a delightful crunch and tropical aroma. Serve immediately to savor the rich flavors and luxurious texture of this homemade frozen dessert.
Expert Tips for Success
Achieving The Creamiest No-Churn Thai Tea Ice Cream is simpler than you think, especially with a few insider tricks. First and foremost, always ensure your heavy cream and the mixing bowl you’ll use for whipping it are very cold. This crucial step significantly aids in the cream whipping up beautifully, leading to a much better texture. Think of it as giving your cream a chilly head start!
If you’re a true connoisseur of bold flavors and want an even more pronounced tea presence, feel free to steep your Thai tea mix for a few extra minutes in Step 1. Just be mindful not to over-steep to avoid bitterness. For that ultimate smooth, crystal-free experience, remember to press the plastic wrap directly onto the surface of the ice cream before freezing. This creates a barrier against air and moisture, the culprits behind pesky ice crystals.
Now, if you pull your frozen masterpiece from the freezer and find it a little too hard to scoop right away, don’t fret! Simply let it sit at room temperature for about 5 to 10 minutes. This brief resting period allows it to soften just enough for effortless scooping. And for those moments when you’ve managed to resist eating the entire batch in one sitting (a feat in itself!), store any leftover ice cream in an airtight container in the freezer. It will keep wonderfully for up to two weeks, ready for whenever a craving for this delightful frozen dessert strikes again.
Why The Creamiest No-Churn Thai Tea Ice Cream is More Than Just a Dessert
This isn’t just about satisfying a sweet tooth; it’s about bringing a little piece of an exotic culinary adventure right into your kitchen. The distinct flavor of Thai tea, with its unique blend of black tea and star anise, creates a taste experience far beyond your average vanilla or chocolate. It’s vibrant, aromatic, and incredibly refreshing, making it the perfect antidote to a warm day or a delightful finish to any meal. This recipe offers an escape, a moment of pure, unadulterated pleasure that’s both comforting and exciting.
The beauty of a no-churn recipe, especially for a dessert as sophisticated as this Thai tea variation, lies in its accessibility. You don’t need fancy equipment, a dedicated ice cream maker, or even years of culinary experience. Just a few simple ingredients, a whisk, and a freezer are all it takes to create a dessert that tastes like it came from a gourmet ice cream parlor. This simplicity makes it a fantastic project for beginners, while the incredible results will impress even the most seasoned dessert enthusiasts.
Plus, let’s talk about the sheer joy of homemade. There’s something undeniably satisfying about crafting something so delicious from scratch. Knowing exactly what goes into your food, and watching simple ingredients transform into The Creamiest No-Churn Thai Tea Ice Cream, adds an extra layer of enjoyment. It’s a project that delivers big on flavor and even bigger on personal satisfaction. So, whether you’re looking for an impressive dessert to share, a simple treat to brighten your day, or a culinary adventure, this recipe delivers on all fronts.
Nutritional Information
For those curious about the specifics, here’s a quick look at the nutritional breakdown for The Creamiest No-Churn Thai Tea Ice Cream per serving:
- Calories: 380
- Protein: 5g
- Carbs: 40g
- Fat: 28g
Final Thoughts: Your New Favorite Frozen Treat
So there you have it, folks! The ultimate guide to crafting The Creamiest No-Churn Thai Tea Ice Cream right in your own kitchen. This recipe is a testament to the fact that you don’t need complicated machinery or advanced techniques to create truly spectacular desserts. It’s about combining simple, quality ingredients with a touch of patience and a whole lot of love.
From the moment you steep that aromatic Thai tea to the final, glorious scoop, you’ll be captivated by the process and, more importantly, the incredible results. This isn’t just a dessert; it’s an experience. It’s a vibrant, creamy, and utterly delightful escape in every spoonful. Go ahead, give it a try. Your taste buds, your family, and your dinner guests will thank you for introducing them to this sensational frozen treat. Get ready to fall head over heels for your new favorite homemade ice cream!
**Details: **
Servings: 6-8
Perfecting the Cooking Process
For truly irresistible results, ensure your Thai tea concentrate is thoroughly chilled before combining. Likewise, begin whipping your heavy cream only when it’s very cold, preferably in a chilled bowl, to achieve those essential stiff peaks. Gentle folding is key to maintaining the airy texture of this delightful frozen treat.
Add Your Personal Touch
You can adjust the optional vanilla extract to your liking, or even omit it if you prefer the pure tea essence. Similarly, the amount of coconut flakes for garnish can be varied. You could also lightly toast the coconut flakes for an enhanced nutty aroma, adding another layer of depth to The Creamiest No-Churn Thai Tea Ice Cream.
Storage & Reheating
Store leftover ice cream in an airtight container for up to two weeks. To maintain its smooth, creamy texture and prevent ice crystals, press plastic wrap directly onto the surface before freezing. If too firm, let it sit at room temperature for 5-10 minutes for easy scooping.
Helpful Chef Tips
This no-churn Thai tea ice cream always takes me back. The vibrant color and exotic aroma instantly transport me to a bustling Bangkok night market, a sweet memory in every creamy scoop.
Final Thoughts
This delightful no-churn recipe delivers an effortless, exotic frozen treat. Imagine that first spoonful: a creamy, sweet indulgence. Distinct aromatic notes of black tea and star anise will dance on your palate. This vibrant, smooth dessert brings a taste of distant lands right to your kitchen. Best of all, you don’t need an ice cream machine! Enjoy the incredible satisfaction of making something so special with simple steps. Don’t just dream of this vibrant dessert. Gather your ingredients today and create your own batch of The Creamiest No-Churn Thai Tea Ice Cream.
Print
The Creamiest No-Churn Thai Tea Ice Cream
- Total Time: 20 minutes
- Yield: 6-8 1x
Description
This no-churn Thai Tea Ice Cream offers a delightful balance of sweet and subtly spiced flavors, characteristic of traditional Thai iced tea. Its vibrant orange hue and incredibly smooth, creamy texture make for an inviting frozen dessert. Each spoonful delivers the distinctive aromatic notes of black tea and star anise, creating a refreshing and indulgent treat without the need for an ice cream maker.
Ingredients
- 1 cup strong brewed Thai tea, chilled (from 4 tablespoons Thai tea mix and 1 cup hot water)
- 14 ounces (1 can) sweetened condensed milk
- 2 cups heavy cream, very cold
- 1/2 teaspoon vanilla extract (optional)
- Pinch of salt (optional, to balance sweetness)
- 2 tablespoons coconut flakes, for garnish (optional)
Instructions
- **Brew Thai Tea:** In a heatproof pitcher or bowl, combine the Thai tea mix with hot water. Steep for 5-7 minutes, then strain the tea leaves, pressing to extract all liquid. Allow the tea concentrate to cool completely, then chill in the refrigerator for at least 1 hour, or until very cold.
- **Combine Base:** In a large bowl, whisk together the chilled Thai tea concentrate, sweetened condensed milk, vanilla extract (if using), and a pinch of salt until well combined.
- **Whip Cream:** In a separate, very cold large bowl, using an electric mixer with a whisk attachment, beat the heavy cream on medium-high speed until stiff peaks form. Be careful not to overbeat.
- **Fold Together:** Gently fold about one-third of the whipped cream into the Thai tea mixture to lighten it. Then, carefully fold in the remaining whipped cream until no streaks remain and the mixture is uniform and airy. Do not overmix.
- **Freeze:** Pour the ice cream mixture into a freezer-safe container (a loaf pan works well). Cover tightly with plastic wrap, pressing it directly onto the surface of the ice cream to prevent ice crystals.
- **Chill:** Freeze for at least 6-8 hours, or preferably overnight, until firm.
- **Serve:** Scoop and serve, garnished with coconut flakes if desired.
Notes
Ensure your heavy cream and mixing bowl are very cold before whipping for the best results.
For a stronger tea flavor, you can steep the Thai tea mix for a few extra minutes.
To prevent ice crystals, press plastic wrap directly onto the surface of the ice cream before freezing.
If the ice cream is too hard, let it sit at room temperature for 5-10 minutes before scooping.
Store leftover ice cream in an airtight container in the freezer for up to 2 weeks.
- Prep Time: 20 minutes
- Cook Time: 0 minutes
Nutrition
- Calories: 380
- Fat: 28g
- Carbohydrates: 40g
- Protein: 5g
FAQs
How can I achieve a strong Thai tea flavor in this ice cream?
To ensure your dessert has a wonderfully rich and authentic taste, begin by steeping your Thai tea mix effectively. In the initial step, combine 4 tablespoons of Thai tea mix with 1 cup of hot water. Allow it to steep for the recommended 5-7 minutes. If you desire an even more pronounced tea flavor, a helpful note suggests steeping the mix for a few extra minutes. Remember to strain the tea leaves thoroughly afterward, pressing to extract every bit of that flavorful liquid. Then cool and chill it completely.
What should I do if my homemade ice cream turns out too firm after freezing?
It’s not uncommon for frozen desserts to become quite firm straight from the freezer. If your no-churn creation is too hard to scoop, don’t worry. The recipe notes offer a simple solution. Just allow the container of ice cream to sit at room temperature for about 5-10 minutes before scooping. This brief resting period will soften it slightly, making it much easier to enjoy its incredibly creamy texture.
How long can I store this creamy no-churn treat, and what’s the best way to keep it fresh?
Proper storage is key to enjoying your homemade frozen dessert for as long as possible. After preparation, transfer the mixture into a freezer-safe container. To protect its creamy texture and prevent ice crystals, cover it tightly with plastic wrap. Press the wrap directly onto the surface of the ice cream. The recipe notes state that if you store this delightful treat in an airtight container in the freezer, it will maintain its quality for up to 2 weeks. This allows you to savor its unique flavors.
Why is it important for the heavy cream and mixing bowl to be very cold before whipping?
The temperature of your heavy cream and mixing bowl plays a crucial role. This is vital for achieving the perfect light and airy texture in this no-churn dessert. The recipe specifically advises using very cold heavy cream and a very cold large bowl for whipping. Keeping these elements chilled helps the fat molecules in the cream stabilize and incorporate air more effectively. This ensures that when you beat the heavy cream, it forms stiff peaks. Such peaks are essential for creating the incredibly smooth and airy base of this flavorful frozen treat.