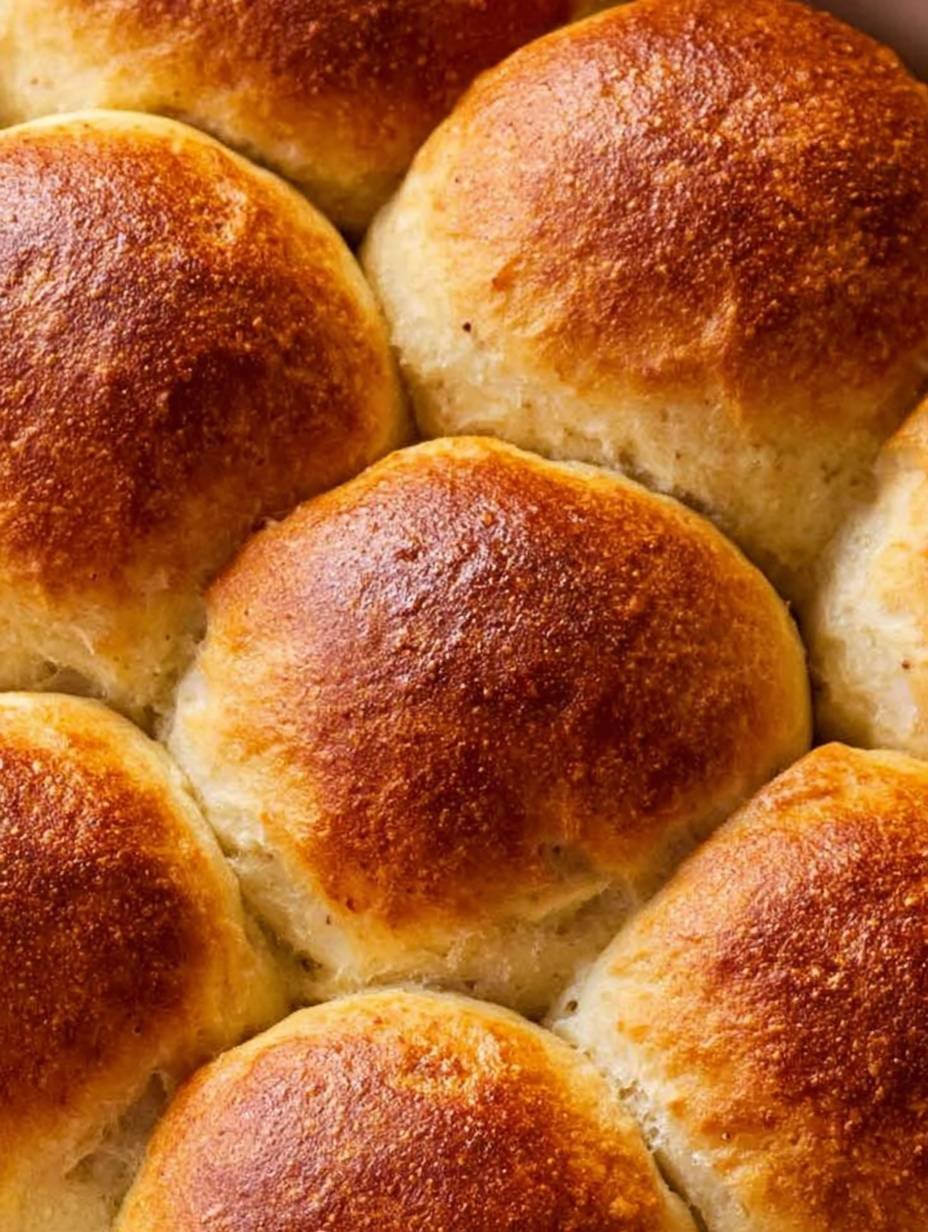
Imagine the comforting aroma of freshly baked bread filling your kitchen, promising a tender bite that melts in your mouth, enveloped by a beautifully crisp, golden crust. These are not just any rolls; these are pure, unadulterated comfort, delivering a gluten-free dream.
I still remember the first time I nailed a batch of these glorious dinner rolls; my notoriously picky nephew, usually a bread skeptic, devoured three before dinner even hit the table, declaring them “cloud bread.” It was a moment of pure, buttery triumph!
Reasons Why You’ll Love This Recipe
You’ll adore these delightful cassava flour bread rolls for their incredible ease of preparation, making delicious, gluten-free baking accessible to everyone. Their unique flavor profile, mild and subtly comforting, offers a versatile accompaniment to any meal without overpowering other dishes. Visually stunning with their beautiful golden-brown crust, these rolls boast a wonderfully soft, tender, and subtly chewy interior that will impress any guest. Best of all, they are incredibly versatile, perfect for serving alongside savory stews, hearty salads, or simply enjoyed on their own with a smear of your favorite spread.
Ingredients
Here’s what you need for this delicious dish:
- **2 cups (240g) cassava flour** This gluten-free flour is the star, providing the distinct soft, tender, and subtly chewy texture that makes these homemade rolls so special. Choose a finely ground variety for the best results.
- **1 teaspoon xanthan gum** Crucial for gluten-free baking, xanthan gum acts as a binder, mimicking gluten to give the dough structure and elasticity, ensuring these rolls are beautifully soft and hold together perfectly.
- **1 tablespoon active dry yeast** This is your leavening agent, responsible for the magnificent rise and the airy, soft interior of your golden rolls. Ensure it is fresh and active for the best outcome.
- **1 tablespoon granulated sugar** More than just a sweetener, sugar feeds the yeast, helping it activate and rise efficiently, contributing to the perfect golden-brown crust.
- **1 teaspoon salt** A fundamental ingredient that balances the flavors, enhances the yeast’s activity, and strengthens the dough structure, making your homemade dinner rolls truly flavorful.
- **1 cup (240ml) warm water (105-115°F / 40-46°C)** The precise temperature of this warm water is vital for activating the active dry yeast without harming it, ensuring a robust rise for the softest rolls.
- **2 tablespoons olive oil or melted unsalted butter** This fat adds richness and moisture to the dough, contributing to the tender texture and a beautifully golden-baked crust, making these dinner rolls wonderfully appealing.
- **1 large egg, at room temperature** An egg binds the ingredients, adds richness, moisture, and helps with the dough’s structure and overall tenderness, while also contributing to the attractive golden hue of the baked rolls.
All ingredients with their exact quantities can be found in the recipe card below.
Step-by-Step Instructions
Here’s a simple guide to help you prepare this delicious recipe:
Step 1: Activate the Yeast
In a small bowl, combine the precisely measured warm water, granulated sugar, and active dry yeast. Stir the mixture gently until combined. Let this concoction sit undisturbed for 5-10 minutes. Watch for the mixture to become beautifully foamy, which is your indicator that the yeast is happily active and ready to work its magic.
Step 2: Combine Dry Ingredients
In a separate, larger mixing bowl, meticulously whisk together the cassava flour, xanthan gum, and salt. Ensure these dry ingredients are thoroughly combined, preparing a uniform base for your dough.
Step 3: Mix Wet into Dry
Add the proofed yeast mixture, along with the olive oil (or the melted butter if you’re using it), and the room temperature egg to the bowl containing your whisked dry ingredients.
Step 4: Form the Dough
Using a stand mixer equipped with a paddle attachment, or if you’re feeling strong, a sturdy spoon, begin mixing all the ingredients together. Mix on medium speed for a duration of 3-4 minutes until a smooth, sticky dough has formed. It’s important to note that this cassava flour dough will naturally be softer and stickier than traditional wheat dough, so don’t be alarmed by its unique consistency.
Step 5: First Rise
Lightly grease a clean bowl with olive oil, ensuring the entire surface is coated. Carefully transfer the sticky dough into this greased bowl, then turn the dough over once or twice to ensure it’s fully coated with oil. Cover the bowl securely with plastic wrap or a clean kitchen towel. Place the covered bowl in a warm spot in your kitchen and allow the dough to rise for 60-90 minutes, or until it has visibly doubled in size. This first rise is critical for the light and fluffy texture of your homemade rolls.
Step 6: Shape the Rolls
Once the dough has risen beautifully, gently punch it down to release the air. Lightly flour your hands with cassava flour to prevent sticking. Divide the dough into 8-10 equal portions, aiming for consistency. Gently shape each portion into a smooth, round ball. Remember the note about cassava flour dough being stickier; resist the urge to add too much extra flour during this shaping process—a light dusting is sufficient.
Step 7: Arrange for Baking
Arrange the newly shaped rolls in a lightly greased 9×13 inch baking dish. Make sure to leave a small, even space between each roll, as they will expand during their second rise and during baking. This spacing ensures each roll bakes up perfectly golden and distinct.
Step 8: Second Rise
Cover the baking dish again, either with plastic wrap or a clean kitchen towel. Return the rolls to a warm place for their second rise, which should last for another 30-45 minutes, or until the rolls appear visibly puffy and have increased significantly in size. This final rise contributes to the ultimate softness and airy texture.
Step 9: Preheat Oven
During the second rise, make sure to preheat your oven. Set the temperature to 375°F (190°C), allowing it ample time to reach and maintain the correct heat for even baking of your perfect homemade dinner rolls.
Step 10: Bake Until Golden
Once the oven is preheated and the rolls have completed their second rise, carefully place the baking dish into the hot oven. Bake the rolls for 20-25 minutes. Keep an eye on them; they are ready when they achieve a beautiful golden brown color on top and are thoroughly cooked through, indicating that wonderful softness inside.
Step 11: Cool and Serve
Remove the perfectly baked rolls from the oven. Let them cool slightly in the pan for a few minutes before you attempt to serve them. This brief cooling period allows the rolls to set, making them easier to handle and ensuring that soft, tender interior holds its shape. These delicious rolls are best enjoyed warm, perhaps with a touch more melted butter, offering a truly comforting experience.
These cassava flour bread rolls offer a delightful gluten-free alternative to traditional bread. Each roll features a beautifully golden-brown crust that yields to a soft, tender, and subtly chewy interior. Prepared by baking, these rolls have a mild, comforting flavor, making them a versatile accompaniment to any meal or a satisfying snack on their own.
**Nutrition Information (per roll, for 8-10 servings): **
- **Calories:** 180 kcal
- **Protein:** 3g
- **Carbs:** 30g
- **Fat:** 5g
**Baker’s Notes for Your Perfect Homemade Dinner Rolls: **
Ensuring your warm water is not too hot, as it can kill the active dry yeast, or too cold, which will prevent it from activating, is crucial for a successful rise. The temperature range of 105-115°F (40-46°C) is ideal for these soft and golden wonders.
Cassava flour dough is naturally stickier than traditional wheat flour dough; resist the urge to add too much extra flour during shaping. A light dusting on your hands is perfectly sufficient to manage the dough and form beautiful balls without making them dense.
For an extra golden crust on your beautiful homemade dinner rolls, you can brush the tops with a little melted butter or an egg wash (prepared by beating 1 egg with 1 tablespoon of water) just before they go into the oven for baking. This simple step enhances their visual appeal and adds to that desirable golden finish.
Store any leftover rolls in an airtight container at room temperature for up to 3 days. For longer storage, they can be frozen, ensuring you always have a supply of these delightful, gluten-free treats ready to enjoy.
**Frequently Asked Questions About These Perfect Homemade Dinner Rolls**
**Q: Can I make these cassava flour rolls ahead of time?**
A: Absolutely! You can prepare the dough up to the first rise (Step 5), then punch it down and refrigerate it overnight. When you’re ready to bake, let the dough come to room temperature for about 30 minutes, then proceed with shaping and the second rise (Steps 6-8). Alternatively, baked rolls can be stored as per the notes, and gently reheated.
**Q: What makes these dinner rolls ‘so soft and golden’ without wheat flour?**
A: The combination of cassava flour, which provides a tender and subtly chewy crumb, and xanthan gum, which acts as a gluten substitute for structure, results in an incredibly soft texture. The egg and olive oil (or butter) also contribute richness and moisture. The ‘golden’ crust is achieved through the baking process, aided by the sugar’s caramelization, and can be enhanced with an optional egg wash or melted butter before baking, as mentioned in the notes. These elements ensure beautiful, soft gluten-free rolls.
**Q: Can I use a different type of gluten-free flour for this recipe?**
A: This recipe is specifically formulated for cassava flour, which has unique properties that contribute to the rolls’ soft and chewy texture. Substituting with other gluten-free flours like almond or coconut flour would significantly alter the texture and moisture balance, and the results would not be the same. For the best outcome, stick with cassava flour for these perfect dinner rolls.
**Q: How do I know if my yeast is active enough for these homemade rolls?**
A: In Step 1, after combining the warm water, sugar, and yeast, let the mixture sit for 5-10 minutes. If the surface becomes foamy and bubbly, your yeast is active and ready to use. If it doesn’t foam, your yeast might be old or the water temperature was incorrect, and you should start with a fresh batch of yeast to ensure the success of your soft dinner rolls.
**Q: What are the best serving suggestions for these soft gluten-free rolls?**
A: These versatile cassava rolls are wonderful with almost anything! They pair beautifully with hearty stews, chili, or your favorite roasted chicken. They are also fantastic simply slathered with butter, jam, or your preferred spread for breakfast or a snack. For a truly comforting experience, serve them warm straight from the oven. Their mild flavor makes them a great accompaniment without overpowering any meal.
I hope you enjoy baking and devouring these amazing cassava flour rolls. They truly are a game-changer for anyone seeking delicious, gluten-free bread that doesn’t compromise on taste or texture. Happy baking, and get ready for some serious carb-induced bliss!
Improving the Cooking Method
For the softest, most tender rolls, perfect yeast activation (Step 1) is key; ensure your warm water is just right. Don’t rush the two rising periods (Steps 5 and 8); patience yields the best texture. Resist adding excess flour during shaping (Step 6), as cassava dough is naturally sticky.
Decorate Your Dish with Your Personal Touch
Personalize these delightful rolls! Instead of olive oil, use melted unsalted butter in the dough for a richer flavor. For an extra golden crust, brush your perfect homemade dinner rolls with melted unsalted butter or an egg wash before baking.
Smart Tips for Storage and Reheating
Store leftover cassava flour bread rolls in an airtight container at room temperature for up to three days. To maintain their soft, tender texture when reheating, a quick refresh in a warm oven or microwave ensures they taste freshly baked. Freezing is also an option for longer enjoyment.
Practical Chef Advice
The first time I served these incredible dinner rolls, my usually picky niece devoured three! Her joyful “More, please!” was the ultimate stamp of approval for these golden-brown beauties.
Final Thoughts
There’s truly nothing quite like the experience of pulling a batch of warm, fragrant bread from your own oven. These gluten-free cassava flour rolls, with their golden-brown crusts and wonderfully soft, tender interiors, are the embodiment of homemade comfort. They offer a subtly chewy texture and mild flavor that makes them a versatile addition to any meal. Imagine the aroma filling your kitchen! Don’t hesitate—gather your ingredients and experience the simple joy of creating these truly Perfect Homemade Dinner Rolls: So Soft & Golden for yourself. Your taste buds will thank you!
Print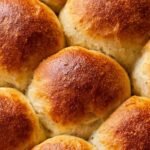
Perfect Homemade Dinner Rolls: So Soft & Golden
- Total Time: 50 minutes
- Yield: 8-10 rolls 1x
Description
These cassava flour bread rolls offer a delightful gluten-free alternative to traditional bread. Each roll features a beautifully golden-brown crust that yields to a soft, tender, and subtly chewy interior. Prepared by baking, these rolls have a mild, comforting flavor, making them a versatile accompaniment to any meal or a satisfying snack on their own.
Ingredients
- 2 cups (240g) cassava flour
- 1 teaspoon xanthan gum
- 1 tablespoon active dry yeast
- 1 tablespoon granulated sugar
- 1 teaspoon salt
- 1 cup (240ml) warm water (105-115°F / 40-46°C)
- 2 tablespoons olive oil or melted unsalted butter
- 1 large egg, at room temperature
Instructions
- In a small bowl, combine the warm water, granulated sugar, and active dry yeast. Stir gently and let it sit for 5-10 minutes until the mixture becomes foamy, indicating the yeast is active.
- In a large mixing bowl, whisk together the cassava flour, xanthan gum, and salt.
- Add the proofed yeast mixture, olive oil (or melted butter), and the egg to the dry ingredients.
- Using a stand mixer with a paddle attachment or a sturdy spoon, mix on medium speed for 3-4 minutes until a smooth, sticky dough forms. The dough will be softer than traditional wheat dough.
- Lightly grease a clean bowl with olive oil, place the dough in it, and turn to coat. Cover the bowl with plastic wrap or a clean kitchen towel and let it rise in a warm place for 60-90 minutes, or until doubled in size.
- Gently punch down the risen dough. Lightly flour your hands with cassava flour. Divide the dough into 8-10 equal portions and gently shape each into a smooth ball.
- Arrange the shaped rolls in a lightly greased 9×13 inch baking dish, leaving a small space between each roll.
- Cover the baking dish again and let the rolls rise in a warm place for another 30-45 minutes, or until visibly puffy.
- Preheat your oven to 375°F (190°C) during the second rise.
- Bake the rolls for 20-25 minutes, or until they are golden brown on top and cooked through.
- Remove from the oven and let cool slightly in the pan before serving.
Notes
Ensure your warm water is not too hot, as it can kill the yeast, or too cold, which will prevent it from activating.
Cassava flour dough is naturally stickier than wheat flour dough; resist the urge to add too much extra flour during shaping. A light dusting on your hands is sufficient.
For an extra golden crust, you can brush the tops of the rolls with a little melted butter or an egg wash (1 egg beaten with 1 tablespoon water) before baking.
Store leftover rolls in an airtight container at room temperature for up to 3 days, or freeze for longer storage.
- Prep Time: 25 minutes
- Cook Time: 25 minutes
Nutrition
- Calories: 180 kcal
- Fat: 5g
- Carbohydrates: 30g
- Protein: 3g
FAQs

How do I ensure my yeast is active for these rolls?
Ensuring your active dry yeast is vigorous is key to light and airy rolls. In the initial step, you’ll combine warm water (specifically between 105-115°F or 40-46°C), granulated sugar, and the yeast. Gently stir this mixture and let it rest for 5-10 minutes. If the mixture becomes foamy and bubbly, it confirms your yeast is active and ready to use. If it doesn’t foam, your water might have been too hot or too cold, or the yeast may be old, and you should start with fresh yeast to prevent dense rolls.
Why is the cassava flour dough so sticky?
It’s completely normal for the cassava flour dough to be stickier than what you might be used to with traditional wheat flours. The recipe explicitly states that this dough will be softer and naturally stickier. Resist the temptation to add excessive amounts of extra cassava flour during the shaping process, as this can make your rolls tough. Instead, lightly flour your hands with cassava flour as suggested in step 6 to make handling the dough easier without altering its desired consistency.
What’s the best way to get my dinner rolls to rise properly?
Achieving a good rise is crucial for soft, tender dinner rolls. After mixing, your dough needs to rise in a warm place for 60-90 minutes until it doubles in size, as described in step 5. After shaping the individual rolls, they need a second rise, again in a warm place, for another 30-45 minutes until they look visibly puffy. A consistently warm, draft-free environment is ideal for yeast activity, ensuring your rolls develop their characteristic light texture before baking.
How should I store leftover homemade dinner rolls?
To keep your freshly baked cassava flour dinner rolls tasting their best, proper storage is important. Once cooled slightly, any leftover rolls should be transferred to an airtight container. They will maintain their quality at room temperature for up to 3 days. For longer storage, you can freeze the rolls. This method helps preserve their softness and flavor, allowing you to enjoy these delightful homemade treats whenever a craving strikes.