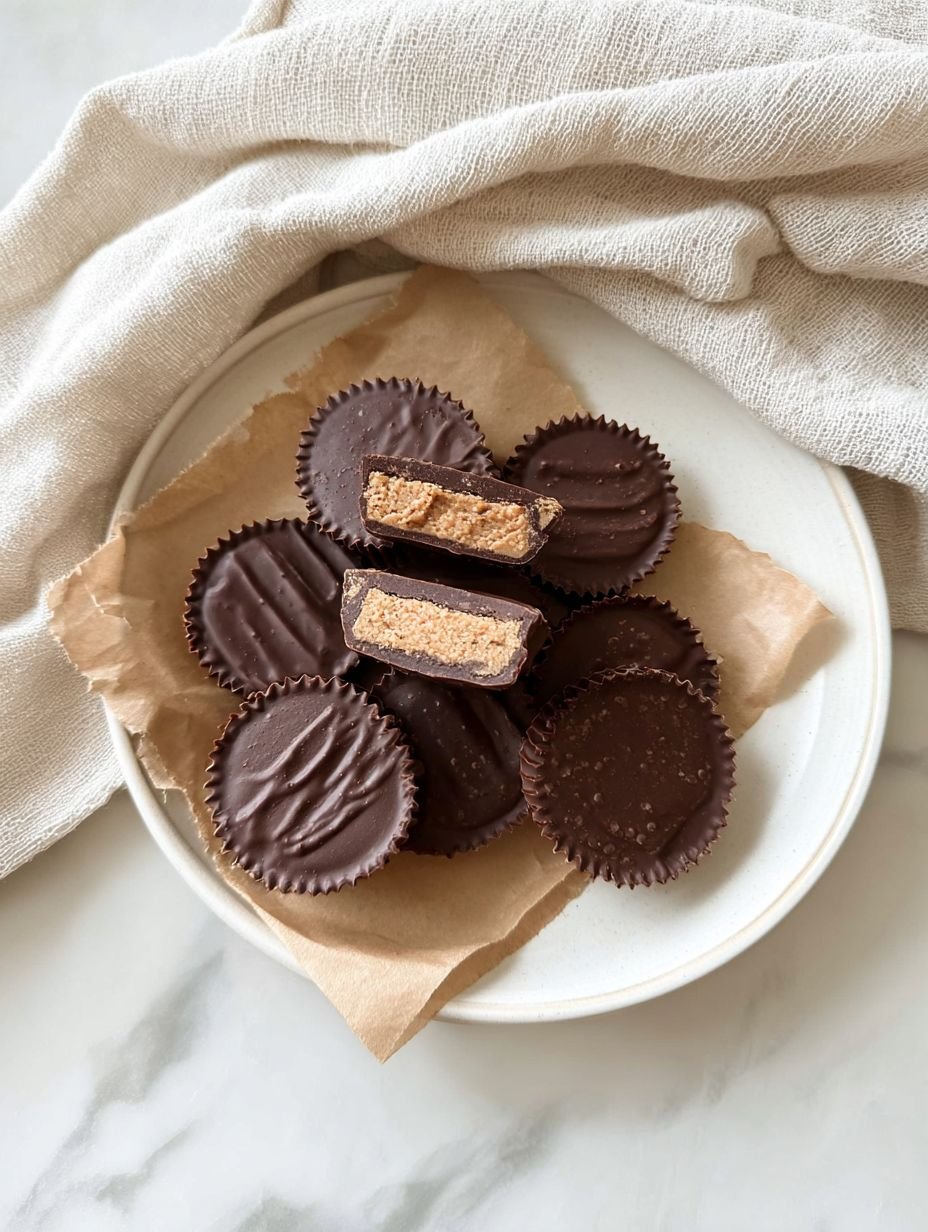
Imagine sinking your teeth into a perfectly balanced symphony of rich, dark chocolate giving way to a luxuriously creamy, slightly salty peanut butter filling. This is a treat that promises pure, unadulterated joy.
My earliest memory of these treats involves a frantic search through Halloween candy, always hoping to snag the elusive foil-wrapped treasures before my brother did. Now, I make my own, and trust me, they are truly next level.
Why You’ll Love This Recipe
These homemade chocolate peanut butter cups offer an irresistible blend of quick preparation and unparalleled flavor that easily surpasses anything you might buy. You will adore how simple they are to assemble, requiring no baking, just a little chilling time to transform simple ingredients into a gourmet delight. The unique flavor profile, a perfect dance between the robust notes of semi-sweet chocolate and the indulgent, creamy, slightly salty peanut butter filling, creates a stunning sensory experience. Visually, these perfectly molded mini cups with their smooth chocolate shell are wonderfully appealing, making them a fantastic addition to any dessert spread or a delightful gift. Plus, their versatility allows you to easily adjust sweetness, making them perfect for any palate.
Ingredients
Here’s what you need for this delicious dish:
- **Semi-sweet chocolate chips** Select a good quality brand that you enjoy eating on its own, as it forms the delightful outer shell and contributes significantly to the richness and depth of flavor in these chocolate peanut butter cups.
- **Coconut oil** This essential ingredient helps the chocolate melt into a wonderfully smooth, pourable consistency and ensures a firmer, more satisfying snap once your homemade treats are chilled, mimicking that professional confectionery texture.
- **Creamy peanut butter** This forms the heart of your creation, providing the iconic, decadent flavor and melt-in-your-mouth texture for the filling. Choose a smooth, creamy variety to achieve the silkiest center that makes these superior.
- **Powdered sugar** The secret to a perfectly smooth and sweetened peanut butter filling, powdered sugar dissolves easily without creating a grainy texture, allowing you to achieve that melt-away consistency that makes these so delightful.
- **Fine sea salt** Just a touch of sea salt in the peanut butter filling enhances all the other flavors, balancing the sweetness and deepening the nutty notes of the peanut butter, which is crucial for a truly “better than store-bought” taste.
- **Vanilla extract (optional)** While not mandatory, a hint of pure vanilla extract elevates the overall aroma and flavor profile of the peanut butter filling, adding a subtle warmth and complexity that makes these treats even more irresistible.
The complete ingredient list, including quantities, can be found directly under the recipe card.
Step-by-Step Instructions
Follow these simple steps to prepare this delicious dish:
Step 1: Preparing Your Muffin Tin
Begin by lining a mini muffin tin with paper liners. This simple step ensures easy removal of your finished peanut butter cups and makes clean-up a breeze.
Step 2: Melting the Chocolate Coating
In a microwave-safe bowl, combine the semi-sweet chocolate chips and coconut oil. Microwave the mixture in 30-second intervals, stirring thoroughly after each interval, until the chocolate is completely smooth and fully melted. Alternatively, you can achieve the same smooth, glossy melt by using a double boiler method over simmering water.
Step 3: Creating the Base Layer
Spoon about 1 teaspoon of the warm, melted chocolate into the bottom of each prepared paper liner, spreading it slightly to ensure the entire base is covered. Once all the liners have their chocolate base, place the muffin tin directly into the refrigerator for 5 to 10 minutes, allowing this first layer of chocolate to firm up and set properly.
Step 4: Crafting the Creamy Filling
While the chocolate base is chilling, prepare the irresistible peanut butter filling. In a medium-sized bowl, combine the creamy peanut butter, powdered sugar, fine sea salt, and the optional vanilla extract. Mix these ingredients thoroughly until they are well combined and result in a smooth, pliable filling consistency.
Step 5: Adding the Peanut Butter Core
Remove the muffin tin from the refrigerator once the chocolate bases are set. Take the prepared peanut butter mixture and roll it into small balls, each approximately 1 teaspoon in size. Gently flatten these small balls into discs and carefully place one peanut butter disc on top of the set chocolate layer in each liner.
Step 6: Encasing with Chocolate
Spoon the remaining melted chocolate evenly over the peanut butter discs in each liner, ensuring that they are fully covered and tucked under a smooth chocolate blanket. Once the chocolate has been distributed, gently tap the muffin tin on the counter a few times. This action helps to release any trapped air bubbles and creates a beautifully smooth and professional-looking top surface for your homemade chocolate peanut butter cups.
Step 7: The Final Chill
Return the muffin tin with your newly formed chocolate peanut butter cups to the refrigerator. Allow them to chill for at least 30 minutes, or until the chocolate cups are completely firm and set through. This crucial step ensures they hold their shape beautifully.
Step 8: Ready to Indulge
Once the treats are fully firm, remove the chocolate peanut butter cups from the muffin tin. Carefully peel off the paper liners before serving them. Garnish with a tiny sprinkle of flaky sea salt for an extra touch of gourmet sophistication and serve immediately to enjoy the perfect texture.
Elevate Your Homemade Peanut Butter Cups
Making these incredible peanut butter cups is a joyful experience, and with a few insights, you can consistently achieve results that truly are better than store-bought. Think about the small details that make a big difference. This simple no-bake recipe is incredibly forgiving, but paying attention to certain elements will ensure your treats are always a resounding success. From the chocolate you choose to how you handle the ingredients, each step contributes to the ultimate deliciousness of these delightful candies. It is all about creating that perfect balance of rich chocolate and creamy peanut butter that tantalizes the taste buds.
Tips for Success
- **Chocolate Quality Matters:** For best results, always use a good quality semi-sweet chocolate that melts smoothly. A higher quality chocolate will give your homemade peanut butter cups a richer flavor and a more luxurious texture. Avoid using chocolate that feels waxy or doesn’t melt evenly, as this can affect the final consistency and taste of your treats.
- **Sweetness Control:** You have the power to adjust the amount of powdered sugar in the peanut butter filling to perfectly suit your sweetness preference. If you like a less sweet treat, start with slightly less powdered sugar and add more to taste. For those with a serious sweet tooth, feel free to add a bit more until you reach your ideal balance.
- **The Magic of Coconut Oil:** Remember, the coconut oil is not just there for melting; it plays a vital role in giving the chocolate a firmer texture once chilled. This ensures that satisfying snap when you bite into your finished peanut butter cups, making them truly special. Do not skip this ingredient for the best results.
Storage and Serving Suggestions
Once your incredible chocolate peanut butter cups are fully set and ready to enjoy, you will want to keep them at their best. Proper storage is key to maintaining their delightful texture and flavor. These are perfect for entertaining, gifting, or simply enjoying as a personal indulgence whenever a craving strikes. They are a versatile treat that can be enjoyed in many settings.
Making Them Last
To maintain their freshness and firm texture, store the finished peanut butter cups in an airtight container. Keep them in the refrigerator for up to two weeks. This not only keeps them from melting but also preserves that wonderful contrast between the snappy chocolate shell and the creamy filling. You might even find they taste better after a day or two in the fridge, allowing the flavors to meld beautifully.
The Perfect Anytime Treat
These delightful homemade peanut butter cups are perfect for a variety of occasions. Serve them as an after-dinner treat, a sweet snack during the day, or even pack them in lunchboxes for a special surprise. They are also fantastic for parties and potlucks, sure to impress everyone with their homemade charm and superior taste. Imagine sharing these at your next gathering, watching faces light up with every bite. The fact that they are no-bake means less stress for you and more time to enjoy your culinary creations.
Nutrition Information
Each of these delightful mini peanut butter cups serves up approximately 150 kcal. They contain 3g of protein, 12g of carbohydrates, and 10g of fat, making them a perfectly portioned indulgence. Enjoying these homemade treats can be part of a balanced approach to snacking.
Creating your own peanut butter cups: better than store-bought has never been simpler or more rewarding. This recipe isn’t just about making a treat; it is about reclaiming the joy of simple, delicious flavors crafted right in your kitchen. From the first melt of chocolate to the final, satisfying bite, you are in for a truly delightful experience. Say goodbye to mass-produced sweets and hello to the superior taste of homemade goodness. We hope you enjoy making and devouring these amazing chocolate peanut butter cups as much as we do. It is time to treat yourself to something truly special that you made with your own hands.
So, gather your ingredients, set aside a little time, and prepare to be amazed by how easy it is to create these incredible chocolate peanut butter cups. Your taste buds, and anyone lucky enough to share them with you, will thank you. Get ready to experience the pure bliss of a perfectly balanced sweet and salty treat.
Mastering the Secrets of Cooking
Achieving perfect Peanut Butter Cups: Better Than Store-Bought relies on precise timing. Let your first chocolate layer set fully for 5-10 minutes before adding the peanut butter. This prevents any unwanted mixing. Afterwards, ensure ample chilling time, at least 30 minutes, for a truly firm, satisfying bite.
Make Your Recipe Unique
Feeling adventurous with your Peanut Butter Cups: Better Than Store-Bought? Swap the creamy peanut butter for its crunchy counterpart to add delightful texture. Experiment with the sweetness level by adjusting the powdered sugar to your liking. Also, consider omitting the vanilla extract if you prefer a purer chocolate and peanut butter essence.
Smart Storage & Reheating
Maintain the irresistible smooth shell and creamy center of these homemade peanut butter cups. Store them in an airtight container, keeping them chilled in the refrigerator for up to two weeks. Enjoy them straight from the fridge. This ensures their optimal firm, melt-in-your-mouth texture, as reheating is not recommended.
The Chef’s Golden Tips
I remember the first time I made these delightful peanut butter cups; my dog, Buster, sat patiently, nose twitching. His hopeful eyes, almost as sweet as the treats themselves, made that day a treasured, delicious memory.
Final Thoughts
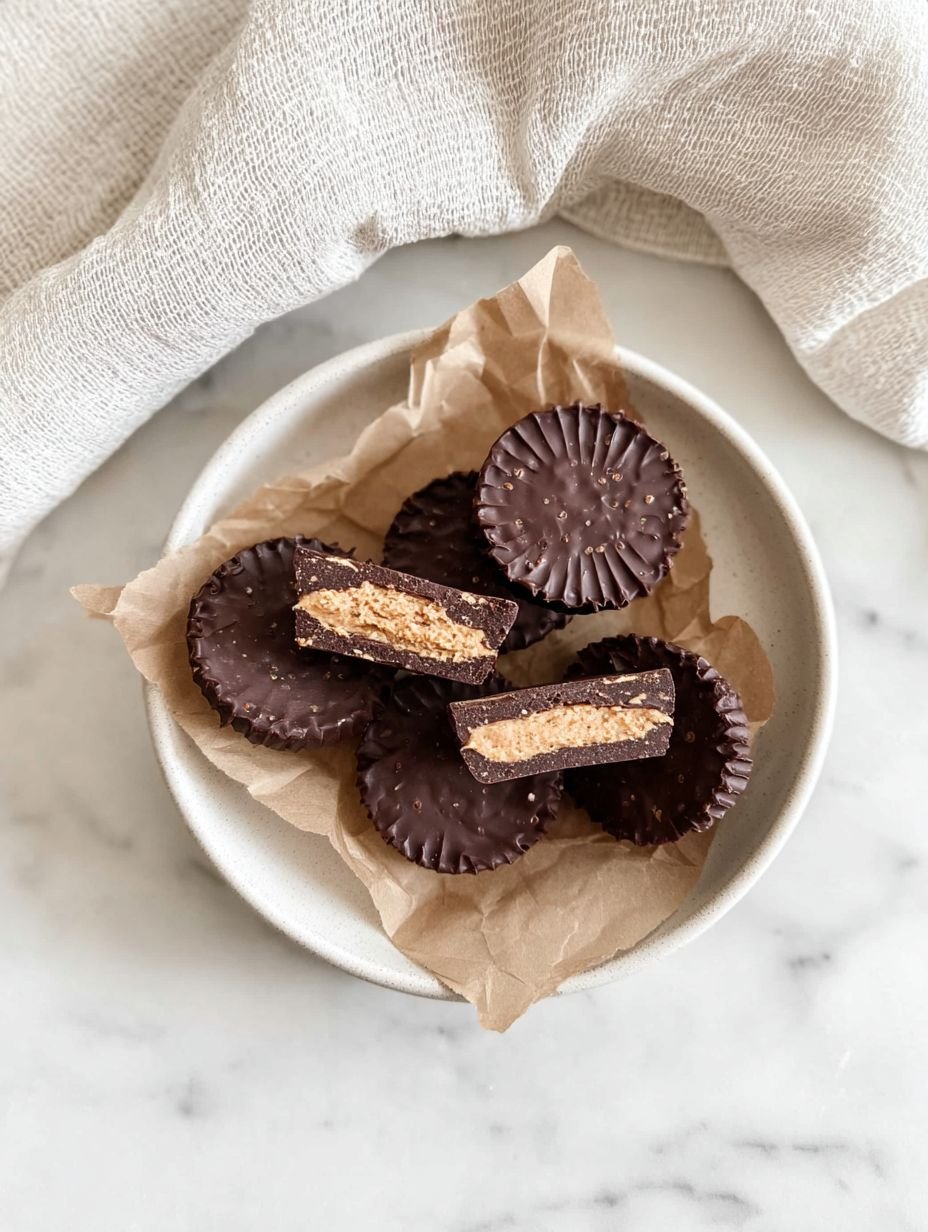
These homemade delights are truly a game-changer. Imagine sinking your teeth into a rich, dark chocolate shell that gives way to a perfectly creamy, slightly salty peanut butter center, all crafted with your own hands. This simple, no-bake recipe delivers on its promise of a satisfying sweet and savory balance, making them a truly superior experience. Forget those store-bought versions; these mini cups offer an unparalleled freshness and flavor profile that will captivate your taste buds. Don’t just dream about them—whip up a batch today and discover why homemade peanut butter cups are simply irresistible.
Print
Peanut Butter Cups: Better Than Store-Bought
- Total Time: 20 minutes
- Yield: 18 mini cups 1x
Description
These homemade chocolate peanut butter cups offer a delightful contrast of rich, dark chocolate and a creamy, slightly salty peanut butter filling. A simple no-bake treat, they provide a satisfying balance of sweet and savory flavors with a smooth outer shell and a soft, melt-in-your-mouth center. They are prepared by layering melted chocolate and a sweetened peanut butter mixture, then chilling until firm.
Ingredients
- 1.5 cups semi-sweet chocolate chips
- 2 tablespoons coconut oil
- 1 cup creamy peanut butter
- 1/2 cup powdered sugar
- 1/4 teaspoon fine sea salt
- 1 teaspoon vanilla extract (optional)
Instructions
- Line a mini muffin tin with paper liners.
- In a microwave-safe bowl, combine chocolate chips and coconut oil. Microwave in 30-second intervals, stirring after each, until smooth and fully melted. Alternatively, melt over a double boiler.
- Spoon about 1 teaspoon of melted chocolate into the bottom of each paper liner, spreading it slightly to cover the base. Place the muffin tin in the refrigerator for 5-10 minutes to allow the chocolate to set.
- While the chocolate is setting, prepare the peanut butter filling. In a medium bowl, combine the creamy peanut butter, powdered sugar, sea salt, and vanilla extract (if using). Mix until well combined and smooth.
- Remove the muffin tin from the refrigerator. Roll the peanut butter mixture into small balls, about 1 teaspoon each, and flatten them slightly into discs. Place one peanut butter disc on top of the set chocolate layer in each liner.
- Spoon the remaining melted chocolate over the peanut butter discs, ensuring they are fully covered. Gently tap the muffin tin on the counter a few times to release any air bubbles and create a smooth top.
- Return the muffin tin to the refrigerator for at least 30 minutes, or until the chocolate cups are completely firm.
- Once set, remove the chocolate peanut butter cups from the muffin tin and peel off the paper liners before serving.
Notes
For best results, use a good quality chocolate that melts smoothly.
Adjust the amount of powdered sugar in the peanut butter filling to suit your sweetness preference.
Store the finished peanut butter cups in an airtight container in the refrigerator for up to two weeks.
Coconut oil helps the chocolate melt more smoothly and gives the cups a firmer texture when chilled.
- Prep Time: 20 minutes
- Cook Time: 0 minutes
Nutrition
- Calories: 150 kcal
- Fat: 10g
- Carbohydrates: 12g
- Protein: 3g
FAQs
What is the purpose of coconut oil in this recipe?
Coconut oil plays a crucial role in creating the perfect texture and appearance for these delightful no-bake treats. When combined with semi-sweet chocolate chips, it helps the chocolate melt smoothly and evenly, ensuring a beautiful, glossy coating for each cup. Furthermore, the coconut oil contributes to the firmness of the chocolate once chilled, giving the finished chocolate cups a satisfying snap when you bite into them. This ingredient is key to achieving that desirable firm shell without making the chocolate brittle.
Can I adjust the sweetness level of the peanut butter filling?
Absolutely! The recipe for these homemade peanut butter cups provides a delicious base, but your personal preference for sweetness can easily be accommodated. The filling calls for powdered sugar, and this is where you have the flexibility to customize. If you prefer a less sweet treat, you can slightly reduce the amount of powdered sugar in the peanut butter mixture. Conversely, for a sweeter filling, feel free to add a little more until it suits your taste. Always mix well to ensure the sugar is fully incorporated.
How should I store the finished peanut butter cups?
To maintain their optimal freshness, texture, and flavor, these delicious homemade chocolate peanut butter cups should be stored properly. Once they are completely firm after chilling, transfer them to an airtight container. Keeping them in an airtight container prevents them from absorbing odors from other foods in the refrigerator and helps maintain their creamy texture. Place the container in the refrigerator, where the chocolate cups will remain fresh and enjoyable for up to two weeks.
What kind of chocolate works best for these cups?
For achieving the best results with these delectable chocolate peanut butter cups, the quality of your chocolate chips truly makes a difference. The recipe specifically calls for semi-sweet chocolate chips, and using a good quality brand ensures the chocolate melts smoothly and coats the peanut butter filling beautifully. High-quality chocolate will create a superior outer shell that is both visually appealing and deliciously rich. This helps create that smooth, glossy finish after chilling, making your homemade treats look as fantastic as they taste.