Imagine the most irresistible aroma wafting from your kitchen: warm, savory garlic mingling with fresh herbs, promising a bite of tender, chewy deliciousness with a perfectly golden-brown crust. This is the magic of homemade flatbread, ready in a flash! I remember those frantic weeknights when dinner was a distant dream until I discovered this recipe, a true savior that transformed a sad pantry into a culinary triumph.
Why You’ll Love This Recipe
This recipe for Pan-Fried Garlic Flatbread: Done in 15 Minutes! isn’t just a meal; it’s a revelation. Its easy preparation makes it perfect for busy schedules, whisking you from zero to delicious in mere minutes, all while filling your home with an intoxicating scent. The unique flavor profile, a delightful blend of pungent garlic and bright, herbaceous notes, ensures every bite is a savory adventure. Beyond its incredible taste, its stunning golden-brown appearance, often puffed with airy pockets, makes it a feast for the eyes. Plus, its versatility knows no bounds, serving as a perfect accompaniment to soups, stews, dips, or even enjoyed on its own as a satisfying, flavorful snack.
Ingredients
Here’s what you need for this delicious dish:
- **all-purpose flour** The foundational element for our dough, providing structure and that satisfying chew. Make sure to have a little extra on hand for dusting your work surface.
- **instant yeast** This magical ingredient is the secret to getting your flatbread ready in record time, ensuring a quick and effective rise that contributes to its airy texture.
- **granulated sugar** Just a touch, this helps activate the yeast and adds a subtle sweetness that balances the savory notes of the garlic and herbs.
- **salt** Essential for enhancing all the other flavors, giving the flatbread a well-rounded and delicious taste.
- **warm water (105-115°F / 40-46°C)** The precise temperature is crucial for waking up the instant yeast, ensuring your dough becomes wonderfully soft and pliable.
- **olive oil** Used both in the dough for richness and tenderness, and generously for cooking in the pan, giving our flatbread that beautiful golden, crispy exterior. This is key to the “Pan-Fried” part of our amazing garlic flatbread.
- **garlic, minced** The star of the show! Freshly minced garlic infuses every inch of the flatbread with an aromatic, savory punch, making this truly a Pan-Fried Garlic Flatbread.
- **fresh parsley, finely chopped** Adds a vibrant, fresh, and slightly peppery herbaceous note, elevating the overall flavor and contributing to the flatbread’s inviting aroma.
- **fresh chives, finely chopped** Offering a delicate oniony flavor and a touch of vivid green, chives complement the garlic beautifully without overpowering it, adding another layer of freshness.
The complete ingredient list, including quantities, can be found directly under the recipe card.
Step-by-Step Instructions
Follow these simple steps to prepare this delicious dish:
**Step 1: Activate the Yeast**
In a large bowl, combine the warm water, granulated sugar, and instant yeast. Give it a gentle stir and let it sit for 5-10 minutes. Watch closely as tiny bubbles appear on the surface; this foamy display tells you the yeast is alive and ready to perform its magic, ensuring our quick pan-fried dough starts off right.
**Step 2: Form the Shaggy Dough**
Once your yeast mixture is beautifully foamy, it’s time to introduce the flour, salt, and 1 tablespoon of olive oil. Using a sturdy spoon, mix these ingredients together until a “shaggy” dough forms. Don’t worry if it looks a bit messy and uneven at this stage; we’re just getting started. This initial combination sets the stage for a delightful, tender bread.
**Step 3: Knead to Perfection**
Turn the shaggy dough out onto a lightly floured surface. Now, put a little elbow grease into it! Knead the dough for 5-7 minutes. You’ll feel it transform under your hands, evolving from sticky and rough to a smooth, elastic, and wonderfully pliable ball. This kneading develops the gluten, crucial for that satisfying chewiness in your Pan-Fried Garlic Flatbread.
**Step 4: The First Rise**
Lightly oil a clean bowl, then place your expertly kneaded dough inside, turning it once to ensure it’s coated. Cover the bowl with a clean kitchen towel or plastic wrap. Find a cozy, warm spot in your kitchen – perhaps near a sunny window or a slightly warm oven. Let the dough rise for 1 hour, or until it has gloriously doubled in size. This crucial resting period allows the flavors to deepen and the dough to become airy.
**Step 5: Infuse with Flavor**
Once the dough has risen beautifully, gently punch it down to release the air. This step is incredibly satisfying! Now for the star ingredients: add the minced garlic, chopped parsley, and chopped chives directly into the dough. Knead briefly, just enough to evenly distribute these aromatic treasures throughout. Every bite of your quick garlic flatbread will be bursting with savory, herbaceous notes.
**Step 6: Divide and Shape**
Transfer the infused dough to a lightly floured surface. Divide this aromatic dough into 6 equal pieces. Take each piece and, using a rolling pin, shape it into a round flatbread. Aim for about 6-7 inches in diameter and roughly 1/4 inch thick. These perfectly portioned rounds are almost ready for their pan-fried transformation.
**Step 7: Prepare the Skillet**
Place a large non-stick skillet or a trusty cast-iron pan over medium heat. Allow it to heat up properly. Once hot, add about 1 teaspoon of olive oil to the pan. This oil will help create that irresistible golden-brown crust we all crave, giving our homemade flatbread its signature pan-fried finish.
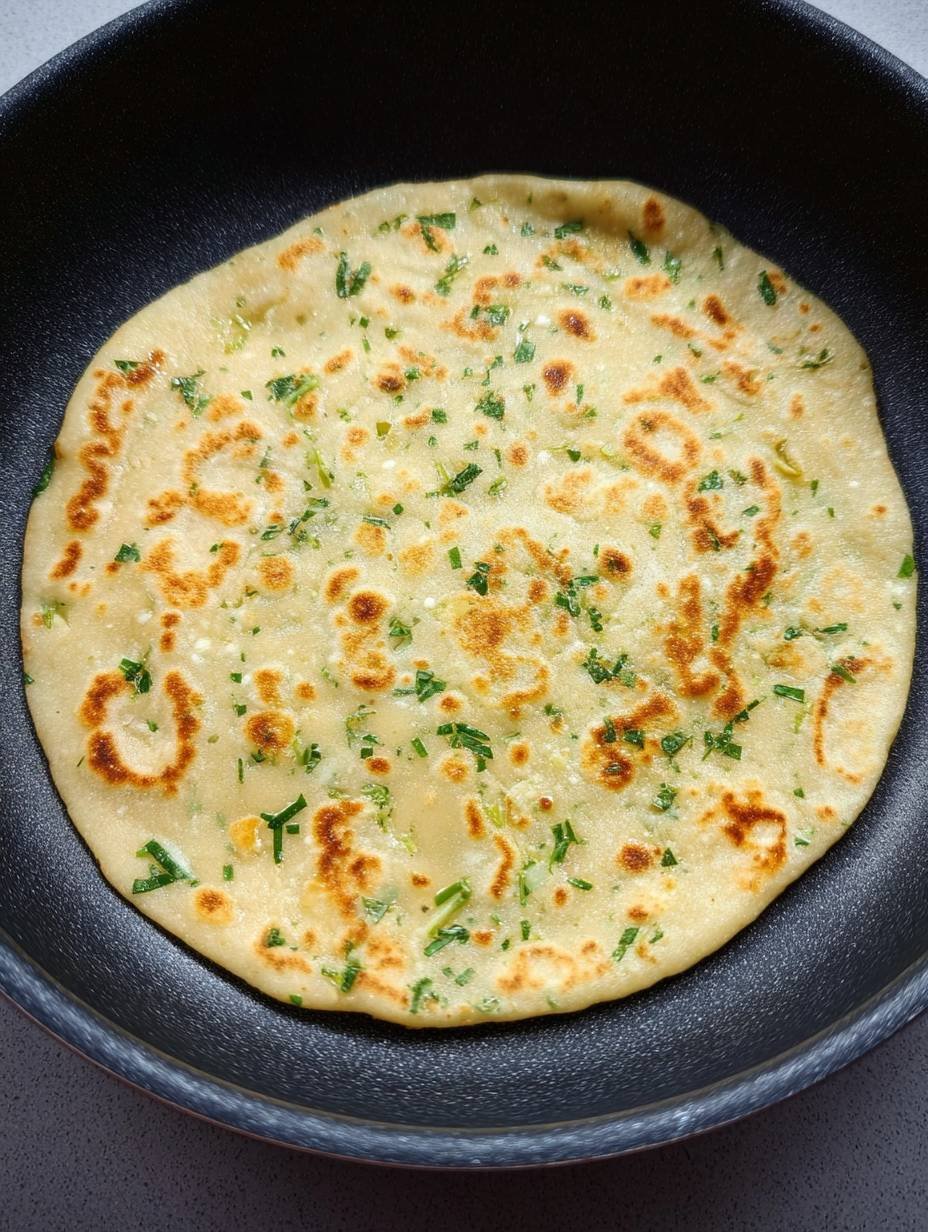
**Step 8: Pan-Frying the Flatbreads**
Carefully place one rolled flatbread into the hot skillet. Cook it for 2-3 minutes per side. Watch as golden brown spots begin to appear, and the flatbread magically puffs up, indicating it’s cooking through beautifully. Repeat this process with the remaining flatbreads, adding a little more olive oil to the pan as needed to maintain that perfect cooking surface. Remember the note to avoid overcrowding the pan; cook flatbreads one at a time for the best results and an even cook.
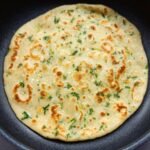
**Step 9: Serve Warm and Enjoy**
Once each flatbread is cooked to a beautiful golden perfection, transfer them to a plate. For an extra touch of richness and shine, you can optionally brush them lightly with additional olive oil. If you’re feeling adventurous and want to elevate the flavor, consider brushing them with melted garlic butter instead of plain olive oil, as per our helpful tip. Serve these delectable Pan-Fried Garlic Flatbreads warm immediately to enjoy their tender texture and robust flavors. These leftover flatbreads can be stored in an airtight container at room temperature for up to 2 days; simply reheat gently in a skillet or microwave for a quick revival.
This recipe yields 6 delicious flatbreads, each a testament to quick and flavorful cooking.
For those curious about the nutritional profile of this delightful quick garlic flatbread, each serving breaks down to approximately 210 kcal, offering 6g of protein, 35g of carbohydrates, and 5g of fat. A note for home bakers: remember to adjust the amount of water slightly if your dough feels too dry or too sticky; the ideal consistency should be soft and pliable. This Pan-Fried Garlic Flatbread: Done in 15 Minutes! truly lives up to its name, delivering a satisfying culinary experience with minimal effort. Whether you’re a seasoned chef or a kitchen novice, this recipe is designed to bring joy and incredible flavor to your table without the fuss.
From its incredibly simple ingredients to the swift cooking process, this pan-fried delight is designed to impress and nourish. It’s more than just a side dish; it’s an experience, a fresh, aromatic bread that complements almost any meal. Imagine tearing into a warm piece, the steam carrying the vibrant scent of garlic and chives to your nose, the tender interior yielding easily, a subtle chewiness making it utterly satisfying. This is comfort food at its finest, made accessible and quick. So, the next time hunger strikes and time is short, skip the takeout and whip up a batch of these glorious flatbreads. Your taste buds, and your family, will thank you for it! This is your go-to recipe for a speedy, savory treat that brings homemade goodness right into your busy life.
Improving the Cooking Method
Achieving that perfect golden crust is all about pan heat. Ensure your skillet is adequately hot, but not smoking, before adding olive oil. Cook these amazing flatbreads one at a time to prevent steaming, guaranteeing beautiful puffiness and even browning. This careful approach ensures each piece is perfectly cooked.
Decorate Your Dish with Your Personal Touch
To personalize your delicious creation, consider swapping the fresh parsley for fresh cilantro, or even fresh dill, to alter the herbal notes. For a zippier kick, you could always add an extra clove of minced garlic to the dough mixture, enhancing its savory depth.
Smart Tips for Storage and Reheating
To maintain the wonderful tender and chewy texture with a hint of crispness, store completely cooled flatbreads in an airtight container at room temperature for up to two days. For the best snap, reheat gently in a skillet instead of the microwave, revitalizing that golden exterior.
Practical Chef Advice
- Ensure your warm water falls precisely within the 105-115°F range to properly activate the instant yeast for a successful, bubbly dough rise.
- After kneading, your dough should feel soft and slightly pliable. Resist adding too much extra flour, as this can lead to a tougher finished flatbread.
- Roll each dough piece to a consistent 1/4 inch thickness. This ensures uniform cooking, preventing uneven textures and delivering a perfect bite.
One evening, I tried to rush the rise time for this flatbread recipe. My “shortcuts” led to rather dense discs, proving patience truly is a virtue for beautifully puffed, flavorful flatbreads. Never again!
Final Thoughts
Imagine the incredible aroma of freshly baked bread, infused with savory garlic and vibrant herbs, filling your kitchen in a flash. This effortlessly simple approach to crafting flatbread delivers a tender texture, a beautiful golden finish, and a burst of savory flavor in every bite. It’s a versatile accompaniment to countless meals or a delightful standalone snack that satisfies those cravings. Achieving this culinary delight, ready in just 15 minutes of cooking time, truly elevates weeknight meals and makes entertaining a breeze. Don’t just dream about it; bring the magic of these quickly prepared flatbreads to your table tonight!
FAQs
How do I ensure my yeast mixture becomes foamy?
To ensure your instant yeast activates properly and becomes foamy, start by using warm water that is between 105-115°F (40-46°C). This temperature range is ideal for activating the yeast without killing it. Combine this warm water with the granulated sugar and the instant yeast in a large bowl. Giving it 5-10 minutes to sit undisturbed allows the yeast to feed on the sugar and begin its activation process, indicated by a foamy layer on the surface. This step is crucial for achieving a well-risen and tender dough for your flatbreads.
What should the dough feel like after I’ve kneaded it?
After you’ve combined the flour, salt, and olive oil with the yeast mixture, a shaggy dough will form. When you turn it out onto a lightly floured surface and knead it for 5-7 minutes, it should transform into a smooth and elastic consistency. The dough needs to be soft and pliable, not overly stiff or sticky. If it feels too dry, you can add a tiny bit more water, a teaspoon at a time. Conversely, if it’s too sticky, incorporate a small amount of additional all-purpose flour until the desired texture is achieved.
Can I add the garlic and herbs to the dough earlier in the process?
For the best distribution and flavor integration in your flatbreads, it’s recommended to add the minced garlic, chopped parsley, and chopped chives after the dough has completed its first rise. Once the dough has doubled in size, gently punch it down. Then, incorporate the garlic and herbs by kneading briefly. This ensures that the aromatic ingredients are evenly distributed throughout the dough without hindering the initial yeast activation or the primary rising process, resulting in fragrant, savory flatbreads.
How should I store and reheat any leftover flatbreads?
If you happen to have any of these delicious flatbreads remaining, they can be easily stored for enjoyment later. Place them in an airtight container at room temperature, where they will keep for up to two days. For reheating, you have a couple of convenient options. You can gently warm them in a skillet over medium heat until they are soft and heated through, which also helps restore a slight crispness. Alternatively, a quick reheat in the microwave will also warm them up effectively for a quick snack or side.
Pan-Fried Garlic Flatbread: Done in 15 Minutes!
- Total Time: 35 minutes
- Yield: 6 flatbreads 1x
Description
This pan-fried flatbread offers a delightful blend of savory garlic and fresh herbs. The dough is tender and slightly chewy, with a golden-brown exterior developed from cooking in a hot skillet. Each bite delivers aromatic notes of garlic and bright, herbaceous freshness, making it a versatile accompaniment to various meals or a satisfying snack on its own.
Ingredients
- 2 cups all-purpose flour, plus more for dusting
- 1 teaspoon instant yeast
- 1 teaspoon granulated sugar
- 1 teaspoon salt
- 3/4 cup warm water (105-115°F / 40-46°C)
- 2 tablespoons olive oil, plus more for cooking and brushing
- 2 cloves garlic, minced
- 2 tablespoons fresh parsley, finely chopped
- 1 tablespoon fresh chives, finely chopped
Instructions
- In a large bowl, combine the warm water, sugar, and instant yeast. Let it sit for 5-10 minutes until foamy.
- Add the flour, salt, and 1 tablespoon of olive oil to the yeast mixture. Mix with a spoon until a shaggy dough forms.
- Turn the dough out onto a lightly floured surface and knead for 5-7 minutes until smooth and elastic.
- Place the dough in a lightly oiled bowl, turning once to coat. Cover with a clean kitchen towel or plastic wrap and let rise in a warm place for 1 hour, or until doubled in size.
- Once risen, gently punch down the dough. Add the minced garlic, chopped parsley, and chopped chives to the dough. Knead briefly to evenly distribute the herbs and garlic.
- Divide the dough into 6 equal pieces. On a lightly floured surface, roll each piece into a round flatbread, about 6-7 inches in diameter and 1/4 inch thick.
- Heat a large non-stick skillet or cast-iron pan over medium heat. Add about 1 teaspoon of olive oil to the pan.
- Place one flatbread in the hot skillet and cook for 2-3 minutes per side, until golden brown spots appear and the flatbread is puffed and cooked through. Repeat with the remaining flatbreads, adding more oil as needed.
- Once cooked, transfer the flatbreads to a plate. Optionally, brush lightly with additional olive oil. Serve warm.
Notes
* Adjust the amount of water slightly if your dough feels too dry or too sticky; it should be soft and pliable.
* Do not overcrowd the pan; cook flatbreads one at a time for best results.
* For extra flavor, you can brush the cooked flatbreads with melted garlic butter instead of olive oil.
* Leftover flatbreads can be stored in an airtight container at room temperature for up to 2 days. Reheat gently in a skillet or microwave.
- Prep Time: 20 minutes
- Cook Time: 15 minutes
Nutrition
- Calories: 210 kcal
- Fat: 5g
- Carbohydrates: 35g
- Protein: 6g