Imagine a bite that’s simultaneously soft, incredibly chewy, and bursts with a creamy chocolate-hazelnut dream. That’s the blissful experience of a perfectly crafted Nutella Mochi: A Sweet & Chewy Delight, a true culinary marvel.
My first encounter with these delightful treats involved a particularly messy attempt in my tiny kitchen, resulting in more flour on the ceiling than on the mochi itself, but oh, the delicious mess was worth every sticky finger.
Reasons Why You’ll Love This Recipe
This recipe is a game-changer for several reasons. It offers incredibly easy preparation, making it accessible even for novice bakers looking for a unique dessert experience. The flavor profile is simply irresistible, combining the familiar comfort of chocolate-hazelnut with an exciting, unexpected chewy texture. Visually, these delicate parcels are stunning, guaranteed to impress anyone lucky enough to try them. Plus, once you’ve mastered the basic technique, the possibilities for customization are endless.
Ingredients
Here’s what you need for this delicious dish:
- **1 cup (120g) glutinous rice flour (mochiko)** This is the star ingredient that gives mochi its signature wonderfully chewy, elastic texture. Ensure you’re using glutinous rice flour, also known as mochiko, not regular rice flour, for that authentic bouncy bite.
- **1/4 cup (50g) granulated sugar** Essential for achieving the perfectly balanced sweet flavor that complements the rich filling. It also plays a role in the dough’s texture, helping it to remain pliable.
- **1 cup (240ml) water** The liquid component that hydrates the flour, creating a smooth, workable dough. Use room temperature water for easy whisking.
- **1/2 cup (approx. 150g) Nutella** The luscious heart of our sweet delight! This creamy chocolate-hazelnut spread provides a rich, indulgent flavor and a delightful contrast to the chewy exterior. Freezing it beforehand is key for easy shaping.
- **1/4 cup (30g) cornstarch or potato starch, for dusting** Crucial for preventing the notoriously sticky mochi dough from adhering to your hands and work surface. It also gives the finished mochi a lovely, soft exterior and ensures they don’t stick together.
All ingredients with their exact quantities can be found in the recipe card below.
Step-by-Step Instructions
Here’s a simple guide to help you prepare this delicious recipe:
Step 1: Prepare Nutella Filling
Scoop 1-tablespoon portions of Nutella onto a parchment-lined plate. This crucial first step ensures your filling is firm and easy to handle when you shape the dough. Place the plate into the freezer for at least 30 minutes, or until each Nutella ball is firm enough to easily pick up and work with. This prevents any melty messes later on.
Step 2: Make Mochi Dough
In a microwave-safe bowl, combine the 1 cup of glutinous rice flour, the 1/4 cup of granulated sugar, and the 1 cup of water. Whisk these ingredients together thoroughly until the mixture is completely smooth and free of any lumps. A smooth batter is the foundation for a silky mochi dough.
Step 3: Cook Mochi Dough
Cover the bowl loosely with plastic wrap, making sure to leave a small vent for steam to escape during cooking. Microwave on high for 1 minute, then carefully remove and stir the dough well. Re-cover the bowl and microwave for another 1 minute, then stir again. Continue microwaving in 30-second intervals, stirring after each, until the dough becomes beautifully translucent and noticeably sticky, typically requiring a total of 3-5 minutes. Alternatively, for a stovetop method, steam the mixture in a heatproof bowl set over simmering water for 15-20 minutes, stirring occasionally, until it reaches that characteristic translucent stage.
Step 4: Cool and Knead
Once cooked, transfer the hot mochi dough immediately to a clean work surface that has been generously dusted with cornstarch. This dusting is vital to prevent sticking. Allow the dough to cool slightly until it’s comfortably warm to the touch, not scorching hot, but still pliable. Dust your hands with cornstarch and gently knead the dough for 1-2 minutes until it becomes smooth and wonderfully elastic. This brief kneading improves the dough’s texture and workability.
Step 5: Portion and Fill
Divide the kneaded mochi dough into 8-10 equal pieces. The exact number will depend on your desired mochi size. Take each piece and flatten it into a disc shape using your hands. Now, carefully place one of your firm, frozen Nutella balls directly in the center of each flattened dough disc.
Step 6: Shape Mochi
With the Nutella ball nestled in the center, carefully bring the edges of the dough up and over the filling. Pinch the dough edges together firmly to completely seal the Nutella inside, ensuring there are no gaps. Once sealed, gently roll the mochi between your palms to form a smooth, perfectly round ball. Take your time to make sure the seal is tight and the shape is appealing.
Step 7: Coat and Serve
Place your beautifully shaped mochi on a plate that has been dusted with an extra layer of cornstarch or powdered sugar. This final coating adds a touch of sweetness and ensures the mochi don’t stick together. Serve your Nutella Mochi: A Sweet & Chewy Delight immediately to enjoy its freshest, most irresistible texture.
The Allure of Crafting Mochi
There’s something uniquely satisfying about transforming simple ingredients into these delicate, chewy parcels. The journey from separate flour and water to a warm, pliable dough is almost magical. Each step of creating these sweet treats is a little dance of precision and patience, culminating in a dessert that’s as delightful to make as it is to eat. It’s an experience that connects you to the culinary traditions behind these wonderful delights, offering a truly hands-on approach to a beloved treat. The finished Nutella mochi, with its rich filling and tender exterior, is a testament to the joy of homemade goodness.
Beyond just the taste, the process itself is a wonderful escape. The rhythmic whisking, the gentle kneading, and the careful shaping all contribute to a mindful cooking experience. It’s a fantastic way to unwind and engage with your kitchen in a fun, rewarding manner. When you finally bite into your homemade creation, you’re not just tasting a dessert; you’re savoring the effort, the care, and the pure joy of bringing a vision to life. This chewy dessert is more than just food; it’s a small victory in your culinary adventures.
Unlocking Mochi Mastery: Essential Tips for Success
Achieving perfect mochi every time is entirely within your grasp with a few key considerations. Firstly, the freezing of your Nutella filling is non-negotiable. Well-frozen Nutella balls maintain their shape beautifully, preventing them from melting prematurely and making the dough incredibly difficult to seal around them. This initial firm texture allows for cleaner, more efficient shaping, which is essential for uniform and attractive mochi.
Secondly, don’t be shy with the dusting starch. Mochi dough is famously sticky, and a generous coating of cornstarch or potato starch on your work surface and hands is your best friend. This prevents the dough from clinging to everything and allows you to handle it with ease, resulting in smoother, less frustrating shaping. Think of it as your non-stick shield.
Finally, work with a sense of purpose while the mochi dough is still warm and pliable. As the dough cools, it tends to stiffen, making it less elastic and harder to stretch around the filling without tearing. Timing is crucial here; embrace the warmth and agility of the fresh dough for the easiest and most successful shaping experience. These simple guidelines will elevate your mochi-making journey considerably, ensuring a delightful Nutella Mochi: A Sweet & Chewy Delight every time.
Creative Swaps and Delicious Deviations
While the classic Nutella Mochi is a masterpiece on its own, once you’ve mastered this particular sweet and chewy delight, the world of mochi customization opens up! For your next batch, consider experimenting with different dusting powders. Instead of just cornstarch or powdered sugar, a light dusting of cocoa powder or even a mix of powdered sugar and matcha powder can add intriguing visual and flavor dimensions. These simple changes can give your treats a completely different character while maintaining the delightful chewy texture.
Another area for exploration, after you’ve perfected the chocolate-hazelnut core, is to consider other types of fillings. While this recipe focuses on Nutella, imagine these chewy delights filled with fruit purees (thickened), sweet red bean paste, or even a different type of chocolate spread. Remember, any filling needs to be firm and scoopable when chilled, similar to how we treat the Nutella. The dough itself is a versatile canvas, ready to embrace new flavors. Just be sure to keep the exterior a soft, chewy glutinous rice dough!
Troubleshooting Your Mochi Journey
Even seasoned chefs have kitchen mishaps, and mochi making can sometimes present its own unique challenges. If your dough turns out too sticky, even with ample cornstarch, you might need to cook it for a little longer. A slightly undercooked dough will be excessively wet and difficult to handle. Pop it back in the microwave for another 30-second interval, stirring well, until it reaches that translucent, elastic consistency.
Conversely, if your mochi dough feels too stiff or hard, it might have been overcooked, or it has cooled too much. If it’s just a little cool, gently reheat it for 10-15 seconds in the microwave to regain some pliability. If it’s truly stiff, unfortunately, it’s often best to start fresh, paying closer attention to the cooking times. Another common issue is the filling oozing out during shaping. This usually means your Nutella balls weren’t frozen firm enough. Ensure they are rock-solid from the freezer before attempting to wrap them in the dough for the best results. Patience with the freezing step is key for this chocolate-hazelnut treat.
Storing Your Delicious Creations
For the absolute best experience of your Nutella Mochi: A Sweet & Chewy Delight, it is highly recommended to consume them on the very day they are made. This ensures you enjoy the quintessential soft, chewy texture that makes mochi so beloved. Freshness is paramount for these delicate desserts, especially to preserve that wonderful elasticity.
Should you find yourself with any delicious leftovers (a rare but possible occurrence!), store them in an airtight container at room temperature. They will retain their quality for up to 24 hours. A crucial piece of advice: resist the urge to refrigerate your mochi. While refrigeration might seem like a logical step for preserving food, it actually causes mochi to harden, losing its delightful softness and chewiness. Keep them at room temperature for that perfect texture, ready for another sweet bite.
Nutrition Snapshot
Curious about what’s in each delightful bite? Each Nutella mochi offers a satisfying energy boost.
- **Calories:** Approximately 180-220 per mochi
- **Protein:** 2-3g per mochi
- **Carbs:** 30-35g per mochi
- **Fat:** 8-12g per mochi
These values provide a general overview of the nutritional content for each of your homemade treats, making this sweet and chewy dessert an occasional indulgence.
Your New Favorite Sweet & Chewy Treat Awaits!
There you have it – a comprehensive guide to creating your very own Nutella Mochi: A Sweet & Chewy Delight. This isn’t just a recipe; it’s an invitation to experience the joy of making something truly special, a treat that combines familiar flavors with an exciting, unique texture. From the careful freezing of the chocolate-hazelnut filling to the final dusting of powdered sugar, every step contributes to a dessert that’s both comforting and adventurous. So, gather your ingredients, clear your counter, and get ready to impress yourself and your loved ones with these irresistible, chewy, and sweet mochi. Happy cooking, and even happier eating!
Perfecting the Cooking Process
Achieving perfect results with this chewy delight starts with preparation. Ensure your chocolate-hazelnut filling is thoroughly frozen first. This firm base makes shaping effortless. Cook the mochi dough until perfectly translucent. Then, work swiftly while it’s warm and pliable for seamless sealing around the chilled centers.
Add Your Personal Touch
Unleash your inner chef! While the rich chocolate-hazelnut spread is stellar, customize these delectable treats. Feel free to use potato starch instead of cornstarch for dusting. This offers a subtly different texture. For a flavor shift, try light brown sugar instead of granulated sugar in the dough.
Storage & Reheating
To preserve the unique soft and chewy texture, enjoy your mochi fresh. Consume these sweet treats on the day of preparation. Store any leftovers in an airtight container at room temperature for up to 24 hours. Avoid refrigeration. It causes the dough to harden.
Helpful Chef Tips
I vividly remember my niece’s sheer delight biting into her first homemade Nutella mochi; her eyes widened, proclaiming it tasted like ‘a hug for her tummy.’ That joy makes every batch of these sweet, chewy delights so incredibly rewarding to create.
Final Thoughts

There’s something truly magical about sinking your teeth into a homemade mochi, especially one filled with a creamy chocolate-hazelnut delight. This recipe for Nutella Mochi: A Sweet & Chewy Delight brings that dream to your kitchen with its simple steps and irresistible outcome. Imagine the soft, elastic dough yielding to the rich, chilled filling, creating a symphony of textures and flavors. It’s a sweet escape, a moment of pure bliss in every bite. Don’t just dream about this delightful confection; gather your ingredients and experience the joy of creating these delightful mochi today. Your taste buds will thank you!
Print
Nutella Mochi: A Sweet & Chewy Delight
- Total Time: 35 minutes
- Yield: 8-10 mochi 1x
Description
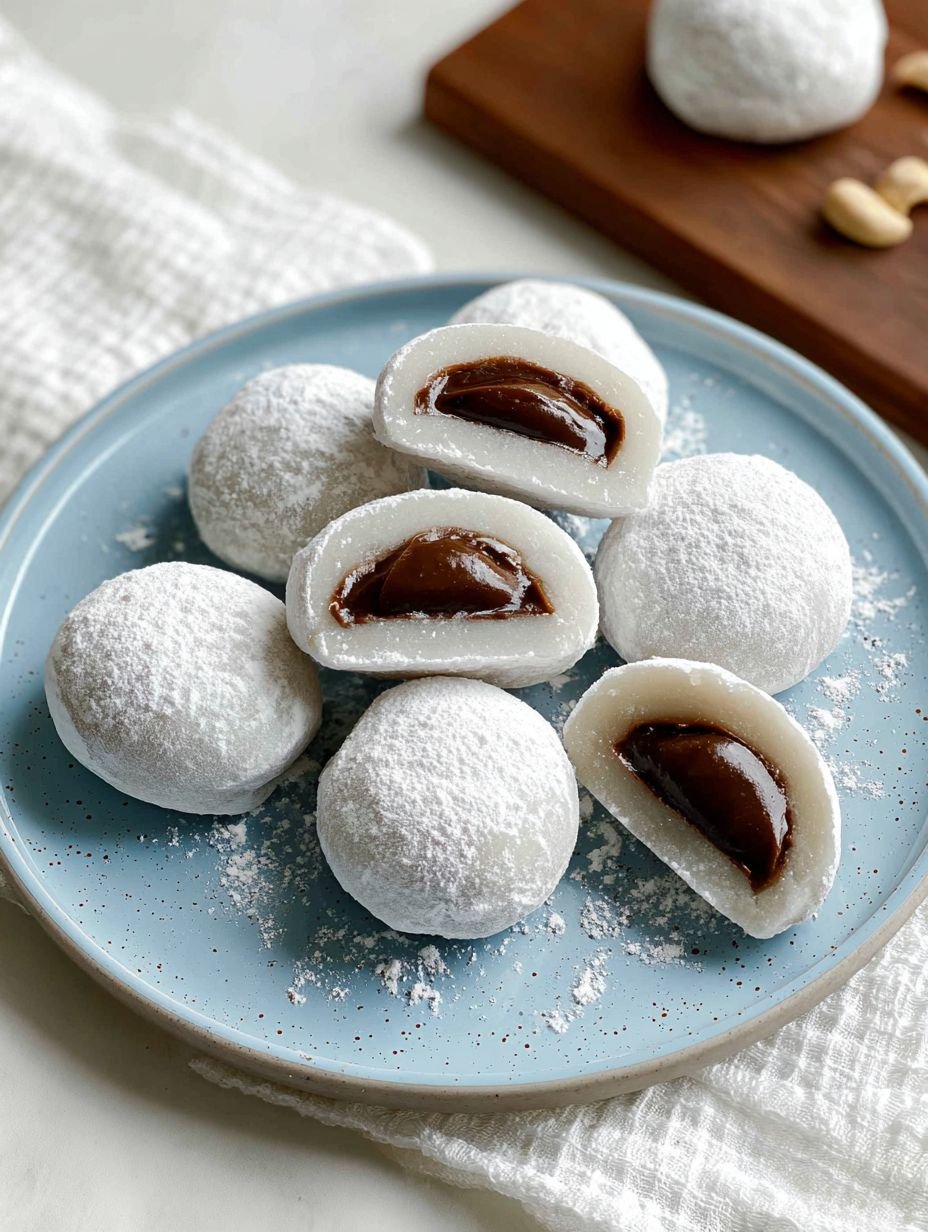
These delightful mochi feature a soft, chewy glutinous rice dough exterior, generously dusted with powdered sugar. Each piece encases a rich, creamy chocolate-hazelnut filling, offering a harmonious blend of textures and sweet flavors. The mochi are typically prepared by steaming or microwaving the dough until tender, then carefully shaped around the chilled filling.
Ingredients
- 1 cup (120g) glutinous rice flour (mochiko)
- 1/4 cup (50g) granulated sugar
- 1 cup (240ml) water
- 1/2 cup (approx. 150g) Nutella
- 1/4 cup (30g) cornstarch or potato starch, for dusting
Instructions
- **Prepare Nutella Filling**: Scoop Nutella into 1-tablespoon portions onto a parchment-lined plate. Freeze for at least 30 minutes, or until firm enough to handle.
- **Make Mochi Dough**: In a microwave-safe bowl, whisk together glutinous rice flour, granulated sugar, and water until smooth.
- **Cook Mochi Dough**: Cover the bowl loosely with plastic wrap (leaving a small vent) and microwave on high for 1 minute. Stir well. Re-cover and microwave for another 1 minute. Stir again. Continue microwaving in 30-second intervals, stirring after each, until the dough is translucent and sticky, typically 3-5 minutes total. Alternatively, steam the mixture in a heatproof bowl over simmering water for 15-20 minutes, stirring occasionally, until translucent.
- **Cool and Knead**: Transfer the hot mochi dough to a surface generously dusted with cornstarch. Allow it to cool slightly until it's warm enough to handle. Dust your hands with cornstarch and gently knead the dough for 1-2 minutes until smooth and elastic.
- **Portion and Fill**: Divide the dough into 8-10 equal pieces. Flatten each piece into a disc using your hands. Place a frozen Nutella ball in the center of each disc.
- **Shape Mochi**: Carefully bring the edges of the dough up and around the Nutella ball, pinching them together to seal completely. Roll gently between your palms to form a smooth ball.
- **Coat and Serve**: Place the finished mochi on a plate dusted with more cornstarch or powdered sugar. Serve immediately or store as directed.
Notes
Ensure the Nutella balls are well-frozen to prevent them from melting and making the dough difficult to seal.
Dust your work surface and hands generously with cornstarch to prevent the sticky mochi dough from adhering.
Work quickly while the mochi dough is still warm and pliable for easier shaping.
For best texture, consume mochi on the day it is made.
Store leftover mochi in an airtight container at room temperature for up to 24 hours. Refrigeration can cause mochi to harden.
- Prep Time: 30 minutes
- Cook Time: 5 minutes
Nutrition
- Calories: 180-220 per mochi
- Fat: 8-12g per mochi
- Carbohydrates: 30-35g per mochi
- Protein: 2-3g per mochi
FAQs
Why is freezing the chocolate-hazelnut filling crucial?
Freezing the Nutella into firm portions is a critical first step in creating these delightful treats. The recipe specifically calls for freezing the scoops for at least 30 minutes until they are firm enough to handle. This solidifies the creamy filling, making it much easier to encase within the soft mochi dough. If the Nutella isn’t sufficiently frozen, it can melt and become very difficult to seal the dough around it, potentially leading to a messy shaping process. This preparation ensures a smooth and successful assembly for your sweet and chewy delights.
What are the cooking methods for preparing the mochi dough?
The recipe offers two convenient methods for cooking the glutinous rice dough until it becomes translucent and sticky. You can opt for the microwave method by whisking the ingredients in a microwave-safe bowl, covering it loosely, and microwaving in intervals (1 minute, then 1 minute, then 30-second bursts) with stirring in between, typically taking 3-5 minutes total. Alternatively, you can steam the mixture in a heatproof bowl over simmering water for 15-20 minutes, stirring occasionally. Both methods aim to achieve the perfectly tender and pliable dough essential for this Nutella Mochi recipe.
How can I manage the stickiness of the mochi dough effectively?
Mochi dough is naturally very sticky, which is part of its unique texture, but it can be challenging to work with without the right technique. The recipe advises generously dusting your work surface and your hands with cornstarch or potato starch before transferring and kneading the cooked dough. This creates a non-stick barrier, preventing the dough from adhering to everything. Additionally, the instructions suggest working quickly while the dough is still warm and pliable, as it becomes more manageable during this stage. Consistent dusting will make shaping your sweet mochi much smoother.
What is the best way to store leftover mochi to maintain its texture?
To enjoy the best texture of your homemade mochi, it is recommended to consume them on the day they are made. If you happen to have any leftovers, the recipe instructs storing them in an airtight container at room temperature. It is crucial to avoid refrigerating mochi, as doing so can cause the delicate dough to harden and lose its characteristic soft, chewy quality. Following these storage guidelines will help preserve the delightful experience of your sweet and chewy mochi for up to 24 hours.