Imagine biting into a fluffy cloud, giving way to a rich, velvety vanilla dream, all encased in a tender, golden embrace. That, my friends, is the exquisite experience awaiting you.
I remember my grandma’s kitchen, filled with the comforting scent of yeast and vanilla, always a sign that something magical was about to emerge from the oven, usually her legendary custard buns.
What Makes This Recipe Special
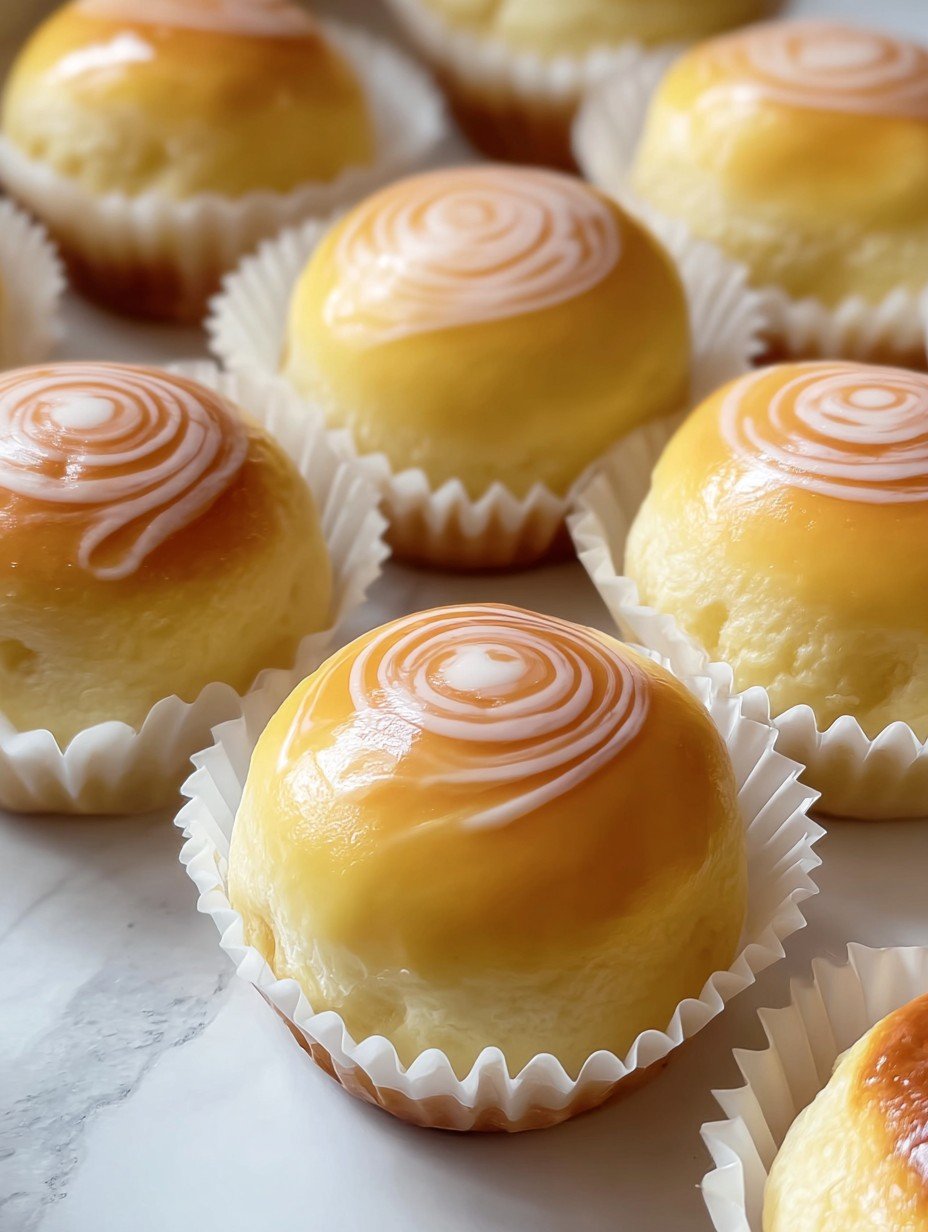
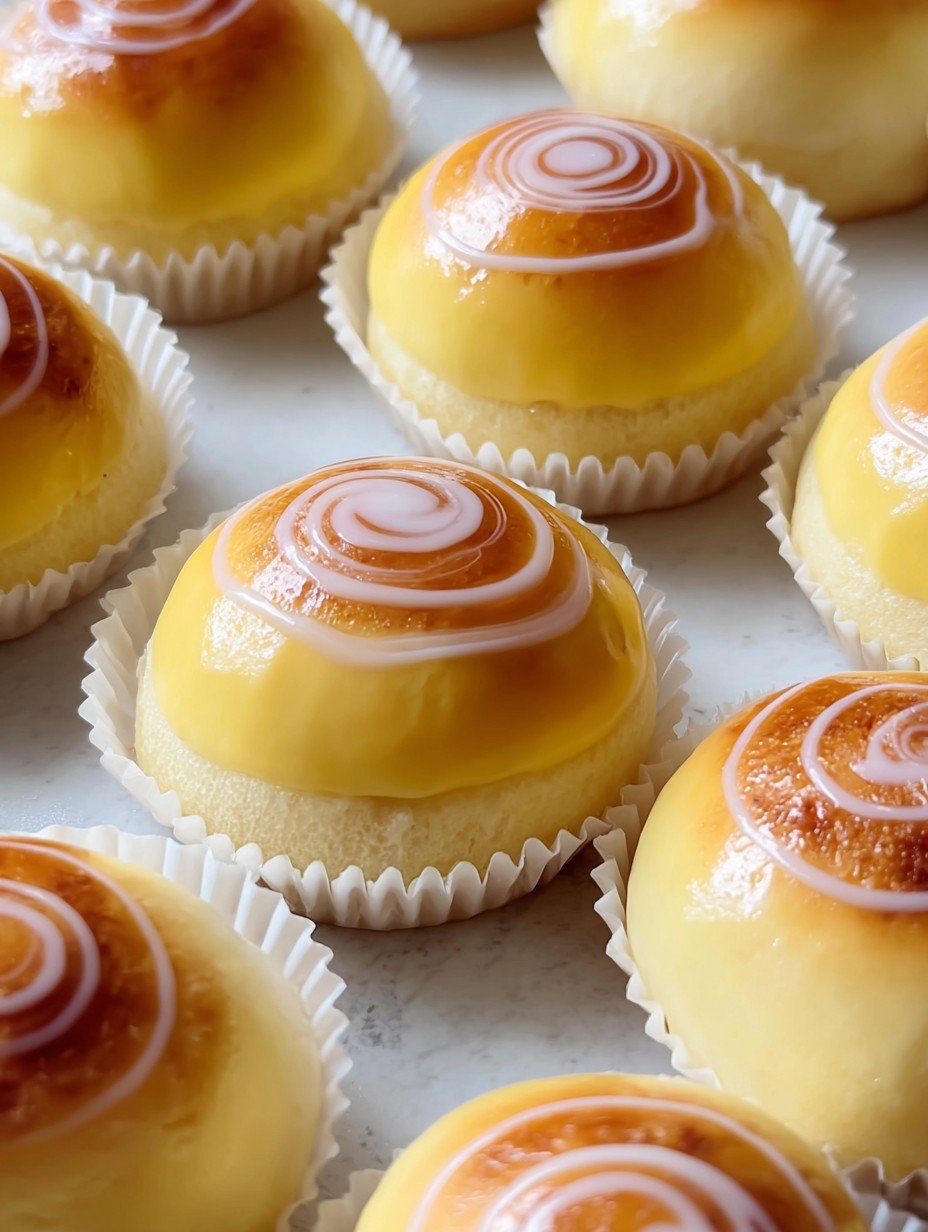
This delightful recipe stands out for its easy-to-follow steps, guiding even novice bakers to success. The unique flavor profile, a harmonious blend of soft, enriched bread and sweet, creamy vanilla custard, creates an irresistible treat. Their stunning appearance, complete with a glossy, artfully swirled glaze, makes them perfect for any occasion, offering both beauty and versatility, ready to be enjoyed as a breakfast pastry, dessert, or a comforting snack.
Ingredients
Here’s what you need for this delicious dish:
all purpose flour This forms the tender, melt-in-your-mouth base of your buns, providing structure and a soft crumb that cradles the creamy filling.
granulated sugar Essential for both the dough and the custard, it adds sweetness and helps with the dough’s golden caramelization and the custard’s smooth texture.
salt Just a pinch enhances all the flavors in the dough, balancing the sweetness and enriching the overall taste.
active dry yeast The magical ingredient that makes your dough wonderfully light and airy, contributing to that desirable fluffy texture of the baked buns.
warm milk (105-115°F / 40-46°C) Crucial for activating the yeast, ensuring your dough rises perfectly to create soft and fluffy buns.
large eggs, at room temperature These add richness, color, and moisture to the dough, creating a more tender and pliable texture. For the custard, egg yolks provide luxurious creaminess and color.
unsalted butter, softened Kneaded into the dough, it creates an incredibly tender, enriched crumb that practically dissolves in your mouth. When cold and cubed, it finishes the custard with a silky, smooth consistency.
whole milk Used as the base for the custard, contributing to its rich, full-bodied creaminess that makes the filling so delectable.
cornstarch This is the secret to a perfectly thick and stable custard, ensuring it holds its shape beautifully without being overly stiff.
vanilla extract A classic flavor enhancer, it infuses the custard with a warm, inviting aroma and a sweet, comforting taste.
powdered sugar The foundation of your elegant glaze, dissolving smoothly to create a delicate, sweet coating.
milk or water Used to thin the powdered sugar into a smooth, pourable glaze that adds a beautiful sheen and extra sweetness.
All ingredients and quantities can be found directly in the recipe card below.
Step-by-Step Instructions
Simply follow these easy steps to prepare this delicious meal:
Step 1: Get Your Dough Dream Started
In a spacious bowl, combine your all-purpose flour, a quarter cup of granulated sugar, one teaspoon of salt, and two and a quarter teaspoons of active dry yeast. In a separate bowl, gently whisk together a half cup of warm milk, ensuring it is between 105-115°F (40-46°C), and two large eggs, making sure they are at room temperature. Now, add these whisked wet ingredients to the dry mixture and mix until a shaggy dough begins to form.
Turn the dough out onto a lightly floured surface and begin to knead it for about 5 to 7 minutes until it becomes wonderfully smooth and elastic. Gradually incorporate a quarter cup of softened unsalted butter, kneading until it is fully absorbed and the dough feels soft and pliable. Transfer this beautifully prepared dough to a lightly oiled bowl, cover it snugly with plastic wrap, and let it rise in a warm place for 1 to 1.5 hours, or until it has delightfully doubled in size.
Step 2: Craft Your Creamy Custard Filling
In a medium saucepan, whisk together one and a half cups of whole milk and half of the granulated sugar over medium heat until it just begins to simmer, releasing a gentle warmth. In a separate bowl, whisk three large egg yolks, three tablespoons of cornstarch, and the remaining granulated sugar until the mixture is perfectly smooth and lump-free. Slowly and carefully temper the hot milk mixture into the egg yolk mixture, whisking constantly to prevent the eggs from scrambling. Return this entire mixture to the saucepan and cook it over medium-low heat, whisking continuously, until the custard thickens to a luxurious, pudding-like consistency. Remove the thickened custard from the heat, then stir in one teaspoon of vanilla extract and two tablespoons of cold, cubed unsalted butter until it has melted completely and the custard is silky smooth. Transfer the warm custard to a shallow dish, cover its surface directly with plastic wrap to prevent any skin from forming, and chill it completely in the refrigerator for at least 2 hours. This chilling step is crucial for perfect handling.
Step 3: Assemble Your Delicious Buns
Once your dough has proudly doubled in size, gently punch it down to release the air. Divide the dough into 12 equal pieces, then roll each piece into a smooth, neat ball. On a lightly floured surface, carefully flatten each dough ball into a 4-inch circle. Place about 1 to 2 tablespoons of your perfectly chilled custard filling right in the center of each circle. Gather the edges of the dough around the creamy filling, pinching them firmly to seal the bun, creating a smooth, round ball. Place these sealed buns seam-side down in paper liners or onto a baking sheet lined with parchment paper, ensuring they are spaced apart to allow for their final rise. Cover the assembled buns loosely with plastic wrap or a clean kitchen towel and let them rise in a warm place for another 30 to 45 minutes, or until they appear visibly puffy and ready for baking.
Step 4: Bake to Golden Perfection
Preheat your oven to 350°F (175°C), getting it nice and hot for your delicious creations. Bake the buns for 15 to 20 minutes, or until their tops are beautifully golden brown, promising a delightful texture. Carefully remove the golden buns from the oven and let them cool slightly on a wire rack, allowing them to firm up before the final, sweet touch.
Step 5: The Sweet Swirl Glaze Finish
While your baked buns are cooling, it’s time to prepare the beautiful glaze. In a small bowl, whisk together one cup of powdered sugar with 2-3 tablespoons of milk or water until the mixture is wonderfully smooth and pourable. Drizzle or spread this delightful glaze generously over the cooled buns. For that elegant swirl pattern, you can use a piping bag with a small round tip or simply a spoon to create concentric circles, adding a professional touch. Allow the glaze to set completely before serving, letting it harden slightly to create a lovely, slightly crisp exterior.
Pro Tips for Achieving Bakery-Quality Custard Buns
Creating those perfectly soft, melt-in-your-mouth custard buns at home is entirely achievable with a few expert insights. Firstly, pay close attention to the temperature of your milk for the dough; it must be warm, between 105-115°F (40-46°C), to gently activate the yeast without harming it. Too hot, and you’ll kill the yeast, leading to flat buns; too cold, and your dough won’t rise properly. For a truly luxurious, smooth custard, consider straining it through a fine-mesh sieve after cooking to eliminate any tiny lumps, ensuring every bite is uniformly creamy. When assembling your sweet baked buns, resist the urge to overfill them; using just 1-2 tablespoons of custard prevents any messy leaks during baking. Chilling the custard thoroughly, for at least two hours, is absolutely essential for easy handling and keeps the dough from becoming soggy. Finally, for an even richer golden color that enhances their visual appeal, you can brush these delightful buns with an egg wash, made from one egg yolk whisked with one tablespoon of milk, just before they go into the oven.
Your Burning Questions Answered About Custard Buns
We often receive questions from home bakers eager to perfect their sweet treats. One common query is about yeast activation: “Why isn’t my dough rising?” The usual culprit is milk temperature; ensure it’s precisely within the 105-115°F range. Another popular question concerns making the custard ahead of time: “Can I prepare the custard filling a day in advance?” Absolutely! In fact, chilling the vanilla custard completely for at least two hours, as specified, makes it much easier to work with when filling the buns. Just remember to cover its surface directly with plastic wrap to prevent a skin from forming, and store it in the refrigerator. Lastly, “How should I store leftover baked buns to maintain their freshness?” For optimal taste and texture, store your cooled, glazed custard buns in an airtight container at room temperature for up to two days. For longer storage, they can be refrigerated, but warming them slightly before serving will restore their delightful softness.
Why These Custard Buns Will Become Your New Obsession
These aren’t just any sweet buns; they are a delightful journey for your senses. The process of making these melt-in-your-mouth custard buns is as rewarding as the first bite, filling your home with an aroma that promises pure comfort. From the tender, yielding dough to the silken, sweet vanilla custard, and the delicate, swirled glaze, every element works in harmony. These delicious pastries are perfect for brightening any morning, offering a sophisticated treat for afternoon tea, or simply indulging in a moment of sweet bliss. Their irresistible texture and classic flavor profile make them an instant favorite, truly a must-try for anyone who appreciates the art of homemade baked goods.
Full Recipe Card: Melt-in-Your-Mouth Custard Buns
**DESCRIPTION: **
These delightful baked custard buns feature a soft, enriched dough with a golden-baked exterior. Each bun is generously filled with a smooth, sweet vanilla custard, offering a creamy contrast to the fluffy bread. A delicate, glossy glaze with an elegant swirl pattern adorns the top, adding a touch of sweetness and visual appeal. The buns are baked to a perfect golden hue, ensuring a tender crumb and a comforting aroma.
**INGREDIENTS: **
**For the Dough: **
– 3 cups all-purpose flour
– 1/4 cup granulated sugar
– 1 teaspoon salt
– 2 1/4 teaspoons active dry yeast
– 1/2 cup warm milk (105-115°F / 40-46°C)
– 2 large eggs, at room temperature
– 1/4 cup unsalted butter, softened
**For the Custard Filling: **
– 1 1/2 cups whole milk
– 1/2 cup granulated sugar
– 3 large egg yolks
– 3 tablespoons cornstarch
– 1 teaspoon vanilla extract
– 2 tablespoons unsalted butter, cold and cubed
**For the Glaze: **
– 1 cup powdered sugar
– 2-3 tablespoons milk or water
**INSTRUCTIONS: **
1. **Prepare the Dough: **
In a large bowl, combine flour, sugar, salt, and yeast. In a separate bowl, whisk together warm milk and eggs. Add the wet ingredients to the dry ingredients and mix until a shaggy dough forms.
Turn the dough out onto a lightly floured surface and knead for 5-7 minutes until smooth and elastic. Gradually knead in the softened butter until fully incorporated and the dough is soft and pliable.
Place the dough in a lightly oiled bowl, cover with plastic wrap, and let it rise in a warm place for 1-1.5 hours, or until doubled in size.
2. **Make the Custard Filling: **
In a medium saucepan, whisk together milk and half of the sugar over medium heat until just simmering.
In a separate bowl, whisk egg yolks, cornstarch, and the remaining sugar until smooth.
Slowly temper the hot milk mixture into the egg yolk mixture, whisking constantly. Return the entire mixture to the saucepan and cook over medium-low heat, whisking continuously, until the custard thickens to a pudding-like consistency.
Remove from heat, stir in vanilla extract and cold butter until melted and smooth. Transfer the custard to a shallow dish, cover the surface directly with plastic wrap to prevent a skin from forming, and chill completely in the refrigerator (at least 2 hours).
3. **Assemble the Buns: **
Once the dough has doubled, gently punch it down and divide it into 12 equal pieces. Roll each piece into a smooth ball.
On a lightly floured surface, flatten each dough ball into a 4-inch circle. Place about 1-2 tablespoons of chilled custard in the center of each circle.
Gather the edges of the dough around the filling and pinch firmly to seal, forming a smooth ball. Place the sealed buns seam-side down in paper liners or on a baking sheet lined with parchment paper, spaced apart.
Cover the buns loosely with plastic wrap or a clean kitchen towel and let them rise in a warm place for another 30-45 minutes, or until visibly puffy.
4. **Bake the Buns: **
Preheat your oven to 350°F (175°C).
Bake the buns for 15-20 minutes, or until golden brown on top.
Remove from the oven and let them cool slightly on a wire rack.
5. **Glaze the Buns: **
While the buns are cooling, prepare the glaze. In a small bowl, whisk together powdered sugar and milk/water until smooth and pourable.
Drizzle or spread the glaze over the cooled buns. For the swirl pattern, you can use a piping bag with a small round tip or a spoon to create concentric circles.
Allow the glaze to set before serving.
**DETAILS: **
Servings: 12 buns
**NUTRITION: **
Calories: 280 per bun
Protein: 7g
Carbs: 45g
Fat: 8g
**NOTES: **
Ensure your milk for the dough is warm, not hot, to activate the yeast without killing it.
For a perfectly smooth custard, strain it through a fine-mesh sieve after cooking to remove any lumps.
Do not overfill the buns, as the custard may leak during baking.
Properly chilling the custard is crucial for easy handling and to prevent it from making the dough soggy.
For a richer golden color, you can brush the buns with an egg wash (1 egg yolk + 1 tablespoon milk) before baking.
Perfecting the Cooking Process
Achieving delightful results relies on careful steps. Ensure your dough fully doubles during the first rise. When making the sweet filling, whisk continuously until thick, then chill thoroughly. This prevents lumps, makes assembly easier, and safeguards against soggy buns, ensuring that perfect, creamy texture.
Add Your Personal Touch
While the classic vanilla custard is divine, subtly customize these treats. Instead of vanilla extract in the creamy filling, try almond extract for a nutty twist. For the glaze, replace the milk or water with a small amount of fruit juice, such as orange or apple, to add a bright, tangy note.
Storage & Reheating
To preserve the soft, fluffy texture of your delectable buns, store them in an airtight container at room temperature for up to two days. For longer enjoyment, refrigerate for up to four. Reheat chilled buns gently in a low oven or microwave until just warm, maintaining the creamy filling.
Helpful Chef Tips
Baking these fluffy, sweet buns instantly brings back cherished memories. The delighted ‘mmm’ from loved ones with each creamy bite makes every effort worthwhile. Truly, some treats embody pure happiness.
Final Thoughts
There’s nothing quite like pulling a batch of warm, golden buns from the oven, their sweet aroma filling your kitchen. This Melt-in-Your-Mouth Custard Buns Recipe delivers that comforting magic, creating soft, fluffy dough generously filled with creamy vanilla custard and topped with an elegant, glossy swirl. Every bite is a delightful contrast of textures and flavors – a true homemade indulgence. Don’t just dream about these delectable treats; gather your ingredients and experience the pure joy of baking and sharing these incredible custard buns today. Your taste buds will thank you!
Print
Melt-in-Your-Mouth Custard Buns Recipe
- Total Time: 2 hours 50 minutes
- Yield: 12 buns 1x
Description
These delightful baked custard buns feature a soft, enriched dough with a golden-baked exterior. Each bun is generously filled with a smooth, sweet vanilla custard, offering a creamy contrast to the fluffy bread. A delicate, glossy glaze with an elegant swirl pattern adorns the top, adding a touch of sweetness and visual appeal. The buns are baked to a perfect golden hue, ensuring a tender crumb and a comforting aroma.
Ingredients
- **For the Dough:**
- 3 cups all-purpose flour
- 1/4 cup granulated sugar
- 1 teaspoon salt
- 2 1/4 teaspoons active dry yeast
- 1/2 cup warm milk (105-115°F / 40-46°C)
- 2 large eggs, at room temperature
- 1/4 cup unsalted butter, softened
- **For the Custard Filling:**
- 1 1/2 cups whole milk
- 1/2 cup granulated sugar
- 3 large egg yolks
- 3 tablespoons cornstarch
- 1 teaspoon vanilla extract
- 2 tablespoons unsalted butter, cold and cubed
- **For the Glaze:**
- 1 cup powdered sugar
- 2–3 tablespoons milk or water
Instructions
- **1. Prepare the Dough:**
- In a large bowl, combine flour, sugar, salt, and yeast. In a separate bowl, whisk together warm milk and eggs. Add the wet ingredients to the dry ingredients and mix until a shaggy dough forms.
- Turn the dough out onto a lightly floured surface and knead for 5-7 minutes until smooth and elastic. Gradually knead in the softened butter until fully incorporated and the dough is soft and pliable.
- Place the dough in a lightly oiled bowl, cover with plastic wrap, and let it rise in a warm place for 1-1.5 hours, or until doubled in size.
- **2. Make the Custard Filling:**
- In a medium saucepan, whisk together milk and half of the sugar over medium heat until just simmering.
- In a separate bowl, whisk egg yolks, cornstarch, and the remaining sugar until smooth.
- Slowly temper the hot milk mixture into the egg yolk mixture, whisking constantly. Return the entire mixture to the saucepan and cook over medium-low heat, whisking continuously, until the custard thickens to a pudding-like consistency.
- Remove from heat, stir in vanilla extract and cold butter until melted and smooth. Transfer the custard to a shallow dish, cover the surface directly with plastic wrap to prevent a skin from forming, and chill completely in the refrigerator (at least 2 hours).
- **3. Assemble the Buns:**
- Once the dough has doubled, gently punch it down and divide it into 12 equal pieces. Roll each piece into a smooth ball.
- On a lightly floured surface, flatten each dough ball into a 4-inch circle. Place about 1-2 tablespoons of chilled custard in the center of each circle.
- Gather the edges of the dough around the filling and pinch firmly to seal, forming a smooth ball. Place the sealed buns seam-side down in paper liners or on a baking sheet lined with parchment paper, spaced apart.
- Cover the buns loosely with plastic wrap or a clean kitchen towel and let them rise in a warm place for another 30-45 minutes, or until visibly puffy.
- **4. Bake the Buns:**
- Preheat your oven to 350°F (175°C).
- Bake the buns for 15-20 minutes, or until golden brown on top.
- Remove from the oven and let them cool slightly on a wire rack.
- **5. Glaze the Buns:**
- While the buns are cooling, prepare the glaze. In a small bowl, whisk together powdered sugar and milk/water until smooth and pourable.
- Drizzle or spread the glaze over the cooled buns. For the swirl pattern, you can use a piping bag with a small round tip or a spoon to create concentric circles.
- Allow the glaze to set before serving.
Notes
Ensure your milk for the dough is warm, not hot, to activate the yeast without killing it.
For a perfectly smooth custard, strain it through a fine-mesh sieve after cooking to remove any lumps.
Do not overfill the buns, as the custard may leak during baking.
Properly chilling the custard is crucial for easy handling and to prevent it from making the dough soggy.
For a richer golden color, you can brush the buns with an egg wash (1 egg yolk + 1 tablespoon milk) before baking.
- Prep Time: 2 hours 30 minutes (includes chilling time for custard)
- Cook Time: 20 minutes
Nutrition
- Calories: 280 per bun
- Fat: 8g
- Carbohydrates: 45g
- Protein: 7g
FAQs
How can I ensure my custard filling is smooth and free of lumps?
Achieving a perfectly smooth custard is key to these delightful buns. First, when you’re whisking the egg yolks, cornstarch, and sugar, make sure the mixture is completely smooth before tempering. Crucially, after slowly adding the hot milk mixture to the egg yolks, return the entire combination to the saucepan and whisk continuously over medium-low heat until it thickens to a pudding-like consistency. If any small lumps still form, the recipe notes suggest straining the custard through a fine-mesh sieve after cooking. This extra step ensures a silky, luxurious texture for your filling.
What’s the best way to prevent the custard from leaking out of the buns during baking?
Preventing custard leakage involves a few important steps. First, it’s critical to properly chill the custard completely in the refrigerator for at least two hours before assembling the buns; this makes it much firmer and easier to handle. When filling, place about 1-2 tablespoons of the chilled custard in the center of each flattened dough circle, but be careful not to overfill them. Finally, gather the edges of the dough firmly around the filling and pinch the seams tightly to create a secure seal. Placing the sealed buns seam-side down on your baking sheet also helps keep the filling contained.
Why is it important for the milk in the dough to be warm, not hot?
The temperature of the milk for the dough is crucial for the success of your Melt-in-Your-Mouth Custard Buns. The recipe specifies using warm milk, between 105-115°F (40-46°C). This specific temperature range is ideal for activating the active dry yeast, allowing it to work effectively and help your dough rise beautifully. If the milk is too hot, it can kill the yeast, preventing the dough from rising. If it’s too cold, the yeast won’t activate properly, resulting in a slow or weak rise. Using the correct temperature ensures a soft and pliable dough.
Can I make these buns even more golden brown?
Yes, if you desire a richer golden color for your baked custard buns, there’s a simple trick you can use before they go into the oven. The recipe notes suggest brushing the buns with an egg wash prior to baking. To prepare this, simply whisk together one egg yolk with one tablespoon of milk. Gently brush this mixture over the tops of the puffy, risen buns just before placing them in the preheated 350°F (175°C) oven. This will give them an even more appealing, deep golden hue once baked.