
Imagine a bite where lush, cool mint meets decadent, rich chocolate, all nestled in a delicate, perfectly sized confection. These aren’t just cakes; they’re tiny architectural marvels, designed to delight every one of your senses.
I still remember the first time I attempted these mini marvels – a culinary adventure that involved more flour on my face than in the bowl and a dramatic rescue mission for a collapsing mousse. But oh, the triumph when that first perfect mint chocolate mini cake emerged!
Reasons Why You’ll Love This Recipe
You’re about to discover a dessert that hits every sweet spot, making these mint chocolate mini cakes an absolute must-try. This recipe simplifies elegance, ensuring an easy preparation process that even a novice baker can master without breaking a sweat, letting you impress guests with minimal fuss. The unique flavor profile, blending cool, refreshing mint with deep, luxurious dark chocolate, creates an unforgettable taste experience that’s both vibrant and indulgent. Visually, these cakes are stunning, boasting glossy ganache and vibrant mint leaves, making them perfect for any special occasion or simply to elevate an ordinary Tuesday. Plus, their versatility means you can prepare them ahead of time, adjust the mint intensity, and even get creative with garnishes.
Ingredients
Here’s what you need for this delicious dish:
- **For the Chocolate Cake Base:**
- **all-purpose flour** The structural backbone of our cake, providing tender crumb.
- **unsweetened cocoa powder** Essential for the deep, rich chocolate flavor that anchors these mini cakes.
- **baking soda** Our leavening agent, ensuring a light and airy texture for the cake base.
- **salt** Just a pinch to enhance and balance all the sweet flavors.
- **unsalted butter, softened** Brought to room temperature, it creams beautifully with sugar for a smooth, tender cake.
- **granulated sugar** Provides sweetness and contributes to the cake’s tender crumb.
- **large egg** Binds the ingredients, adds richness, and helps with structure.
- **vanilla extract** A classic flavor enhancer that complements the chocolate notes.
- **buttermilk** Adds moisture and a slight tang, reacting with baking soda for extra lift.
- **For the Mint Mousse:**
- **heavy cream, divided** Whipped to create the ethereal lightness of the mousse, providing a creamy counterpoint to the cake.
- **granulated sugar** Sweetens the minty mousse, ensuring it’s perfectly balanced.
- **unflavored gelatin powder** The secret to a perfectly set, yet still delicate and wobbly mousse, giving it structure without being rubbery.
- **cold water** Used to bloom the gelatin, preparing it to dissolve smoothly into the warm cream mixture.
- **pure mint extract** This is the star for our ‘Mint Chocolate’ theme, delivering that refreshing, cool burst of flavor. Adjust to your preference for a bolder or subtler mint presence.
- **green food coloring (optional)** A few drops will give your mousse a lovely, vibrant minty hue, perfectly matching the refreshing flavor of these individual mint chocolate treats.
- **For the Chocolate Ganache:**
- **dark chocolate, finely chopped** For the glossy, luxurious ganache, providing a deep chocolate finish that cascades elegantly over the sides of your mini cakes.
- **heavy cream** Creates a smooth, pourable ganache when combined with the hot chocolate.
- **For Garnish:**
- **dark chocolate, roughly chopped** Adds delightful texture and an extra layer of chocolatey indulgence to the finished dessert.
- **Fresh mint leaves** A beautiful, fragrant, and classic garnish that clearly signifies the mint flavor within each small cake.
All ingredients with their exact quantities can be found in the recipe card below.
Step-by-Step Instructions
Here’s a simple guide to help you prepare this delicious recipe:
Step 1: Create the Chocolate Cake Bases
First, preheat your oven to 350F (175C) and prepare your pan. Grease and flour an 8×8 inch baking pan, or simply line a muffin tin if that’s what you’re using. In a medium bowl, whisk together the all-purpose flour, unsweetened cocoa powder, baking soda, and salt. Set this dry mixture aside. In a separate large bowl, cream together the softened unsalted butter and granulated sugar until the mixture is light and fluffy, about 2-3 minutes. Beat in the large egg and vanilla extract until well combined. Now, it’s time to marry your dry and wet ingredients: gradually add the whisked dry ingredients to the butter mixture, alternating with the buttermilk. Begin and end with the dry ingredients, mixing only until just combined to avoid overworking the batter. Pour this rich chocolate batter into your prepared pan and bake for 18-22 minutes, or until a toothpick inserted into the center comes out with moist crumbs. Let the cake cool completely in the pan before proceeding. Once fully cooled, use a 2-inch round cookie cutter to cut out your perfect little mini cake bases from the chocolate cake. This step creates the foundation for each of your delightful mint chocolate mini cakes.
Step 2: Craft the Refreshing Mint Mousse
Let’s get that minty magic happening! In a small bowl, sprinkle the unflavored gelatin powder over 2 tablespoons of cold water and let it bloom for precisely 5 minutes. This allows the gelatin to hydrate properly. Meanwhile, in a medium saucepan, gently heat 1/2 cup of heavy cream and 1/4 cup of granulated sugar over medium heat. Stir continuously until the sugar completely dissolves and the cream is warm; it’s crucial not to let it boil. Remove the saucepan from the heat and stir in the bloomed gelatin until it is fully dissolved into the warm cream mixture. Set this aside to cool slightly. In a separate large bowl, using an electric mixer, whip the remaining 1 cup of heavy cream until soft peaks just begin to form. Once the gelatin mixture has cooled slightly, gently fold it into the whipped cream. Add the 1 teaspoon of pure mint extract and 2-3 drops of green food coloring (if you’re using it to achieve that vibrant mint hue). Fold everything together until fully combined and beautifully airy, creating the light and delicious mousse for your mini cakes.
Step 3: Assemble the Elegant Mousse Cakes
Now for the exciting part – bringing these perfect mint chocolate mini cakes to life! Place your chocolate cake rounds into individual dessert rings. For perfectly clean edges and easy unmolding later, make sure to line your dessert rings with acetate strips. If you don’t have dessert rings, a muffin tin lined with cupcake liners can work, though the shape will be slightly different. Once the cake bases are in place, spoon or pipe the prepared mint mousse over each cake base, filling it right to the top of the ring. Carefully smooth the tops of the mousse so they look neat and even. Transfer your assembled mini cakes to the refrigerator and let them chill for at least 4 hours, or even better, preferably overnight. This crucial step allows the mousse to fully set, ensuring a stable and delightful texture.
Step 4: Prepare the Glossy Chocolate Ganache
It’s time for the crowning glory of your perfect mint chocolate mini cakes: the luscious chocolate ganache. Place the 4 ounces (113g) of finely chopped dark chocolate into a heatproof bowl. In a small saucepan, heat 1/2 cup (120ml) of heavy cream over medium heat until it just begins to simmer around the edges – do not let it boil vigorously. As soon as you see those tiny bubbles, remove the cream from the heat and pour the hot cream directly over the chopped dark chocolate in the heatproof bowl. Let this mixture sit undisturbed for 5 minutes. This allows the heat from the cream to gently melt the chocolate. After 5 minutes, whisk the mixture gently, starting from the center and working your way outwards, until it transforms into a smooth, glossy, and uniform ganache. Let the ganache cool slightly until it thickens to a pourable consistency. You want it warm enough to flow beautifully but not too hot, which could melt your perfectly set mousse.
Step 5: Finish and Serve Your Mint Chocolate Delights
The grand finale! Carefully remove the chilled mousse cakes from their molds, peeling away the acetate strips if you used them. Drizzle the slightly cooled ganache generously over the top of each cake, allowing it to gracefully drip down the sides for that professional, elegant look. To add a final touch of indulgence and texture, garnish each mini cake with a sprinkle of the roughly chopped dark chocolate and a fresh mint leaf. These exquisite mint chocolate mini cakes are now ready to be served immediately, allowing your guests to savor the delightful balance of flavors and textures, or you can refrigerate them until you are ready to serve. For the best experience, bring them out of the fridge a few minutes before serving to let the flavors truly shine.
These delightful treats, offering 8 mini cakes, each come in at approximately 350 kcal with 4g protein, 35g carbs, and 25g fat, making them a perfectly portioned indulgence. They can be prepared a day in advance and stored in the refrigerator, meaning less stress on your big day. Adjust the amount of mint extract to your personal preference for a stronger or milder mint experience, ensuring every bite is tailored just for you. With these tips and a little kitchen magic, you’re all set to create mini masterpieces that will impress everyone fortunate enough to try them.
Improving the Cooking Method
For stellar results, ensure your chocolate cake base is completely cooled before cutting rounds. Bloom the gelatin while warming cream for the mousse, then let that mixture cool slightly before folding into whipped cream. This prevents melting the peaks and ensures a smooth, set mousse.
Decorate Your Dish with Your Personal Touch
Personalize your mini cakes! Instead of chopped dark chocolate, try shaving it for a delicate finish on top. For a natural look, omit the green food coloring from the mint mousse. Adjust the mint extract for your preferred intensity, making these mint chocolate treats truly your own.
Smart Tips for Storage and Reheating
To keep your mint chocolate mini cakes pristine, store them covered in the refrigerator for up to 3 days. To maintain the mousse’s smooth texture and the ganache’s glossy finish, keep them chilled. For the freshest garnish, add the fresh mint leaves just before serving.
Practical Chef Advice
I remember making a batch of these mint chocolate mini cakes for a friend’s birthday. Her eyes lit up with joy, reminding me that the simple act of baking can truly create magical moments and sweet memories.
Final Thoughts
After exploring how to make these exquisite mint chocolate mini cakes, you’ve discovered the joy of combining a tender dark chocolate base with a refreshingly light mint mousse. Each bite, crowned with a glossy ganache and generous chocolate chunks, offers a sophisticated balance of cool mint and deep cocoa notes. This recipe isn’t just about baking; it’s about crafting an indulgent experience that delights the senses. So, gather your ingredients and embark on creating these delightful treats. Share them with loved ones, and savor the unforgettable taste of these perfectly portioned desserts.
Print
How to Make Perfect Mint Chocolate Mini Cakes
- Total Time: 1 hour 20 minutes
- Yield: 8 mini cakes 1x
Description
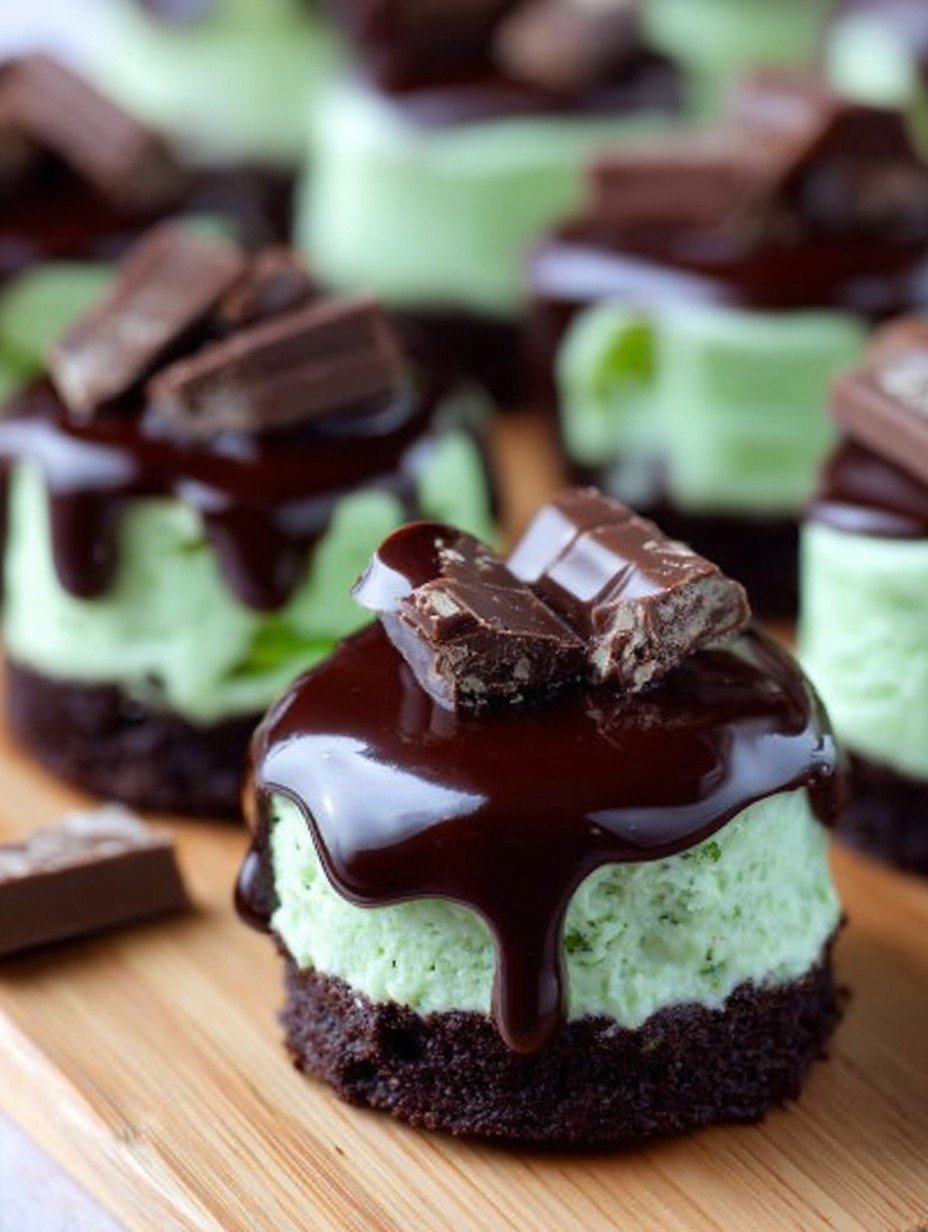
These mini mint chocolate mousse cakes offer a delightful balance of rich and refreshing flavors. A tender, dark chocolate cake base provides a sturdy foundation for a light and airy mint-infused mousse. Each cake is elegantly finished with a glossy dark chocolate ganache, cascading down the sides, and topped with generous chunks of chocolate for added texture and indulgence. The cool mint complements the deep chocolate notes, creating a sophisticated dessert experience.
Ingredients
- *For the Chocolate Cake Base:*
- 1/2 cup (60g) all-purpose flour
- 1/4 cup (20g) unsweetened cocoa powder
- 1/2 teaspoon baking soda
- 1/4 teaspoon salt
- 1/4 cup (56g) unsalted butter, softened
- 1/2 cup (100g) granulated sugar
- 1 large egg
- 1/2 teaspoon vanilla extract
- 1/4 cup (60ml) buttermilk
- *For the Mint Mousse:*
- 1 1/2 cups (360ml) heavy cream, divided
- 1/4 cup (50g) granulated sugar
- 1 teaspoon unflavored gelatin powder
- 2 tablespoons (30ml) cold water
- 1 teaspoon pure mint extract
- 2–3 drops green food coloring (optional)
- *For the Chocolate Ganache:*
- 4 ounces (113g) dark chocolate, finely chopped
- 1/2 cup (120ml) heavy cream
- *For Garnish:*
- 2 ounces (56g) dark chocolate, roughly chopped
- Fresh mint leaves
Instructions
- **Prepare the Chocolate Cake Base:** Preheat oven to 350F (175C). Grease and flour an 8×8 inch baking pan or line a muffin tin. In a medium bowl, whisk together flour, cocoa powder, baking soda, and salt. In a separate large bowl, cream together butter and sugar until light and fluffy. Beat in the egg and vanilla extract. Gradually add the dry ingredients to the wet ingredients, alternating with the buttermilk, beginning and ending with dry ingredients. Mix until just combined. Pour batter into the prepared pan and bake for 18-22 minutes, or until a toothpick inserted into the center comes out with moist crumbs. Let cool completely. Once cooled, use a 2-inch round cookie cutter to cut out mini cake bases.
- **Prepare the Mint Mousse:** In a small bowl, sprinkle gelatin powder over cold water and let it bloom for 5 minutes. In a medium saucepan, heat 1/2 cup of heavy cream and sugar over medium heat until sugar dissolves and cream is warm (do not boil). Remove from heat, stir in the bloomed gelatin until fully dissolved. Let cool slightly. In a large bowl, whip the remaining 1 cup heavy cream until soft peaks form. Gently fold the cooled gelatin mixture, mint extract, and green food coloring (if using) into the whipped cream until fully combined.
- **Assemble the Mousse Cakes:** Place the chocolate cake rounds into individual dessert rings or muffin tin cavities lined with acetate strips for easy unmolding. Spoon or pipe the mint mousse over each cake base, filling to the top of the ring. Smooth the tops. Refrigerate for at least 4 hours, or preferably overnight, until the mousse is set.
- **Prepare the Chocolate Ganache:** Place chopped dark chocolate in a heatproof bowl. Heat 1/2 cup heavy cream in a small saucepan until it just begins to simmer. Pour the hot cream over the chocolate and let it sit for 5 minutes. Whisk gently until smooth and glossy. Let the ganache cool slightly until it thickens to a pourable consistency.
- **Finish and Serve:** Carefully remove the mousse cakes from their molds. Drizzle the cooled ganache over the top of each cake, allowing it to drip down the sides. Garnish with chopped dark chocolate and a fresh mint leaf. Serve immediately or refrigerate until ready to serve.
Notes
For perfectly clean edges, line your dessert rings with acetate strips before adding the mousse.
Adjust the amount of mint extract to your preference for a stronger or milder mint flavor.
Ensure the ganache is warm enough to pour but not too hot, which could melt the mousse.
These mini cakes can be prepared a day in advance and stored in the refrigerator.
If you don’t have dessert rings, a muffin tin lined with cupcake liners can work, though the shape will be slightly different.
- Prep Time: 60 minutes
- Cook Time: 20 minutes
Nutrition
- Calories: 350 kcal
- Fat: 25g
- Carbohydrates: 35g
- Protein: 4g
FAQs
How do I ensure the mint mousse sets firmly for these mini cakes?
Achieving a perfectly set mint mousse involves a few key steps. Begin by sprinkling the gelatin powder over cold water, allowing it to bloom for five minutes; this activates its gelling properties. Next, gently heat a portion of the heavy cream with sugar until the sugar fully dissolves and the cream is warm, then stir in the bloomed gelatin until it’s completely melted. It is crucial to let this mixture cool slightly before folding it into the whipped cream. Finally, once assembled, refrigerate the mini cakes for at least four hours, or preferably overnight, to allow the mousse ample time to set completely.
What’s the secret to achieving a glossy, pourable chocolate ganache?
The key to a beautiful, pourable chocolate ganache lies in careful preparation and temperature control. Start by placing finely chopped dark chocolate into a heatproof bowl. In a separate small saucepan, heat the heavy cream until it just begins to simmer, then immediately pour the hot cream over the chopped chocolate. Let this mixture sit undisturbed for about five minutes. This allows the heat from the cream to melt the chocolate evenly. After the resting period, gently whisk the mixture until it becomes smooth and glossy. Ensure the ganache cools slightly until it reaches a pourable, yet thick, consistency before drizzling it over your mini cakes.
Can these mint chocolate mini cakes be prepared in advance?
Absolutely, these elegant mint chocolate mini cakes are an excellent make-ahead dessert, perfect for entertaining or enjoying throughout the week. Once assembled with the chocolate cake base and mint mousse, they require at least four hours of refrigeration to set, but they can conveniently be prepared a day in advance. Store the set mousse cakes in the refrigerator until you are ready to apply the ganache and garnishes. Finishing them just before serving ensures the ganache remains beautifully glossy and the fresh mint leaves are vibrant.
What can I use if I don’t have individual dessert rings for assembly?
If you don’t have individual dessert rings on hand, you can still successfully assemble these delicious mint chocolate mini cakes. A standard muffin tin provides a great alternative. Simply line the cavities with cupcake liners to hold the mini cake bases and mousse. While the resulting shape might be slightly different from using dessert rings, the flavors and textures will be just as delightful. For a cleaner presentation, you can also line your chosen molds, whether dessert rings or muffin tin cavities, with acetate strips before adding the mousse.