Imagine biting into a warm, tender pear, its natural sweetness enhanced by aromatic cinnamon, culminating in a velvety, cool cream. This, my friends, is the pure bliss of Heavenly Baked Pears with Cinnamon Cream. I remember the first time I tried baked pears; it was a dreary autumn day, and this simple dessert turned my mood right around, proving comfort food doesn’t have to be complicated to be utterly delightful.
What Makes This Recipe Special
This delightful dessert, perfectly embodying the essence of fall and winter, offers a captivating experience with minimal effort. It boasts an incredibly easy preparation, requiring just a few simple steps and readily available ingredients, making it ideal for busy evenings or impromptu gatherings. The flavor profile of these Heavenly Baked Pears with Cinnamon Cream is uniquely comforting, blending the delicate sweetness of fruit with the bold warmth of cinnamon and honey, creating a harmonious balance that truly sings. Visually, each golden-baked pear half, elegantly topped with its creamy cloud, presents a stunning appearance, suitable for any special occasion. Furthermore, its versatility shines through, allowing for simple variations to cater to different tastes, truly making it a dish for everyone.
Ingredients
Here’s what you need for this delicious dish:
Opt for ripe but firm varieties like Bosc or Anjou. These hold their shape beautifully during baking, ensuring a tender interior without becoming mushy, providing the perfect foundation for this elegant dessert.
A natural sweetener that caramelizes wonderfully in the oven, infusing the pears with a subtle, rich sweetness and contributing to their beautiful golden hue. Choose a good quality honey for the best flavor.
This warm, aromatic spice is the heart of the dish, providing that signature cozy flavor that pairs so perfectly with fruit. It’s used both during baking and as a final dusting to enhance the overall aroma and contribute to the “cinnamon” aspect of this treat.
Just a small amount of water in the baking dish helps create a steamy environment, ensuring the pears bake gently and remain moist, preventing them from drying out while achieving perfect tenderness.
This provides the luxurious “cream” aspect of our dessert. A luscious, cool topping that perfectly contrasts with the warm, baked fruit, adding a delightful creamy texture and a fresh finish. Use whipped cream for indulgence or Greek yogurt for a tangier, lighter option.
All ingredients and quantities can be found directly in the recipe card below.
Step-by-Step Instructions
Simply follow these easy steps to prepare this delicious meal:
Step 1: Get Ready to Bake
Begin by preheating your oven to a precise 375°F (190°C), ensuring it reaches the ideal temperature for even baking. This initial step is key for perfect results and ensures the pears cook uniformly.
Step 2: Prepare Your Pears
Carefully wash each pear, then slice them in half lengthwise. With a spoon, precisely core each half, removing seeds and any tough bits from the center. You can leave the elegant stem on for a beautiful presentation if desired.
Step 3: Arrange for Baking
Gently place the prepared pear halves, cut-side facing upwards, into a small baking dish. This positioning allows the honey and cinnamon to fully absorb into the fruit as it bakes, creating a richer flavor.
Step 4: Flavor Infusion
Drizzle each pear half generously and evenly with the honey, ensuring full coverage, then sprinkle with the ground cinnamon. This combination creates a sweet, aromatic crust as the pears bake.
Step 5: Add Moisture
Pour the measured water into the bottom of the baking dish around the pears. This creates a gentle steaming effect during baking, keeping the pears moist and ensuring a tender texture without drying out.
Step 6: Bake to Perfection
Slide the baking dish into your preheated oven and bake for 20 to 30 minutes. Check for tenderness by piercing a pear with a fork; it should feel soft with little resistance. Baking time will vary based on the pear’s size and ripeness.
Step 7: Cool Down
Once perfectly tender, carefully remove the dish from the oven and allow the baked fruit to cool slightly. This brief resting period helps the flavors settle and the pears to become even more succulent before serving.
Step 8: Serve with Creamy Topping
Serve these warm, tender pears by topping each half with a generous dollop of whipped cream or plain Greek yogurt. For an extra touch of aromatic bliss, dust with additional cinnamon just before enjoying this delightful dessert.
Why Baked Pears Are a Dessert Dream
Alright, let’s get real for a moment. Who hasn’t stared into the fridge, wondering what to make for dessert that feels fancy but doesn’t require a culinary degree or a trip to a specialty store? Enter the humble pear. It’s often overshadowed by apples, but when baked, pears transform into something truly magical. They become incredibly tender, sweet, and wonderfully fragrant. This isn’t just about baking a fruit; it’s about unlocking a simple pleasure, turning everyday into extraordinary without all the fuss. Whether you’re a seasoned baker or someone who usually burns toast (no judgment here, we’ve all been there), this recipe is your secret weapon for impressing everyone, including yourself.
The Sweet Science of Baking Pears
There’s a beautiful simplicity in how pears behave under heat. Unlike some fruits that break down into a watery mess, pears maintain their elegant shape, their flesh becoming succulently soft. The natural sugars caramelize, deepening their flavor and giving them a gorgeous golden sheen. When combined with warm spices like cinnamon and a touch of honey, the flavors meld into a symphony that’s both comforting and sophisticated. It’s like nature decided to bake itself a warm hug, and we’re just here to reap the delicious benefits of this wonderful fruit dessert.
Expert Tips for Perfect Baked Pears
Making this dish is straightforward, but a few insider tips can elevate your experience from simply good to absolutely unforgettable. Think of these as your little culinary superpowers, ensuring every bite is as delicious as the last.
Choosing the Right Pear for Baking
The journey to perfect baked pears begins at the grocery store. Look for pears that are ripe but still quite firm. Varieties such as Bosc or Anjou are fantastic choices because they hold their shape magnificently during the baking process. If they’re too soft, you risk ending up with pear sauce, which, while delicious, isn’t what we’re aiming for here. Give them a gentle squeeze; they should yield slightly but not feel mushy. This ensures they become tender without losing their elegant structure.
Enhancing Flavor Beyond the Basics
While our recipe for these exquisite baked pears with creamy topping is perfect as is, a little creativity never hurt anyone! For those who love to experiment, consider adding a tiny pinch of nutmeg or cardamom to the cinnamon. These spices complement the pear and cinnamon wonderfully, adding an extra layer of warm, aromatic complexity that will have your taste buds singing. It’s a subtle change that makes a big difference, transforming the flavor profile even further and making each bite even more memorable.
Storage and Reheating Savvy
Life happens, and sometimes we have delicious leftovers. If you find yourself with extra baked pear halves, store them in an airtight container in the refrigerator. They’ll keep beautifully for up to three days, meaning you can enjoy this delightful treat for days to come. When you’re ready to indulge again, a gentle reheat in the microwave or oven will bring them back to their tender, warm glory. Just a minute or two in the microwave, or 10-15 minutes in a moderate oven, and they’re good as new, ready to offer their comforting sweetness once more.
Frequently Asked Questions About Baked Pears

Can I use different sweeteners?
While honey offers a unique caramelization and flavor, you can certainly experiment with other options. Maple syrup is a fantastic alternative for a different kind of rich sweetness. Just remember that quantities might need slight adjustments based on your preference for sweetness, as some sweeteners are more intense than others.
What if I don’t have Bosc or Anjou pears?
No worries! While those varieties are recommended for their firm texture, other pears like Bartlett can also work well. Just be mindful that softer varieties might require a shorter baking time, so keep a close eye on them to prevent them from becoming overly soft. The key is ripeness combined with a good level of firmness.
Is the creamy topping essential?
The whipped cream or Greek yogurt provides a wonderful cool contrast to the warm fruit and enhances the overall experience by adding a creamy texture. This creates the “cream” part of our delightful dessert. However, if you prefer, you can certainly enjoy the baked fruit on its own. A scoop of vanilla ice cream would also be a lovely addition for an extra touch of indulgence!
Can I prepare this dish ahead of time?
You can prepare the pears by washing, halving, and coring them a few hours in advance, keeping them in the fridge to save time. However, for the best results, it’s highly recommended to bake them just before serving so you can enjoy them warm and freshly tender, maximizing their flavor and texture.
The Joy of Simple Desserts
There’s an undeniable charm to desserts that don’t demand hours of labor or a mountain of obscure ingredients. This recipe for Heavenly Baked Pears with Cinnamon Cream offers just that: a sophisticated, utterly delicious treat that’s surprisingly simple to execute. It’s a testament to the fact that sometimes, the most memorable culinary experiences come from the purest, most natural ingredients. Imagine the aroma filling your kitchen, the soft glow of the oven, and the anticipation of that first spoonful. It’s more than just food; it’s an experience, a moment of comfort and joy that truly nourishes the soul.
Whether you’re looking for a light finish to a grand meal or a cozy evening treat, these flavorful baked pears with cinnamon-kissed cream are an absolute winner. They are elegant enough for guests yet comforting enough for a quiet night in, proving that simplicity can be profoundly satisfying. So, next time you’re pondering what sweet delight to whip up, remember this easy, impressive option. Your taste buds (and your busy schedule) will thank you for discovering this delightful and practical dessert.
Share Your Baked Pear Creations!
We absolutely adore seeing your culinary adventures! If you try this recipe for baked fruit, be sure to share your photos and experiences in the comments below or tag us on social media. We love connecting with our community of home cooks and celebrating every delicious success, big or small. What’s your favorite type of pear to bake with? Let us know, we’re always eager to hear your insights and see your delicious creations!
—
**Recipe Card** (Please note: The recipe card is a conceptual placeholder as I cannot generate HTML for it directly in this response. The following summarizes the required content for SEO purposes in a structured format.)
**Heavenly Baked Pears with Cinnamon Cream**
**Description: **
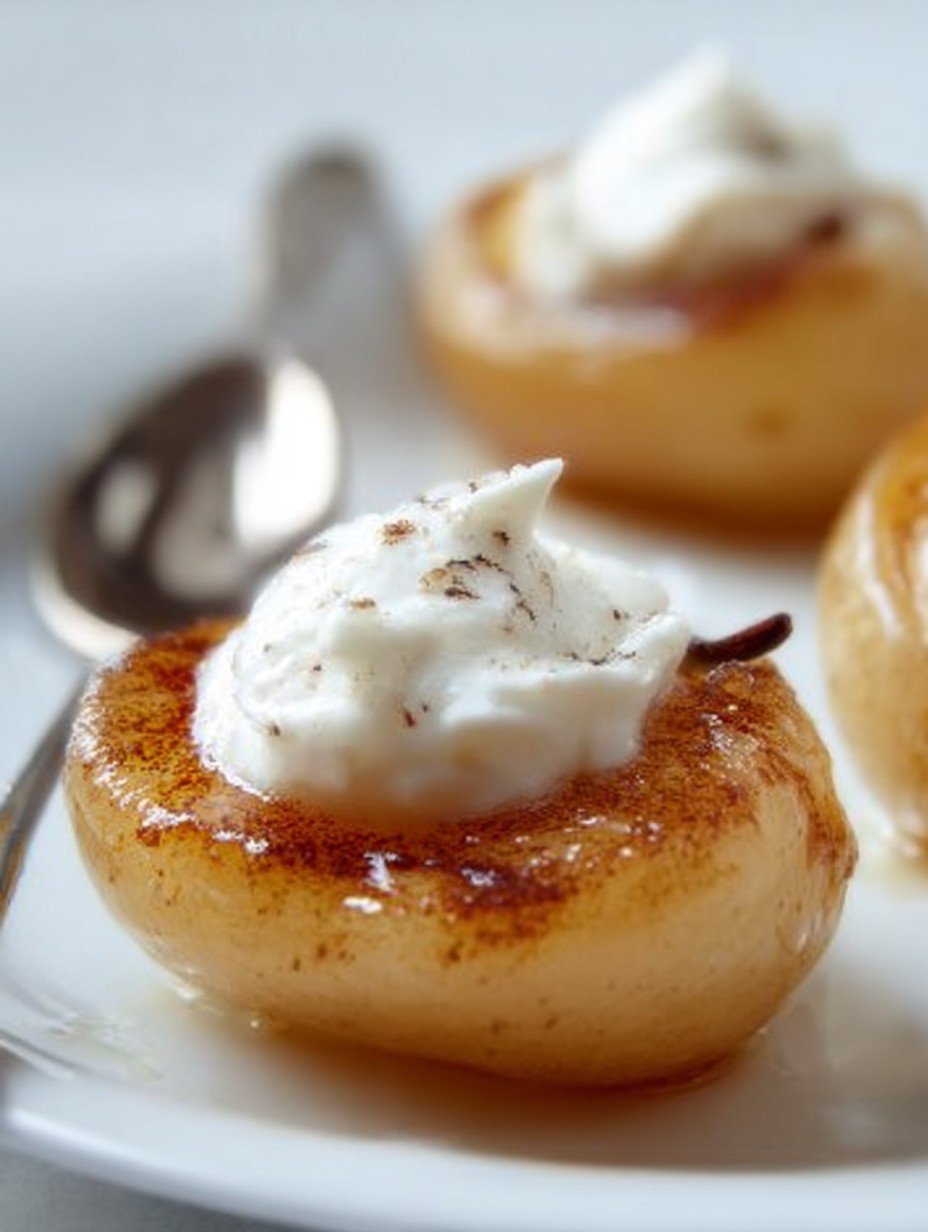
This elegant dessert features tender pears, gently baked until soft and infused with the comforting warmth of cinnamon and the natural sweetness of honey. The cooking process yields a beautifully caramelized exterior and a succulent interior, creating a delightful contrast. Each pear half is finished with a dollop of creamy topping and a light sprinkle of cinnamon, enhancing the overall aromatic profile and providing a smooth counterpoint to the fruit’s texture.
**Yields: ** 4 servings
**Prep time: ** 10 minutes
**Cook time: ** 20-30 minutes
**Ingredients: **
**Instructions: **
**Notes: **
**Nutrition Information (per serving): **
: 210
: 2g
: 48g
: 3g
Perfecting the Cooking Process
To achieve truly Heavenly Baked Pears with Cinnamon Cream, ensure pears are ripe yet firm; this prevents mushiness. Bake them cut-side up in water; this creates a gentle steam bath for tenderness. Simultaneously, the honey caramelizes beautifully. This approach guarantees a succulent interior and infused flavor.
Add Your Personal Touch
Elevate your baked pears by playing with spice warmth. While ground cinnamon is classic, consider integrating a pinch of nutmeg or cardamom alongside it for richer aroma, as suggested. For the topping, enjoy the versatility of light whipped cream or tangy plain Greek yogurt, suiting your preference.
Storage & Reheating
To maintain exquisite tenderness, store cooled leftover baked pears in an airtight refrigerator container for up to three days. For the best experience, gently reheat in the microwave or oven. Apply fresh whipped cream or Greek yogurt to each warm pear just before serving.
Helpful Chef Tips
The aroma of these cinnamon-infused pears always takes me back to chilly autumn evenings by the fireplace. Sharing this simple, warm dessert with loved ones created such a cozy, unforgettable moment. It’s truly a hug in a bowl.
Final Thoughts
There’s something truly magical about transforming simple ingredients into a dessert that feels so special. This beautiful dish, with its tender, honey-kissed fruit and warm cinnamon aroma, is a testament to that. Each bite offers a comforting taste, enhanced by a luscious creamy topping, making for a beautifully satisfying experience. The gentle baking process creates a succulent interior and a lightly caramelized exterior that’s simply irresistible. Imagine that comforting fragrance filling your kitchen! Don’t just imagine; gather your ingredients and create this truly delightful treat tonight. Your home will smell incredible, and your taste buds will rejoice.
Print
Heavenly Baked Pears with Cinnamon Cream
- Total Time: 35 minutes
- Yield: 4 1x
Description
This elegant dessert features tender pears, gently baked until soft and infused with the comforting warmth of cinnamon and the natural sweetness of honey. The cooking process yields a beautifully caramelized exterior and a succulent interior, creating a delightful contrast. Each pear half is finished with a dollop of creamy topping and a light sprinkle of cinnamon, enhancing the overall aromatic profile and providing a smooth counterpoint to the fruit’s texture.
Ingredients
- 2 ripe but firm pears (e.g., Bosc, Anjou)
- 2 tablespoons honey
- 1/2 teaspoon ground cinnamon, plus extra for dusting
- 1/4 cup water
- 1/2 cup whipped cream or plain Greek yogurt, for serving (optional)
Instructions
- Preheat your oven to 375°F (190°C).
- Wash, halve, and core the pears. You may leave the stem on for presentation if desired.
- Place the pear halves cut-side up in a small baking dish.
- Drizzle each pear half evenly with honey and sprinkle with ground cinnamon.
- Pour water into the bottom of the baking dish.
- Bake for 20-30 minutes, or until the pears are tender when pierced with a fork. Baking time may vary based on the ripeness and size of the pears.
- Remove from the oven and allow to cool slightly.
- Serve warm, topped with a dollop of whipped cream or Greek yogurt and an additional dusting of cinnamon, if desired.
Notes
Choose pears that are ripe but still firm to ensure they hold their shape well during baking.
For an added layer of flavor, consider including a pinch of nutmeg or cardamom along with the cinnamon.
Leftover baked pears can be stored in an airtight container in the refrigerator for up to 3 days.
Gently reheat the pears in the microwave or oven before serving for the best experience.
- Prep Time: 10 minutes
- Cook Time: 25 minutes
Nutrition
- Calories: 210
- Fat: 3g
- Carbohydrates: 48g
- Protein: 2g
FAQs
What Type of Pears Work Best for Baking?
For the perfect baked fruit dessert, selecting the right pears is key. The recipe specifically suggests using ripe but firm varieties such as Bosc or Anjou pears. These types maintain their structure beautifully during the baking process, preventing them from becoming mushy while still achieving a wonderfully tender texture. Pears that are too soft might lose their shape, whereas overly hard pears might require a longer baking time. A firm pear ensures a delightful contrast between the caramelized exterior and the succulent, soft interior once it is gently baked with honey and cinnamon.
How Do I Know When My Pears Are Done Baking?
Determining when your pears are perfectly baked is straightforward. The recipe indicates a baking time of 20-30 minutes at 375°F (190°C). However, the most reliable test is to gently pierce a pear with a fork. It should feel tender without being overly soft or mushy. Keep in mind that the exact baking time can vary based on the ripeness and size of your specific pears. Always check for tenderness around the 20-minute mark and continue baking in short intervals if needed until they reach that ideal succulent consistency, ready for their creamy topping.
Can I Serve These Pears Cold?
While the recipe suggests serving these delicious baked pears warm for the best experience, allowing them to cool slightly before serving is also recommended. Serving them warm truly enhances their aromatic profile, allowing the comforting scent of cinnamon and the sweetness of the honey to shine through. If you have leftovers, they can be stored in the refrigerator for up to three days. To enjoy them again, simply reheat them gently in the microwave or oven. However, the initial serving is best when the pears are still warm from the oven, offering a truly delightful dessert.
What Are the Best Topping Options for This Dessert?
The recipe offers a couple of delightful, optional toppings to complement this elegant baked fruit dish. You can choose to serve each warm pear half with a dollop of whipped cream, which adds a lovely richness and smooth texture. Alternatively, for a lighter and tangier counterpoint, plain Greek yogurt is an excellent choice. Both options provide a creamy finish that beautifully balances the tender, sweet fruit. A final dusting of cinnamon over your chosen topping not only adds a touch of visual appeal but also enhances the overall aromatic experience, making each bite even more satisfying.