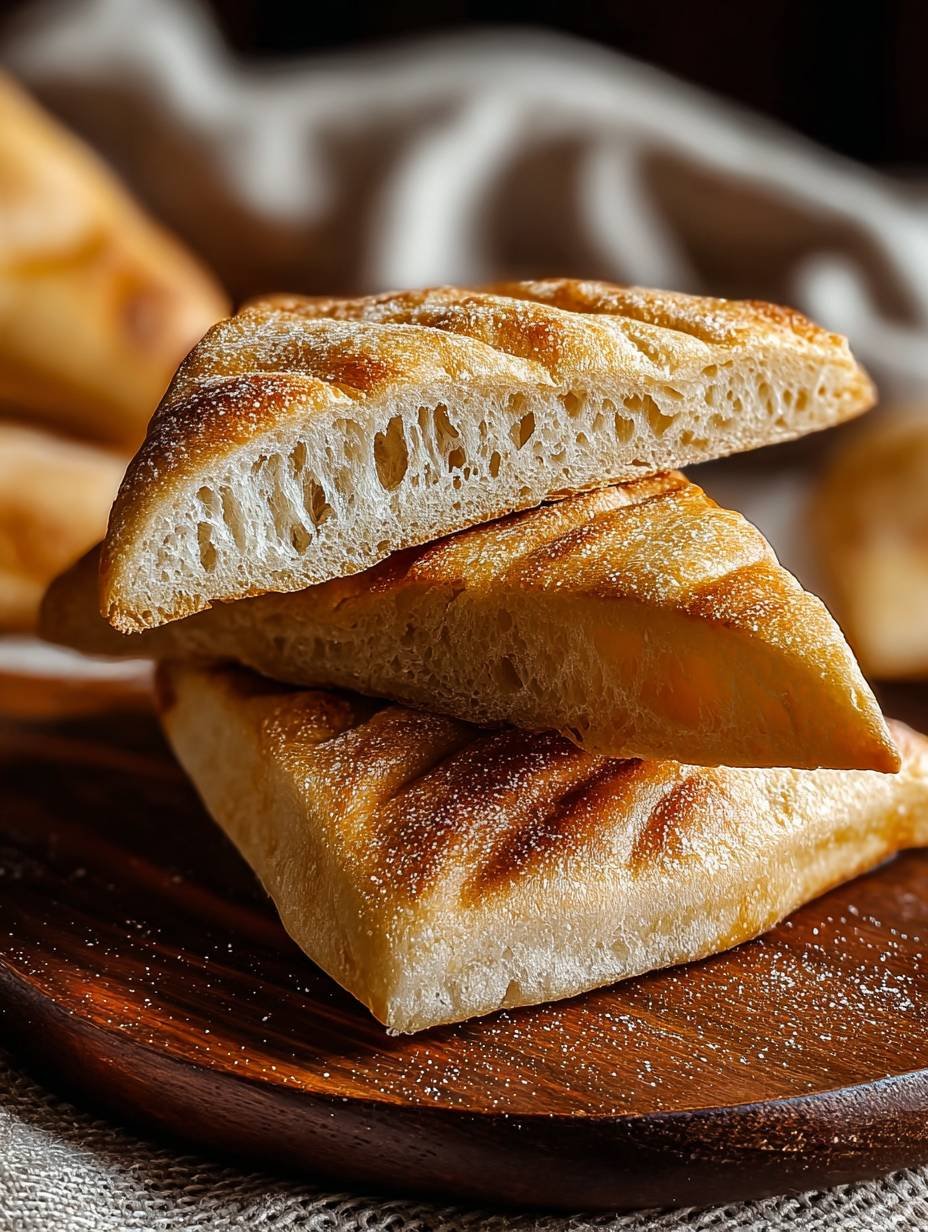
The aroma of freshly baked bread, with its subtle yeasty perfume and a hint of golden olive oil, signals pure comfort. Imagine sinking your teeth into a light, airy crumb contrasted by a glorious, golden-brown exterior that crackles with every bite.
I remember my first attempt at making focaccia; it ended up flatter than a pancake, but tasted like a dream. This recipe, perfected over countless kitchen experiments, promises a much more triumphant and genuinely delicious outcome.
Why You’ll Love This Recipe
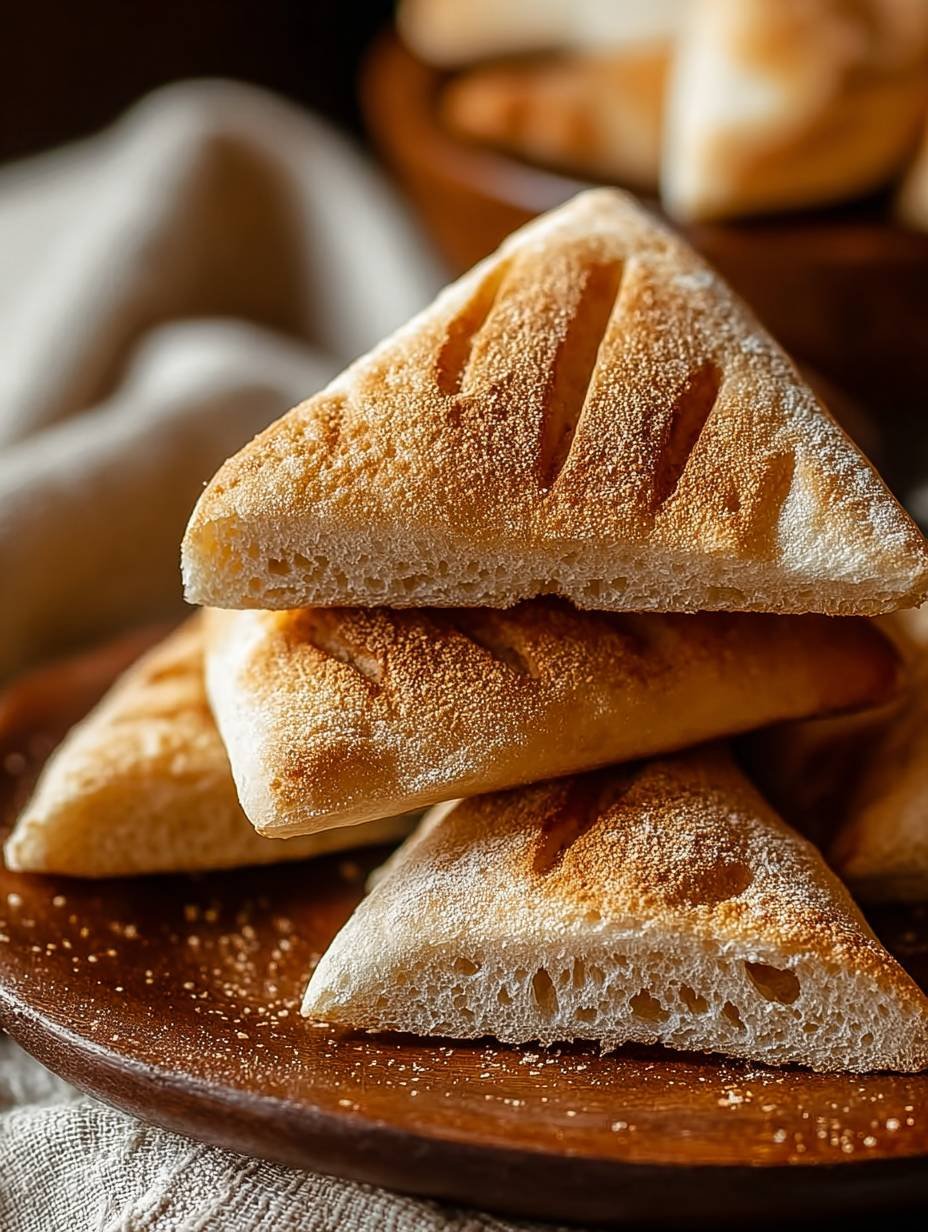
This rustic flatbread isn’t just a dish; it’s an experience. Its simplicity belies a deeply satisfying flavor profile, making it a joy to prepare even for novice bakers. With a captivating golden-brown finish and alluring irregular triangles, it’s visually stunning and versatile enough to complement any meal or stand proudly as a satisfying snack. Whether you are hosting a dinner party or simply craving something wholesome and delicious, this easy homemade focaccia recipe offers a perfect blend of unique taste and effortless elegance that will have everyone reaching for another piece.
Gathering Your Simple Ingredients
Here’s what you need for this delicious dish:
- **All-purpose flour:** This forms the structural backbone of our delightful bread, providing the necessary gluten to create a wonderfully elastic dough that will become airy and tender inside. Have a little extra on hand for dusting your work surface.
- **Active dry yeast:** The magical catalyst that brings our dough to life! This ingredient is absolutely essential for creating a light and fluffy homemade focaccia with its characteristic airy texture and yeasty aroma. Make sure it’s fresh for the best rise.
- **Granulated sugar:** Just a pinch, this acts as food for our active dry yeast, helping it to wake up and get bubbling, which contributes directly to the beautiful fluffy texture we’re aiming for.
- **Warm water:** The perfect temperature is crucial for activating the yeast without killing it. This warm liquid combines with the flour and yeast to kickstart the dough’s development, ensuring a soft, pliable, and ultimately, a very airy crumb.
- **Olive oil:** Used generously, this golden liquid not only enriches the dough with a subtle fruity flavor but also plays a starring role in achieving that sought-after crispy crust and a tender interior. You’ll need some for the dough, for oiling the bowl, and for brushing the top before baking.
- **Fine sea salt:** This essential seasoning enhances all the flavors in the bread, contributing to its mild, savory profile. It’s evenly distributed throughout the dough.
- **Flaky sea salt:** This is your secret weapon for that irresistible crispy crust and delightful textural contrast. Sprinkled on top before baking, it provides bursts of savory flavor and a beautiful shimmering finish that screams professional baker.
The complete ingredient list, including quantities, can be found directly under the recipe card.
Step-by-Step Guide to Focaccia Perfection
Follow these simple steps to prepare this delicious dish:
Activating the Yeast: The Foundation of Fluffiness
Step 1: Combine Water, Sugar, and Yeast
In a large mixing bowl, gently combine the specified warm water (ensure it’s between 105-115°F / 40-46°C), the granulated sugar, and the active dry yeast. Allow this mixture to stand undisturbed for 5 to 10 minutes until a foamy layer appears on the surface, indicating the yeast is active and ready to create a wonderfully fluffy homemade focaccia.
Step 2: Incorporate Wet and Dry Ingredients
Once the yeast is bubbly and fragrant, stir in the 2 tablespoons of olive oil and the fine sea salt. Gradually add the all-purpose flour to the bowl, mixing continuously with a sturdy spoon or spatula until a shaggy, slightly sticky dough forms. Do not overmix at this stage; just ensure all the flour is incorporated.
Kneading Your Way to Elastic Dough
Step 3: Knead the Dough to Smoothness
Turn the shaggy dough out onto a lightly floured surface. Begin to knead the dough for 8 to 10 minutes. Use a rhythmic push, fold, and turn motion until the dough transforms into a smooth, elastic, and springy ball. This crucial step develops the gluten, which is vital for the airy, tender crumb of your homemade focaccia.
The Art of the First Rise
Step 4: The First Rise
Lightly oil a clean, large bowl with a little olive oil. Place the kneaded dough into the bowl, turning it once to ensure all sides are coated in the oil. Cover the bowl securely with plastic wrap or a clean, damp cloth. Position the bowl in a warm place in your kitchen and let the dough rise for 1 to 1.5 hours, or until it has visibly doubled in size. This slow rise is key to the bread’s yeasty flavor and soft texture.
Shaping and Seasoning Your Triangles
Step 5: Punch Down and Shape the Dough
Once the dough has doubled, gently punch it down to release the trapped gases. Turn the dough out onto a lightly floured surface. Using a rolling pin or your fingertips, gently roll or press the dough into a large rectangular shape, aiming for a thickness of about 1/2 inch.
Step 6: Season and Cut
Brush the entire top surface of the rolled dough with a little extra olive oil. If you desire that extra crunch and savory burst, sprinkle generously with flaky sea salt. Using a sharp knife or a pizza cutter, carefully slice the large rectangle into individual triangles, creating visually appealing, rustic portions.
Step 7: Second Rest for Enhanced Texture
Carefully transfer the cut focaccia triangles to a baking sheet that has been lined with parchment paper, ensuring there is a little space between each piece. Loosely cover the triangles with plastic wrap or a damp cloth and let them rest again for another 15 to 20 minutes. This short rest allows the dough to relax, contributing to a lighter texture and helping create that fluffy homemade focaccia.
The Grand Finale: Baking and Cooling
Step 8: Preheat Your Oven
About 10 minutes before the second resting period is complete, preheat your oven to 425°F (220°C). A hot oven is essential for achieving a quick rise and a beautiful golden-brown, crispy crust.
Step 9: Bake to Golden Perfection
Place the baking sheet with the focaccia triangles into the preheated oven. Bake for 15 to 20 minutes, or until the focaccia is beautifully golden brown on top and cooked all the way through. The high heat ensures a rapid expansion, resulting in an airy interior and a perfectly crispy exterior.
Step 10: Cool Before Enjoying
Carefully remove the baking sheet from the oven. Let the fluffy homemade focaccia cool slightly on a wire rack for a few minutes before serving. This allows the internal structure to set and ensures the crust remains wonderfully crispy. Garnish with fresh herbs if desired, and serve immediately to enjoy the fantastic crispy texture.
Expert Tips for Your Best Fluffy Homemade Focaccia
Crafting the perfect loaf of focaccia is an immensely rewarding experience, especially when you master that glorious balance between a fluffy interior and a crispy crust. For an extra crispy crust that truly elevates this rustic flatbread, consider baking your focaccia on a preheated pizza stone or a baking steel. These tools retain and transfer heat efficiently, giving the bottom of the bread a magnificent crispness. Remember not to overcrowd your baking sheet; if you are making a large batch, bake the triangles in batches to ensure even cooking and optimal air circulation, which is crucial for both texture and color.
Don’t fret if you have leftovers of this delightful homemade focaccia! They can be stored in an airtight container at room temperature for up to two days, though their crispy crust is best enjoyed fresh. If you’re a planner, the dough for this delectable recipe can even be prepared a day ahead of time. Simply complete the first rise (Step 4), then refrigerate the dough in its oiled bowl, covered, until you’re ready to bake. Just make sure to bring it back to room temperature before you proceed with shaping and baking to ensure a proper second rise and the characteristic fluffy texture.
Serving Suggestions and Storage Wisdom
This versatile fluffy homemade focaccia with a crispy crust is a culinary chameleon, ready to adapt to almost any meal. It’s absolutely divine when served warm as an accompaniment to a hearty bowl of soup or a vibrant green salad. Its subtle savory flavor also makes it an ideal canvas for dipping into rich olive oil, balsamic vinegar, or your favorite herbed dipping sauce. Imagine it alongside grilled chicken, or perhaps as the base for a mini open-faced sandwich. The possibilities are truly endless, and its inviting aroma alone is enough to bring everyone to the table.
When it comes to storage, remember that the peak crispiness is truly straight out of the oven. However, if you do find yourself with extra triangles, store them in an airtight container at room temperature for up to two days. For best results, a quick refresh in a toaster oven or conventional oven can help revive some of that wonderful crispness, though it might not be quite as pronounced as the initial bake. This rustic flatbread is so good, however, that leftovers are a rare occurrence in most kitchens!
This recipe yields 8 delightful triangles, each a testament to simple ingredients transforming into something truly special.
Nourish Your Soul (And Your Body!)
Beyond its incredible taste and satisfying textures, this delightful bread offers a modest nutritional profile. Each serving of this fluffy homemade focaccia with a crispy crust provides approximately:
- **Calories:** 210
- **Protein:** 6g
- **Carbohydrates:** 38g
- **Fat:** 4g
These values reflect a light and wholesome addition to your meal, allowing you to indulge in its comforting flavors without compromise. Enjoy the simplicity and goodness of a truly homemade creation.
Improving the Cooking Method
Ensuring your kneading is thorough for 8-10 minutes is paramount. This crucial step develops the gluten network, creating the essential elasticity for a truly fluffy focaccia. Additionally, for that glorious crispy crust, remember the magic of a preheated pizza stone or baking steel; it truly makes a difference.
Decorate Your Dish with Your Personal Touch
For an elevated flavor profile, consider experimenting with a robust extra virgin olive oil when brushing the dough before baking. This simple switch can deepen the savory notes. Alternatively, vary the amount of flaky sea salt you sprinkle, from a subtle whisper to a more generous crunch, adding a bespoke touch to your focaccia.
Smart Tips for Storage and Reheating
To preserve the signature crispy crust and fluffy interior of your focaccia triangles, store them in an airtight container at room temperature for up to two days. For optimal enjoyment, gently rewarm them in a preheated oven for a few minutes to revive that delightful texture.
Practical Chef Advice
I once served a batch of these golden triangles at a neighborhood get-together, and within minutes, they were gone! Everyone raved about the incredible texture and flavor, proving this simple flatbread is always a crowd-pleaser.
Final Thoughts
Bringing this wonderfully airy, tender flatbread to your table is an experience for the senses. Imagine the irresistible aroma filling your kitchen, followed by that satisfying crunch as you break through the golden-brown, subtly crisp crust. Beneath lies a wonderfully airy crumb, perfect for soaking up olive oil or accompanying your favorite meal. This fluffy homemade focaccia with a crispy crust offers simple pleasure and impressive results. Its mild, savory flavor makes it incredibly versatile. Don’t just dream about that fresh-baked goodness; gather your ingredients and embark on this rewarding baking journey today. Your taste buds will thank you for creating these delightful rustic triangles.
Print
Fluffy Homemade Focaccia with a Crispy Crust
- Total Time: 43 minutes
- Yield: 8 triangles 1x
Description
These rustic flatbread triangles present a delightful contrast of textures, featuring a golden-brown, subtly crisp crust and a wonderfully airy, tender crumb. Each piece offers a gentle yeasty aroma and a mild, savory flavor, enhanced by a touch of olive oil and a sprinkle of sea salt. Expertly baked, their irregular, inviting shape makes them an ideal accompaniment for various dishes or a simple, satisfying snack.
Ingredients
- 3 cups (360g) all-purpose flour, plus more for dusting
- 1 teaspoon active dry yeast
- 1 teaspoon granulated sugar
- 1 1/4 cups (300ml) warm water (105-115°F / 40-46°C)
- 2 tablespoons olive oil, plus more for brushing
- 1 teaspoon fine sea salt
- Flaky sea salt, for sprinkling (optional)
Instructions
- In a large bowl, combine warm water, sugar, and yeast. Let stand for 5-10 minutes until foamy.
- Stir in 2 tablespoons of olive oil and fine sea salt. Gradually add the flour, mixing until a shaggy dough forms.
- Turn the dough out onto a lightly floured surface and knead for 8-10 minutes, until smooth and elastic.
- Lightly oil a clean bowl, place the dough in it, turning to coat. Cover with plastic wrap or a damp cloth and let rise in a warm place for 1-1.5 hours, or until doubled in size.
- Gently punch down the dough. On a lightly floured surface, roll or press the dough into a large rectangle, about 1/2 inch thick.
- Brush the top with a little olive oil and sprinkle with flaky sea salt, if desired. Using a sharp knife or pizza cutter, cut the rectangle into triangles.
- Carefully transfer the triangles to a baking sheet lined with parchment paper. Cover loosely and let rest for 15-20 minutes.
- Preheat oven to 425°F (220°C).
- Bake for 15-20 minutes, or until golden brown and cooked through.
- Remove from oven and let cool slightly on a wire rack before serving.
Notes
For an extra crispy crust, bake on a preheated pizza stone or baking steel.
Do not overcrowd the baking sheet; bake in batches if necessary.
Leftover flatbread can be stored in an airtight container at room temperature for up to 2 days.
The dough can be prepared a day ahead and refrigerated after the first rise. Bring to room temperature before shaping.
- Prep Time: 25 minutes
- Cook Time: 18 minutes
Nutrition
- Calories: 210
- Fat: 4g
- Carbohydrates: 38g
- Protein: 6g
FAQs
Why is the water temperature important for this recipe?
The temperature of the warm water is crucial for properly activating the active dry yeast, a key ingredient in achieving an airy crumb. The recipe specifies 105-115°F (40-46°C) because this range is ideal for waking up the yeast. Water that is too cold will prevent the yeast from becoming active and foamy, meaning your dough won’t rise properly. Conversely, water that is too hot can kill the yeast, rendering it ineffective. Observing the yeast become foamy after mixing with sugar and water confirms it’s alive and ready to work its magic, contributing to the delightful texture of this homemade flatbread.
What if my dough doesn’t double in size during the first rise?
If your dough isn’t doubling in size during the first rise, several factors could be at play. Ensure your active dry yeast activated correctly in step one. Remember to use warm water, between 105-115°F (40-46°C). If it didn’t become foamy, the yeast might not be viable. Your rising spot’s warmth is also crucial. A cool or drafty area will notably slow the process. Move the covered bowl to a warmer location. This could be a slightly warmed (but off!) oven or near a sunny window. Patience is key. Sometimes it needs more time than the 1-1.5 hours, especially in cooler environments, to develop its wonderful airy texture.
How can I achieve an extra crispy crust for my focaccia?
For an exceptional, extra crispy crust, consider baking your homemade focaccia on a preheated pizza stone or baking steel. The recipe notes highlight this method. Preheat one of these in your oven to 425°F (220°C). This provides a burst of direct, intense heat from the bottom. Such rapid heat quickly sets the crust. It results in a significantly crispier texture than baking on a standard baking sheet. Carefully transfer your shaped dough onto the hot surface. Then bake for the instructed 15-20 minutes. Ensure it is golden brown and cooked through for the best results.
Can I prepare the dough for this rustic flatbread ahead of time?
Yes, this recipe works well for partial preparation in advance, simplifying your baking day. The dough can be prepared a day ahead. Follow instructions through step 4, allowing the dough to complete its first rise until doubled. After this, refrigerate it in a lightly oiled, covered bowl instead of shaping. When ready to bake, bring the dough to room temperature. Then proceed with shaping, brushing with olive oil, and baking as instructed. Leftover triangles, stored in an airtight container at room temperature, will remain delightful for up to two days.