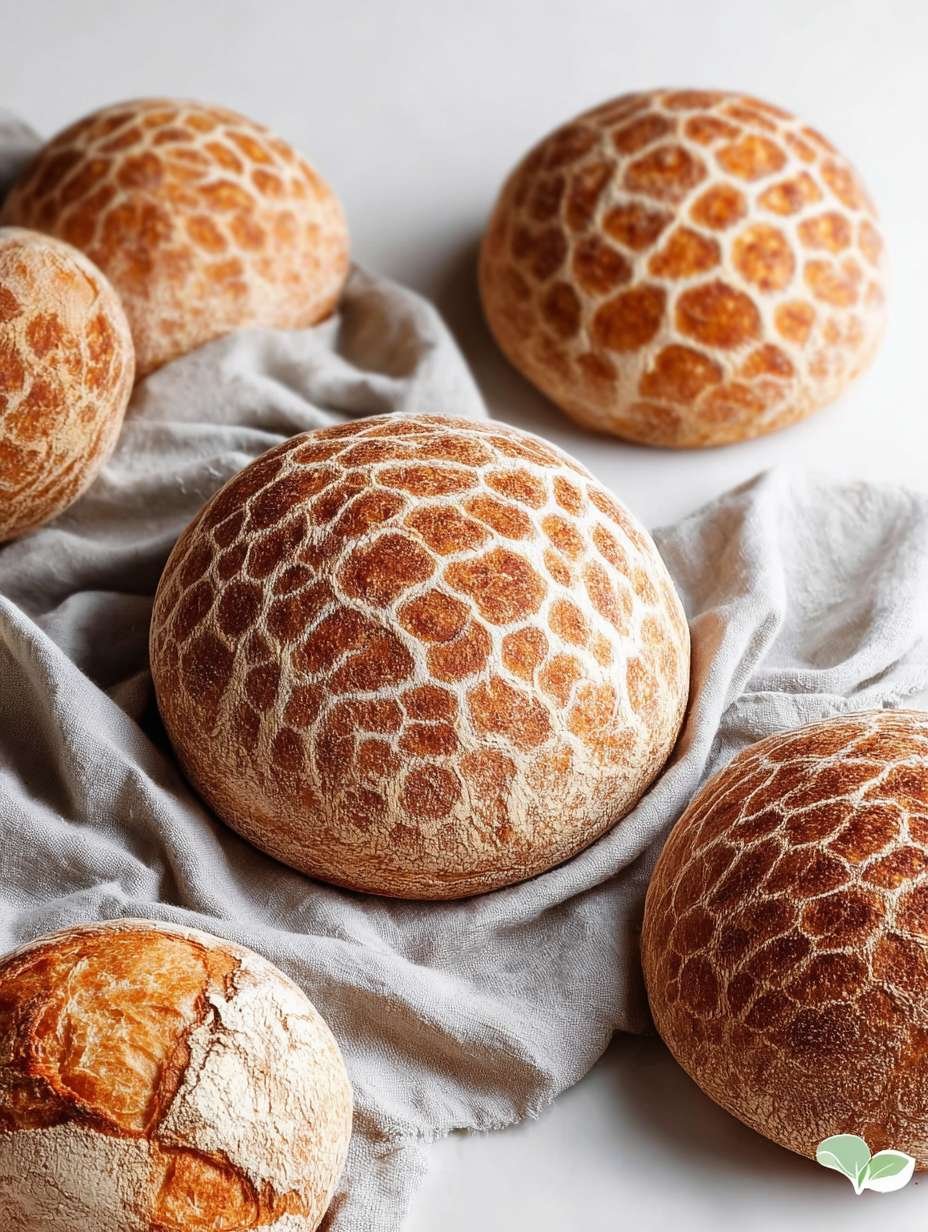
Imagine a crust that crunches just so, yielding to an incredibly soft, subtly sweet interior that practically melts in your mouth. This is the magic of freshly baked tiger bread.
My first attempt at baking bread involved a very confused cat and a flour explosion, but this recipe is thankfully much more straightforward and far less chaotic.
What Makes This Recipe Special
This recipe for tiger bread rolls isn’t just about baking; it’s about creating culinary magic. Its easy preparation belies a stunning appearance, making you look like a seasoned baker. The unique flavor profile, a delicate balance of yeasty goodness and a hint of sesame, perfectly complements the beautifully mottled, crispy crust. Plus, its versatility means these rolls are perfect for any meal, from breakfast sandwiches to dinner sides.
Ingredients
Here’s what you need for this delicious dish:
- **Warm Water (for dough)**: This is crucial, as it needs to be at the ideal temperature (105-115°F / 40-46°C) to gently awaken your active dry yeast, ensuring a lively rise for your dough and a light texture in your homemade tiger bread.
- **Active Dry Yeast**: The tiny, mighty engine that gives your bread its beautiful rise and airy texture. Use a fresh, standard packet for best results when you bake beautiful crispy tiger bread at home.
- **Granulated Sugar (for dough)**: A touch of sweetness here feeds the yeast, helping it activate, and subtly enhances the dough’s overall flavor and browning.
- **All-Purpose Flour**: The foundational building block, giving structure to your rolls; have a little extra on hand for dusting your work surface to prevent sticking.
- **Salt**: Essential for bringing out the rich flavor of the bread and controlling the yeast’s activity, ensuring a perfectly balanced taste.
- **Olive Oil**: Adds a wonderful tenderness to the dough and contributes to a subtle richness, making each bite more enjoyable.
- **Rice Flour**: This is the secret star for the signature tiger paste, crucial for achieving the distinctive, beautifully mottled, and ultimately crispy, tiger-like crust that defines these rolls.
- **Warm Water (for paste)**: Used to create the smooth, lump-free tiger paste; its warmth helps the rice flour mix seamlessly for an even application.
- **Granulated Sugar (for paste)**: A small amount that aids in browning the paste as it bakes, contributing to the unique pattern and contributing to that delightful crispy finish.
- **Sesame Oil (optional)**: While optional, it’s highly recommended for an extra layer of savory depth and aromatic complexity in the signature paste, elevating the overall experience of your homemade crispy tiger bread.
All ingredients and quantities can be found directly in the recipe card below.
Conquering the Kitchen: Tips for Successful Baking
Venturing into the world of bread making can feel like an Olympic sport, but fear not, fellow culinary adventurers! While the idea of baking something as impressive as beautiful crispy tiger bread at home might seem daunting, it’s actually incredibly forgiving and deeply rewarding. The joy of pulling a warm, aromatic loaf from the oven, with its unique pattern and irresistible crunch, is unparalleled. It’s a moment of pure triumph, a testament to your patience and passion.
This recipe is designed to be as straightforward as possible, breaking down each step into manageable actions. Think of it less as a complex science experiment and more as a joyful dance between ingredients. The gentle kneading, the watchful waiting during the rises, and the artistic application of the tiger paste are all part of the fun. Don’t be afraid to get your hands a little floury; it’s all part of the authentic home-baking experience. Embrace the process, and soon you’ll be savoring rolls with a golden-brown, delicately crisp exterior and a soft, airy crumb. These unique rolls are a fantastic addition to any meal, providing both a visual and textural delight. So, roll up your sleeves, put on your favorite baking playlist, and prepare to create something truly magnificent that will impress everyone at your table.
Understanding the Tiger Effect: The Magic of Rice Flour
The characteristic mottled pattern and delightful crispiness of tiger bread aren’t just a happy accident; they’re the result of a brilliant culinary technique involving a simple, yet powerful, ingredient: rice flour. When you apply the rice flour paste to the surface of the dough, something truly magical happens in the oven. As the rolls bake, the rice flour paste dries out and contracts faster than the underlying wheat dough. This differential in expansion causes the paste to crack and pull apart, creating the iconic “tiger stripe” or “giraffe print” effect. This process not only gives the bread its stunning visual appeal but also contributes significantly to the delicate crispness of the crust. The rice flour paste browns beautifully, forming a thin, brittle layer that shatters with each bite, providing a wonderful textural contrast to the soft interior. Without this special paste, your rolls would simply be delicious plain bread. It’s this ingenious application of rice flour that truly transforms ordinary rolls into these extraordinary, beautifully crispy tiger-striped masterpieces, making it possible to bake beautiful crispy tiger bread at home.
Step-by-Step Instructions
Simply follow these easy steps to prepare this delicious meal:
Step 1: Activate Yeast, Prepare, and Knead the Dough
Begin by activating your yeast. In a large bowl, combine 1 ½ cups of warm water, ensuring it’s between 105-115°F (40-46°C), with 1 tablespoon of granulated sugar and 2 ¼ teaspoons of active dry yeast. Let this mixture sit undisturbed for 5-10 minutes until a foamy layer appears on the surface, indicating your yeast is alive and ready to work its magic. Next, add 2 tablespoons of olive oil, 1 ½ teaspoons of salt, and 3 ½ cups of all-purpose flour to the yeast mixture. Mix thoroughly with a wooden spoon, or use a stand mixer fitted with a dough hook, until all ingredients are combined and a shaggy dough forms. Turn the shaggy dough out onto a lightly floured surface. Knead the dough vigorously for 8-10 minutes by hand, or for 6-8 minutes using a stand mixer, until it becomes smooth and elastic. If the dough feels too sticky during kneading, incorporate additional all-purpose flour, one tablespoon at a time, until it reaches the desired consistency. This kneading process is vital for developing the gluten structure that gives your tiger bread its chew.
Step 2: First Rise and Shape Your Rolls
Once your dough is beautifully kneaded, lightly oil a clean bowl. Place the dough into the bowl, then turn it once to ensure the entire surface is coated with oil, preventing it from drying out. Cover the bowl securely with plastic wrap or a clean kitchen towel. Allow the dough to rise in a warm place for 1-1 ½ hours, or until it has visibly doubled in size. This first rise allows the yeast to work, developing flavor and volume. After the first rise, gently punch down the dough to release the accumulated gases. Transfer the dough to a clean surface and divide it into 10 equal pieces. Shape each piece into a smooth, round roll. Arrange the rolls on a baking sheet that has been lined with parchment paper, making sure to leave ample space between each roll to allow for their second rise and expansion in the oven.
Step 3: Second Rise and Craft the Signature Tiger Paste
With your rolls shaped and resting on the baking sheet, loosely cover them again with plastic wrap or a clean kitchen towel. Let them rise in a warm place for another 30-45 minutes, or until they appear visibly puffy and slightly larger. This second rise contributes to the light and airy texture of the finished bread. While your rolls are enjoying their second rise, it’s time to prepare the distinctive tiger paste. In a small bowl, whisk together ½ cup of rice flour, ½ cup of warm water, 1 teaspoon of granulated sugar, and, if you choose, 1 teaspoon of sesame oil. Continue whisking until the mixture is completely smooth and lump-free. The paste should have a consistency similar to that of pancake batter, ensuring it can be easily spread. This paste is the secret to the unique pattern that will make your beautiful crispy tiger bread at home truly stand out.
Step 4: Apply the Paste and Bake to Crispy Perfection
As the rolls approach the end of their second rise, preheat your oven to 400°F (200°C). Carefully uncover the risen rolls. Using a pastry brush or the back of a spoon, gently spread a generous, even layer of the prepared rice flour paste over the tops of each roll. Be mindful to avoid getting the paste on the sides of the rolls; keeping the sides clear is essential for creating the distinct, cracked pattern that gives tiger bread its name. Once the paste is applied, transfer the baking sheet to the preheated oven. Bake for 20-25 minutes, or until the rolls have turned a beautiful golden brown and the crust has developed its characteristic cracked, tiger-like pattern. For absolute certainty, the internal temperature of the rolls should register between 200-210°F (93-99°C) when tested with a thermometer.
Step 5: Cool and Serve Your Golden-Crusted Masterpiece
Once your beautiful crispy tiger bread rolls emerge from the oven, gleaming golden and exquisitely cracked, transfer them immediately to a wire rack. Allow the rolls to cool completely before serving. This cooling process is crucial, as it allows the internal structure of the bread to set and the crust to fully crisp up. A warm roll might seem tempting, but patience truly makes perfect when aiming for that signature crispy texture. Once cooled, these delightful rolls are ready to be enjoyed! Serve them alongside your favorite soup, as a base for sandwiches, or simply with a dollop of butter. Their subtle yeasty aroma and mild, comforting flavor make them versatile for any meal.
Your Baking Questions Answered: FAQs about Tiger Bread
Embarking on the journey to bake beautiful crispy tiger bread at home often comes with a few questions. Don’t worry; that’s completely normal! Here are some common queries and their straightforward answers to help you achieve baking success and confidence in your kitchen.
Why is my yeast not foaming?
If your yeast isn’t foaming after 5-10 minutes, it’s likely due to one of two reasons: either your water temperature was incorrect, or your yeast is past its prime. Remember, the water needs to be warm (105-115°F / 40-46°C), but not hot enough to kill the yeast, nor too cold to activate it properly. If the water was too hot, the yeast cells perished. If it was too cold, they just didn’t wake up. Also, check the expiration date on your yeast packet. Old yeast loses its potency. If you suspect either of these issues, it’s best to start again with fresh yeast and accurately measured warm water.
Can I make the dough ahead of time?
Absolutely! You can prepare the dough up to the first rise (Step 4) and then refrigerate it overnight. After the first rise, gently punch down the dough, cover the bowl tightly with plastic wrap, and place it in the refrigerator. The cold temperature will significantly slow down the yeast activity. When you’re ready to bake, remove the dough from the refrigerator and let it come to room temperature for about 30-60 minutes before proceeding with shaping the rolls (Step 5) and the subsequent steps. This method is a fantastic way to spread out your baking process and enjoy fresh tiger bread whenever you like.
What if my tiger paste is too thick or too thin?
The consistency of your tiger paste is key to achieving that perfect cracked pattern. It should be similar to pancake batter – thick enough to coat the rolls but thin enough to spread easily without clumping. If your paste seems too thick, whisk in a very small amount of warm water, a teaspoon at a time, until you reach the desired consistency. If it’s too thin, you can add a tiny pinch more rice flour, ¼ teaspoon at a time, and mix thoroughly. Adjustments like these are common in baking and show your growing expertise in the kitchen!
How do I get a super crispy crust?
To achieve an even crispier crust for your beautiful crispy tiger bread at home, here’s a professional trick: place a shallow pan filled with hot water on the bottom rack of your oven during baking. The steam created by the hot water helps keep the surface of the bread moist initially, allowing it to expand more fully before forming a hard crust. Once the moisture evaporates, the crust sets beautifully, resulting in an incredibly crisp exterior. Just be careful when opening the oven to avoid the steam, and always use oven mitts when handling the hot pan.
The Journey to Your Perfect Tiger Bread
Making these unique rolls is a delightful culinary adventure, promising rewards that extend far beyond the taste buds. From the moment the warm water awakens the yeast, through the therapeutic kneading, to the artistic application of the tiger paste, each step is a building block in creating something truly special. The aroma that fills your kitchen as the rolls bake is a reward in itself, a preview of the deliciousness to come.
When you bake beautiful crispy tiger bread at home, you’re not just following a recipe; you’re crafting an experience. These rolls, with their distinctive, mottled crust and soft, airy crumb, offer a texture contrast that is simply irresistible. They are versatile companions for any meal, perfect for soaking up rich sauces, complementing hearty stews, or simply enjoyed with a pat of butter. The pride you’ll feel when you pull your golden-brown, tiger-patterned rolls from the oven is immense, a testament to your efforts. So, embrace the process, trust the steps, and prepare to delight yourself and your loved ones with these magnificent homemade crispy rolls. Happy baking!
Recipe Card
**Tiger Bread Rolls**
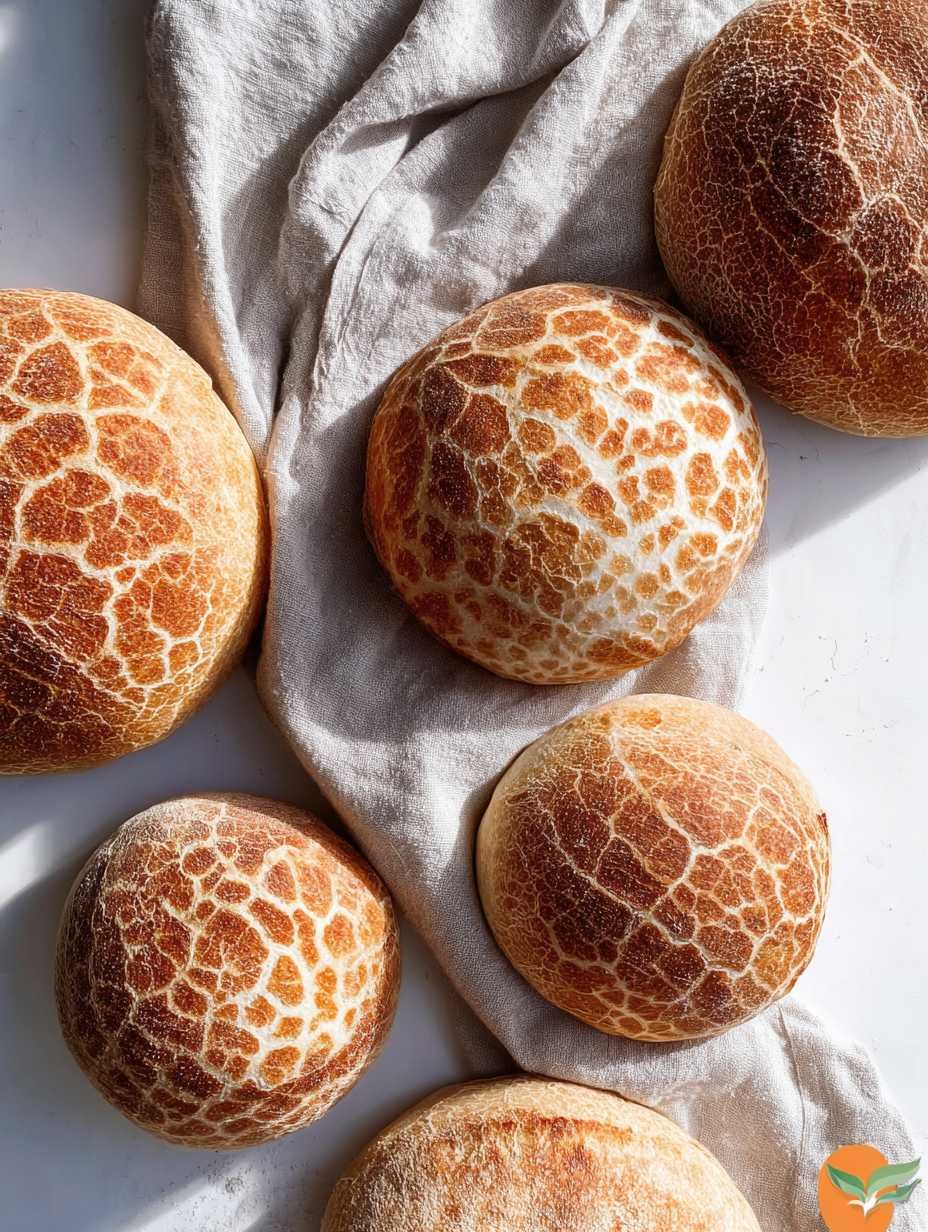
These Tiger Bread Rolls feature a distinctive, mottled crust that bakes to a beautiful golden-brown, offering a delicate crispness. Beneath this unique exterior lies a soft, airy crumb with a subtle yeasty aroma and a mild, comforting flavor. Baked to perfection, these rolls provide a delightful texture contrast, making them suitable for various accompaniments.
**Yields: ** 10 rolls
**Prep time: ** 30 minutes
**Rise time: ** 1 hour 30 minutes – 2 hours 15 minutes
**Bake time: ** 20-25 minutes
**Ingredients**
For the Dough:
- 1 ½ cups warm water (105-115°F / 40-46°C)
- 2 ¼ teaspoons active dry yeast (1 standard packet)
- 1 tablespoon granulated sugar
- 3 ½ – 4 cups all-purpose flour, plus more for dusting
- 1 ½ teaspoons salt
- 2 tablespoons olive oil
For the Tiger Paste:
- ½ cup rice flour
- ½ cup warm water
- 1 teaspoon granulated sugar
- 1 teaspoon sesame oil (optional)
**Instructions**
1. **Activate Yeast: ** In a large bowl, combine warm water, 1 tablespoon sugar, and yeast. Let sit for 5-10 minutes until foamy.
2. **Prepare Dough: ** Add olive oil, salt, and 3 ½ cups of flour to the yeast mixture. Mix with a wooden spoon or a stand mixer with a dough hook until a shaggy dough forms.
3. **Knead Dough: ** Turn the dough out onto a lightly floured surface and knead for 8-10 minutes, or use a stand mixer for 6-8 minutes, until smooth and elastic. Add more flour, one tablespoon at a time, if the dough is too sticky.
4. **First Rise: ** Place the dough in a lightly oiled bowl, turning once to coat. Cover with plastic wrap or a clean kitchen towel and let rise in a warm place for 1-1 ½ hours, or until doubled in size.
5. **Shape Rolls: ** Gently punch down the risen dough. Divide it into 10 equal pieces and shape each into a smooth, round roll. Place the rolls on a baking sheet lined with parchment paper, leaving space between them.
6. **Second Rise: ** Cover the shaped rolls loosely with plastic wrap or a kitchen towel and let rise again in a warm place for 30-45 minutes, or until visibly puffy.
7. **Prepare Tiger Paste: ** While the rolls are on their second rise, whisk together rice flour, ½ cup warm water, 1 teaspoon sugar, and optional sesame oil in a small bowl until smooth and lump-free. The paste should have a consistency similar to pancake batter.
8. **Apply Paste: ** Preheat your oven to 400°F (200°C). Gently brush or spread a generous layer of the rice flour paste over the tops of the risen rolls. Avoid getting paste on the sides, as this helps create the distinct pattern.
9. **Bake: ** Bake for 20-25 minutes, or until the rolls are golden brown and the crust has developed its characteristic cracked, tiger-like pattern. The internal temperature should reach 200-210°F (93-99°C).
10. **Cool: ** Transfer the baked rolls to a wire rack to cool completely before serving.
**Notes**
- Ensure your water temperature is correct for yeast activation; too hot will kill it, too cold will slow it down.
- Do not over-knead the dough, as this can result in tough rolls.
- For a crispier crust, place a shallow pan of hot water on the bottom rack of your oven during baking.
- The rice flour paste is key to the unique pattern; apply it evenly but not too thickly.
- Store leftover rolls in an airtight container at room temperature for up to 2-3 days, or freeze for longer storage.
**Nutrition Information (per roll)**
- Calories: 200
- Protein: 6g
- Carbs: 38g
- Fat: 3g
Perfecting the Cooking Process
Ensure your warm water temperature for yeast activation is precise; too hot will kill it, too cold slows it down. During kneading, avoid overworking the dough to achieve tender, not tough, rolls. Allow both rises their full time for airy perfection.
Add Your Personal Touch
While the distinctive tiger paste usually shines with its unique character, consider omitting the sesame oil if you prefer a simpler flavor profile. The warmth of the water is critical for yeast activation, but beyond that, the recipe’s magic lies in its simplicity. Embrace the subtle nuances.
Storage & Reheating
Store leftover Tiger Bread Rolls in an airtight container at room temperature for up to 2-3 days, or freeze them for longer storage. To revive their characteristic crisp exterior, lightly toast or warm them in a preheated oven just before serving. This brings back that beautiful, crackly texture for your homemade bread.
Helpful Chef Tips
The aroma of fresh Tiger Bread once filled my kitchen, bringing back childhood memories of bakery visits. Sharing these warm, crispy rolls straight from the oven with loved ones is pure, simple joy.
Final Thoughts
As you pull these golden beauties from your oven, the aroma alone is enough to transport you. The satisfaction of seeing that iconic, cracked crust emerge, knowing you’ve created something truly special, is unmatched. Each bite offers a delightful contrast: the delicate crispness of the exterior yielding to a soft, airy crumb. It’s more than just a roll; it’s an experience for all your senses. Don’t just dream of that perfect breakfast or dinner accompaniment; it’s time to create these distinctive rolls yourself. Gather your ingredients, follow these simple steps, and prepare to impress everyone (including yourself!) with your homemade crispy, patterned bread. Your kitchen awaits its next delicious triumph.
Print
Bake Beautiful Crispy Tiger Bread at Home.
- Total Time: 1 hour 5 minutes
- Yield: 10 rolls 1x
Description
These Tiger Bread Rolls feature a distinctive, mottled crust that bakes to a beautiful golden-brown, offering a delicate crispness. Beneath this unique exterior lies a soft, airy crumb with a subtle yeasty aroma and a mild, comforting flavor. Baked to perfection, these rolls provide a delightful texture contrast, making them suitable for various accompaniments.
Ingredients
- For the Dough:
- 1 ½ cups warm water (105-115°F / 40-46°C)
- 2 ¼ teaspoons active dry yeast (1 standard packet)
- 1 tablespoon granulated sugar
- 3 ½ – 4 cups all-purpose flour, plus more for dusting
- 1 ½ teaspoons salt
- 2 tablespoons olive oil
- For the Tiger Paste:
- ½ cup rice flour
- ½ cup warm water
- 1 teaspoon granulated sugar
- 1 teaspoon sesame oil (optional)
Instructions
- **Activate Yeast:** In a large bowl, combine warm water, 1 tablespoon sugar, and yeast. Let sit for 5-10 minutes until foamy.
- **Prepare Dough:** Add olive oil, salt, and 3 ½ cups of flour to the yeast mixture. Mix with a wooden spoon or a stand mixer with a dough hook until a shaggy dough forms.
- **Knead Dough:** Turn the dough out onto a lightly floured surface and knead for 8-10 minutes, or use a stand mixer for 6-8 minutes, until smooth and elastic. Add more flour, one tablespoon at a time, if the dough is too sticky.
- **First Rise:** Place the dough in a lightly oiled bowl, turning once to coat. Cover with plastic wrap or a clean kitchen towel and let rise in a warm place for 1-1 ½ hours, or until doubled in size.
- **Shape Rolls:** Gently punch down the risen dough. Divide it into 10 equal pieces and shape each into a smooth, round roll. Place the rolls on a baking sheet lined with parchment paper, leaving space between them.
- **Second Rise:** Cover the shaped rolls loosely with plastic wrap or a kitchen towel and let rise again in a warm place for 30-45 minutes, or until visibly puffy.
- **Prepare Tiger Paste:** While the rolls are on their second rise, whisk together rice flour, ½ cup warm water, 1 teaspoon sugar, and optional sesame oil in a small bowl until smooth and lump-free. The paste should have a consistency similar to pancake batter.
- **Apply Paste:** Preheat your oven to 400°F (200°C). Gently brush or spread a generous layer of the rice flour paste over the tops of the risen rolls. Avoid getting paste on the sides, as this helps create the distinct pattern.
- **Bake:** Bake for 20-25 minutes, or until the rolls are golden brown and the crust has developed its characteristic cracked, tiger-like pattern. The internal temperature should reach 200-210°F (93-99°C).
- **Cool:** Transfer the baked rolls to a wire rack to cool completely before serving.
Notes
Ensure your water temperature is correct for yeast activation; too hot will kill it, too cold will slow it down.
Do not over-knead the dough, as this can result in tough rolls.
For a crispier crust, place a shallow pan of hot water on the bottom rack of your oven during baking.
The rice flour paste is key to the unique pattern; apply it evenly but not too thickly.
Store leftover rolls in an airtight container at room temperature for up to 2-3 days, or freeze for longer storage.
- Prep Time: 40 minutes
- Cook Time: 25 minutes
Nutrition
- Calories: 200
- Fat: 3g
- Carbohydrates: 38g
- Protein: 6g
FAQs
Why is the water temperature crucial for the dough?
The temperature of the warm water is absolutely vital for successfully activating the active dry yeast, which is the leavening agent for these rolls. The recipe specifies a range of 105-115°F (40-46°C). If the water is too hot, it can kill the yeast, preventing your dough from rising properly. Conversely, if the water is too cold, the yeast will activate very slowly or not at all, leading to a dense dough. Achieving that perfect warmth allows the yeast to become foamy, indicating it is active and ready to make your rolls light and airy.
How does the distinctive tiger pattern appear on the rolls?
The unique, characteristic cracked “tiger” pattern on these rolls comes from a special rice flour paste. This paste, made from rice flour, warm water, sugar, and optional sesame oil, is whisked until smooth, resembling pancake batter. After the rolls have completed their second rise, a generous layer of this paste is gently brushed over their tops. As the rolls bake at 400°F (200°C), the rice flour paste dries out and cracks, while the dough underneath continues to rise and expand. This creates the beautiful, mottled effect that gives these rolls their iconic appearance.
What should I do if my dough feels too sticky during preparation?
If your dough feels overly sticky after mixing or during the kneading process, don’t worry, this is a common occurrence and easily remedied. The recipe calls for 3 ½ to 4 cups of all-purpose flour, with the flexibility to add more. When kneading, if the dough clings excessively to your hands or the work surface, simply add more flour, one tablespoon at a time. Incorporate each addition thoroughly before deciding if more is needed. The goal is to achieve a smooth, elastic dough that is manageable and no longer excessively sticky, ensuring a proper rise and texture for your finished rolls.
Can I make these rolls even crispier?
Yes, you can certainly enhance the crispiness of your rolls! The recipe includes a helpful tip for achieving an extra-crispy crust. To do this, simply place a shallow pan filled with hot water on the bottom rack of your oven while the rolls are baking. The steam generated from the hot water during the baking process helps create a more pronounced, crispier crust. This simple addition elevates the textural contrast, making the distinctive exterior even more delightful against the soft interior. It’s a fantastic technique to try for an extra layer of crunch.