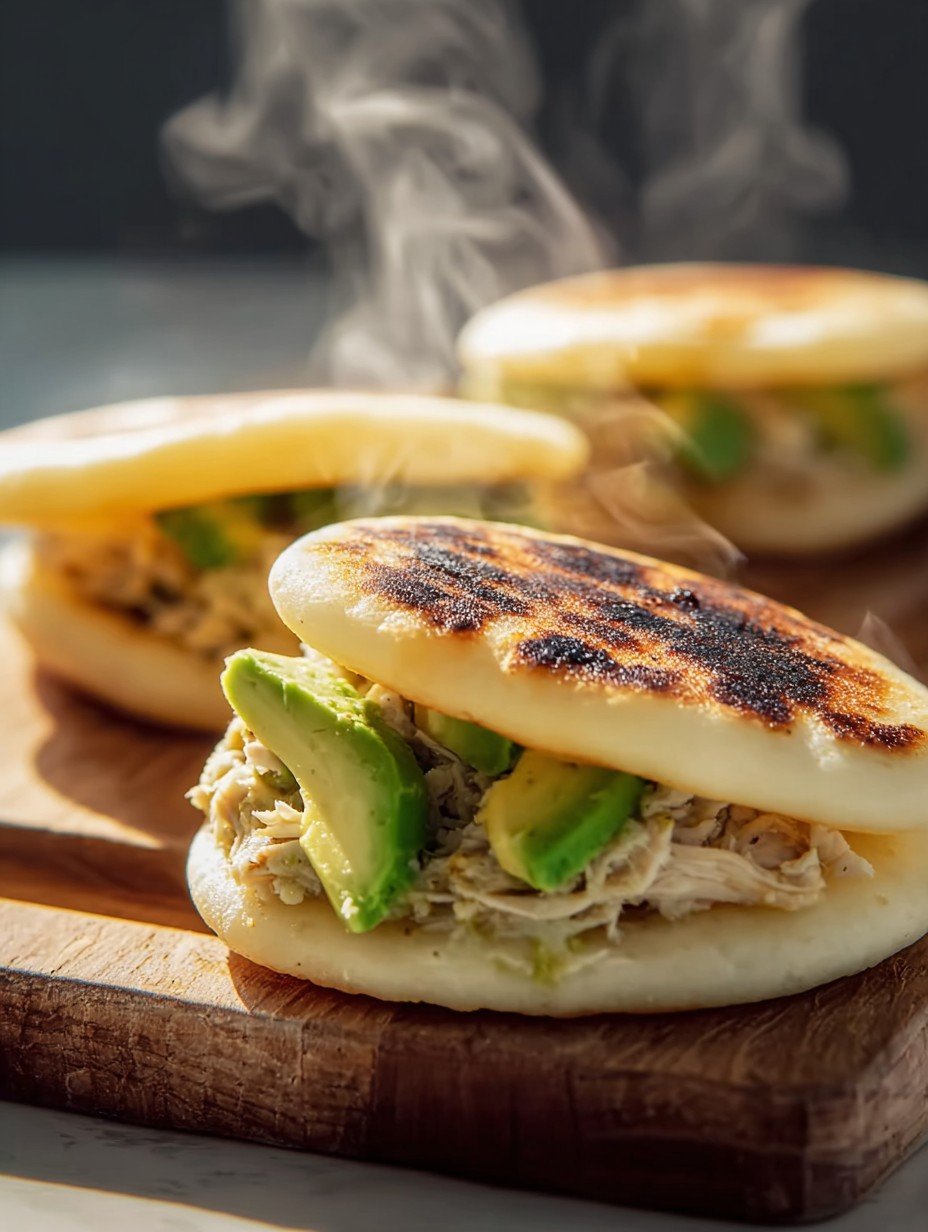
Imagine a golden, slightly crisp exterior giving way to a tender, fluffy interior, embracing a savory shredded chicken mixture and creamy avocado slices. This isn’t just food; it’s a culinary hug.
My first encounter with a homemade arepa was pure magic, a delicious accident born from a desperate pantry dive and a yearning for something beyond toast.
Why You’ll Love This Recipe
This recipe for arepas is a total game-changer, blending incredible ease with a flavor profile that’s truly unique and utterly captivating. You will discover how simple it is to whip up these visually stunning cornmeal patties, creating a dish that looks as amazing as it tastes. Plus, with options for the filling and how you serve them, it’s wonderfully versatile for any meal or occasion.
What Makes Arepas Reina Pepiada So Special?
Let’s talk about the magic that is the Reina Pepiada. This isn’t just any stuffed corn cake; it’s a Venezuelan culinary icon, a beloved staple that has captured hearts (and stomachs) worldwide. The very name, “Reina Pepiada,” translates to “Curvy Queen,” and it was coined in honor of Susana Duijm, Venezuela’s first Miss World back in 1955. Legend has it that a local arepa stand owner, celebrating her victory, created this specific filling—a rich, creamy blend of chicken and avocado—and named it after her. The arepa itself provides the perfect canvas: a warm, substantial corn patty that cradles the generous, flavorful filling. It’s a testament to simple ingredients coming together to create something truly extraordinary. Whether you’re new to Venezuelan cuisine or a seasoned fan, this easy Reina Pepiada recipe offers a taste of tradition that’s both comforting and exciting. It’s the kind of dish that transports you with every single bite.
Ingredients
Here’s what you need for this delicious dish:
- **Pre-cooked white cornmeal (Harina P.A.N. or similar)**: This specific cornmeal is the secret to achieving that perfect golden, slightly crisp exterior and a tender, fluffy interior that defines a traditional arepa. Do not substitute with corn flour or masa harina for the best results.
- **Warm water**: Essential for activating the cornmeal, allowing it to hydrate properly and form a smooth, pliable dough for your arepas.
- **Salt**: A crucial seasoning for the arepa dough, enhancing its flavor and balancing the sweetness of the corn.
- **Vegetable oil (for cooking)**: Used to lightly grease your skillet or griddle, ensuring the arepas cook to a beautiful golden-brown color with a firm, appealing crust.
- **Cooked, shredded chicken breast**: The savory heart of the Reina Pepiada filling, providing a lean and flavorful protein base that pairs wonderfully with the creamy avocado.
- **Large ripe avocado, diced or sliced**: This vibrant, creamy fruit is what gives the “Pepiada” its distinctive texture and richness, folding gently into the chicken mixture for a truly indulgent bite.
- **Mayonnaise (or plain Greek yogurt)**: Binds the chicken and avocado together, adding a delightful creaminess and a touch of tang to the filling.
- **Fresh lime juice**: A squeeze of this citrus brightens the entire filling, cutting through the richness with a zesty, refreshing note.
- **Chopped fresh cilantro**: Adds a burst of herbaceous freshness, elevating the aroma and flavor profile of the chicken and avocado mixture.
- **Salt to taste**: Allows you to season the chicken and avocado filling perfectly to your preference, ensuring every bite is balanced and delicious.
- **Black pepper to taste**: A simple seasoning that adds a subtle warmth and depth to the creamy, savory filling.
The complete ingredient list, including quantities, can be found directly under the recipe card.
Step-by-Step Instructions
Follow these simple steps to prepare this delicious dish:
Step 1: Create the Arepa Dough
In a large mixing bowl, combine the warm water and the specified amount of salt. Gradually add the pre-cooked white cornmeal, mixing thoroughly with your hands until a soft, uniform dough forms. Knead this dough for 2-3 minutes until it feels smooth and pliable to the touch. If the dough appears too dry and is cracking, incorporate an additional tablespoon of water; if it feels too wet or sticky, add another tablespoon of cornmeal. Allow the dough to rest undisturbed for 5 minutes.
Step 2: Shape the Arepas
Divide the prepared dough into 6-8 equal portions. Take each portion and roll it into a neat ball, then gently flatten it between the palms of your hands to create a disc approximately 3/4 inch thick and 3-4 inches in diameter. Carefully smooth out any small cracks that may appear around the edges to ensure a solid form.
Step 3: Begin Cooking the Arepas
Heat a large non-stick skillet or griddle over medium heat. Lightly grease the hot surface with the vegetable oil. Carefully place the formed arepas onto the heated surface and cook them for 7-10 minutes on each side. Continue cooking until they achieve a beautiful golden-brown color and a firm crust has developed. You’ll know they’re ready for the next stage if they sound hollow when lightly tapped.
Step 4: Enhance for Fluffier Interiors (Optional)
For those who prefer an even fluffier interior texture, transfer the pan-fried arepas directly to a preheated oven set to 350°F (175°C). Bake for an additional 10-15 minutes, or until the arepas are thoroughly cooked through and have puffed up slightly, indicating a light and airy center.
Step 5: Prepare the Creamy Filling
While the arepas are cooking to perfection, in a medium bowl, combine the cooked, shredded chicken, mayonnaise (or plain Greek yogurt if preferred), fresh lime juice, chopped cilantro, salt, and black pepper. Mix all these ingredients thoroughly until well combined. Gently fold in the diced or sliced avocado, taking care not to mash it too much, preserving its delightful texture.
Step 6: Assemble and Serve Your Arepas
Carefully slice each fully cooked arepa horizontally, cutting almost all the way through to create a deep pocket without fully separating the halves. Generously fill each arepa with the delicious chicken and avocado mixture. Serve your arepas immediately to enjoy their warm, comforting goodness and the delightful contrast of textures.
Pro Tips for Perfect Arepas

Achieving arepa perfection is simpler than you might think, especially with a few expert insights. First, pay close attention to the dough consistency during preparation; it should be firm enough to hold its shape when you form the patties, yet soft and pliable enough to knead without developing cracks. This balance is key to a successful arepa. Secondly, the type of cornmeal truly matters. For the best results, always opt for pre-cooked white cornmeal, often labeled as Harina P.A.N. or a similar brand specifically designed for arepas. Avoid using corn flour or masa harina, as these will yield a different texture and result. Lastly, when you cook the arepas, make sure your skillet is not overly hot. An excessively high temperature can cause the exterior to burn quickly before the inside has a chance to cook through properly, leaving you with a raw center. A medium heat ensures a perfectly golden crust and a thoroughly cooked interior.
Making Ahead and Storing Your Arepas
Life gets busy, and sometimes, the best recipes are those that can be prepared in advance. Good news! These Arepas Reina Pepiada can certainly be made ahead of time, offering a convenient option for meal prep or quick weeknight dinners. Once cooked, allow your arepas to cool completely. Then, store them in an airtight container in the refrigerator for up to 3 days. When you’re ready to enjoy them again, simply reheat the arepas in a toaster oven for that desired crispness, or warm them gently in a skillet until heated through. This ensures you can enjoy a delicious, homemade Venezuelan treat with minimal fuss, even on your busiest days.
Creative Twists and Serving Suggestions
While the classic chicken and avocado filling is undeniably delicious, the beauty of the Arepas Reina Pepiada lies in its versatility. Don’t be shy about experimenting with other delightful fillings to suit your taste or what you have on hand. For a hearty vegetarian option, consider stuffing your arepas with seasoned black beans and crumbled white cheese. A mix of sautéed bell peppers and onions or even some tender slow-cooked beef could also make fantastic additions. Beyond the filling, arepas make an excellent canvas for various meals. Serve them for breakfast with a fried egg on top, for lunch as a satisfying sandwich alternative, or as a fun, interactive dinner. They are also perfect for parties as an appetizer, allowing guests to choose their own fillings. Pair them with a simple side salad or some fresh fruit to complete your meal.
Nutrition Breakdown
Understanding what you eat is important, and this delicious arepa recipe offers a balanced profile. Each serving (approximately 1 arepa with filling) provides:
- **Calories**: 380
- **Protein**: 22g
- **Carbs**: 33g
- **Fat**: 18g
These values can vary slightly based on specific ingredient brands and exact portion sizes, but they provide a clear idea of the nutritional contribution of this satisfying dish.
Concluding Thoughts on This Delicious Arepa
There you have it—the ultimate guide to making your very own Arepas Reina Pepiada: Receta fácil y deliciosa. This journey through golden cornmeal and creamy chicken and avocado is more than just cooking; it’s about bringing a piece of vibrant Venezuelan culture and incredibly satisfying flavors right into your kitchen. Whether you’re a seasoned cook or just starting your culinary adventures, this simple and practical recipe promises a rewarding experience and a truly delightful meal. So, roll up your sleeves, gather your ingredients, and prepare to be amazed by how easily you can create something so rich in flavor and tradition. Your taste buds—and your inner food blogger—will thank you.
Mastering the Secrets of Cooking
To master these delicious arepas, let the dough rest after kneading, allowing proper hydration. While the arepas get golden in the skillet and finish baking for a fluffy interior, prepare the chicken and avocado filling. This sequence ensures fresh, perfectly textured components are ready for immediate assembly.
Make Your Recipe Unique
Customize your arepas easily! For a lighter filling, use plain Greek yogurt instead of mayonnaise. Instead of diced avocado, mash it into the chicken mixture for a creamier texture. Adjust the fresh cilantro and lime juice amounts to suit your preference.
Smart Storage & Reheating
To preserve the crisp exterior and fluffy interior, store cooked arepa shells and the chicken avocado filling separately in airtight containers. Refrigerate both for up to 3 days. Reheat arepas in a toaster oven or skillet until warm. Then, fill them generously for optimal texture and enjoyment.
The Chef’s Golden Tips
I’ll never forget the joy of biting into my first Arepas Reina Pepiada. The creamy chicken and avocado, encased in a warm corn shell, was pure comfort. It was a delicious moment of culinary bliss.
Final Thoughts
Imagine sinking your teeth into that perfect golden crust, giving way to a soft, warm interior, bursting with savory shredded chicken and creamy avocado. This recipe for Arepas Reina Pepiada: Receta fácil y deliciosa isn’t just a meal; it’s an experience, a vibrant taste of tradition made accessible in your own kitchen. It’s a satisfying dish that brings together incredible textures and fresh flavors, all while being remarkably straightforward to prepare. You’ve seen how simple it is to whip up these comforting cornmeal patties and their zesty filling. So why wait? Gather your ingredients, roll up your sleeves, and bring this incredible Venezuelan delight to your table tonight. Your taste buds will thank you!
Print
Arepas Reina Pepiada: Receta fácil y deliciosa
- Total Time: 50 minutes
- Yield: 6-8 arepas 1x
Description
These Venezuelan arepas feature a golden, slightly crisp exterior that gives way to a tender, fluffy interior. Each arepa is generously filled with a savory shredded chicken mixture, complemented by slices of fresh, creamy avocado. The cornmeal patties are traditionally pan-fried or griddled, offering a delightful contrast in textures and a comforting flavor.
Ingredients
- *Arepas:*
- 1 cup pre-cooked white cornmeal (Harina P.A.N. or similar)
- 1 1/4 cups warm water
- 1 teaspoon salt
- 1 tablespoon vegetable oil (for cooking)
- *Chicken and Avocado Filling:*
- 1 1/2 cups cooked, shredded chicken breast
- 1 large ripe avocado, diced or sliced
- 2 tablespoons mayonnaise (or plain Greek yogurt)
- 1 tablespoon fresh lime juice
- 2 tablespoons chopped fresh cilantro
- Salt to taste
- Black pepper to taste
Instructions
- **Prepare the Arepa Dough:** In a large bowl, combine the warm water and salt. Gradually add the pre-cooked white cornmeal, mixing with your hands until a soft, uniform dough forms. Knead for 2-3 minutes until smooth and pliable. If the dough feels too dry, add a tablespoon of water; if too wet, add a tablespoon of cornmeal. Let the dough rest for 5 minutes.
- **Form the Arepas:** Divide the dough into 6-8 equal portions. Roll each portion into a ball, then flatten it gently between your palms to form a disc about 3/4 inch thick and 3-4 inches in diameter. Smooth out any cracks around the edges.
- **Cook the Arepas:** Heat a large non-stick skillet or griddle over medium heat. Lightly grease with vegetable oil. Place the arepas on the hot surface and cook for 7-10 minutes per side, until golden brown and a firm crust has formed. The arepas should sound hollow when tapped.
- **Finish Cooking (Optional, for fluffier interior):** For a truly fluffy interior, transfer the pan-fried arepas to a preheated oven at 350°F (175°C) for 10-15 minutes, or until fully cooked through and puffed slightly.
- **Prepare the Filling:** While the arepas are cooking, in a medium bowl, combine the shredded chicken, mayonnaise (or Greek yogurt), lime juice, cilantro, salt, and pepper. Mix well. Gently fold in the diced or sliced avocado.
- **Assemble the Arepas:** Carefully slice each cooked arepa horizontally, almost all the way through, to create a pocket. Fill each arepa generously with the chicken and avocado mixture. Serve immediately.
Notes
The key to a good arepa is the dough consistency; it should be firm enough to hold its shape but soft enough to knead without cracking.
For best results, use pre-cooked white cornmeal specifically for arepas, not corn flour or masa harina.
Arepas can be made ahead and stored in an airtight container in the refrigerator for up to 3 days. Reheat in a toaster oven or skillet.
Experiment with other fillings like black beans or cheese.
Ensure your skillet is not too hot, or the arepas will burn on the outside before cooking through on the inside.
- Prep Time: 20 minutes
- Cook Time: 30 minutes
Nutrition
- Calories: 380
- Fat: 18g
- Carbohydrates: 33g
- Protein: 22g
FAQs
How do I ensure my arepa dough is the right consistency?
The perfect dough for these arepas is crucial for their texture. After combining the warm water, salt, and pre-cooked white cornmeal, you’ll want to knead it for 2-3 minutes until it’s smooth and pliable. The goal is a dough that feels firm enough to hold its shape when you form the discs but remains soft enough that it doesn’t crack around the edges. If it feels too dry during kneading, add just a tablespoon of warm water. Conversely, if it seems too sticky or wet, incorporate another tablespoon of cornmeal. This small adjustment ensures your arepas achieve that ideal, tender interior.
What’s the best way to cook the arepas for a golden, crisp exterior and fluffy inside?
To achieve that signature golden brown crust and tender interior, start by heating your non-stick skillet or griddle over medium heat, lightly greased with vegetable oil. Cook the arepas for 7-10 minutes per side, ensuring they develop a firm crust and sound hollow when tapped. For an extra fluffy result, transfer them to a preheated oven at 350°F (175°C) for an additional 10-15 minutes after pan-frying. It’s important not to have your skillet too hot initially, as this can burn the outside before the inside is fully cooked, so medium heat is key.
Can I use any type of cornmeal for making these Arepas Reina Pepiada?
For truly authentic and delicious arepas, it’s essential to use pre-cooked white cornmeal, often labeled as “Harina P.A.N.” or similar brands specifically for arepas. This type of cornmeal has been pre-cooked and finely ground, which allows it to absorb water quickly and form the correct dough consistency. Do not substitute with corn flour, masa harina (used for tortillas), or regular yellow cornmeal. These different corn products have distinct properties and will not yield the desired texture or structure for this traditional Venezuelan dish. Using the correct cornmeal is a key step for success.
Can I prepare these chicken and avocado arepas in advance?
Yes, you can certainly prepare the arepas ahead of time to make mealtime even easier. Once cooked, allow them to cool completely. Store the plain arepa patties in an airtight container in the refrigerator for up to 3 days. When you’re ready to enjoy them, simply reheat the arepas in a toaster oven or a skillet until warmed through and slightly crisp again. The chicken and avocado filling, however, is best made fresh and assembled just before serving to maintain the vibrant freshness of the avocado and cilantro. This ensures the best flavor and texture.