Imagine sinking your teeth into a warm, pillowy cloud, subtly yeasty and perfectly pliable, with just a hint of golden crispness on the outside. This is more than just bread; it’s a comforting embrace. I remember the first time I managed to coax yeast into submission, feeling like a culinary wizard, and ever since, homemade flatbread has been my go-to for instant kitchen glory.
What Makes This Recipe Special
This recipe stands out for its incredible simplicity, proving that homemade bread doesn’t require a culinary degree or a secret society handshake. It boasts a uniquely delicious subtly yeasty flavor that beautifully complements a myriad of dishes, making it an excellent canvas for your favorite meals. The visual appeal, with its inviting golden-brown spots and satisfying puff, will make you feel like a pro chef, while its impressive versatility means you can pair it with anything from savory stews to sweet spreads.
Why This Soft Homemade Flatbread Will Change Your Life
There’s a certain magic that happens when warm, fresh bread emerges from your kitchen. It’s an aroma that wraps around you, a taste that transports you, and a texture that redefines comfort. For those of us navigating the wonderful world of gluten-free eating, that magic can sometimes feel elusive. Store-bought options often fall short, tasting more like cardboard masquerading as bread than the soft, pliable dream we crave. But fear not, my friends! This isn’t just *any* flatbread recipe; this is about creating the softest homemade flatbread experience you’ll ever have.
Forget dry, crumbly imitations. We’re talking about a flatbread that’s so wonderfully soft and tender, it practically melts in your mouth, offering a delightful chewiness with every bite. The subtly yeasty notes add depth, making it the ideal companion for dips, spreads, or simply enjoyed on its own. It’s perfect for scooping up hummus, cradling grilled vegetables, or even creating mini pizzas. This gluten-free pita bread recipe demystifies the art of bread-making, proving that a truly exceptional loaf is within everyone’s reach, even if you’re a complete novice. The satisfaction of pulling a perfectly puffed, golden-brown flatbread from the pan is an unrivaled kitchen victory. Prepare to impress yourself and everyone lucky enough to share in this delicious creation.
Mastering the Magic: Tips for Your Soft Flatbread Success
Achieving that perfect, soft texture isn’t just about the ingredients; it’s also about a few insider secrets that guarantee success every time. The foundation of any good yeasted bread, even a no-knead wonder, starts with the yeast. Think of yeast as tiny, sleepy creatures that need the perfect wake-up call. Ensure your warm water is within the specified temperature range of 105-115°F (40-46°C). Too cold, and the yeast won’t activate; too hot, and you’ll unfortunately kill them, leading to a flat, dense result. A foamy layer on your yeast mixture is your green light, signaling they’re awake and ready to work their magic.
Next, the quality of your gluten-free all-purpose flour blend makes a significant difference in the final texture. Not all blends are created equal! Opt for a high-quality blend specifically designed for baking, as these often contain a balanced mix of starches and gums (like xanthan gum, which is included in our recipe’s blend) that mimic the elasticity typically provided by gluten. This helps achieve that desirable pliable and tender crumb. When it comes to kneading, resist the urge to overwork the dough. Unlike traditional wheat doughs that benefit from extensive kneading, gluten-free dough can become tough if handled too aggressively. A gentle knead for just two to three minutes is all it needs to become smooth and cohesive. Finally, the ultimate secret to retaining the luxurious softness of your cooked flatbreads is surprisingly simple: cover them! As each golden-brown pita emerges from the skillet, stack it on a plate and immediately cover it with a clean kitchen towel. This traps the steam, keeping the flatbread moist and wonderfully soft. For optimal flavor and texture, these delicious creations are best enjoyed warm, so consider serving them straight from the pan.
Ingredients for Your Incredible Flatbreads
Here’s what you need for this delicious dish:
- **Warm water (105-115°F / 40-46°C)**: This is the critical element to awaken your active dry yeast; ensure its temperature is within the specified range for optimal activation and that beautiful rise.
- **Active dry yeast**: The magic leavening agent that gives this homemade flatbread its airy structure and subtle yeasty flavor, contributing significantly to its soft texture.
- **Granulated sugar**: A small amount of sugar acts as food for the yeast, helping it activate and thrive, which in turn leads to a better rise and a more tender crumb.
- **Gluten-free all-purpose flour blend (with xanthan gum)**: The foundational ingredient for these gluten-free pitas, the xanthan gum in the blend is crucial for mimicking the elasticity of gluten, ensuring a pliable, soft, and cohesive dough.
- **Baking powder**: Working in conjunction with the yeast, this leavening agent provides an extra boost of lightness and contributes to the soft, fluffy interior of the flatbread.
- **Salt**: A vital flavor enhancer, salt balances the sweetness and yeasty notes, while also playing a role in regulating yeast activity for the perfect rise.
- **Olive oil**: Beyond adding a lovely subtle flavor, olive oil introduces richness and moisture to the dough, ensuring a beautifully tender texture, with extra needed for cooking.
All ingredients and quantities can be found directly in the recipe card below.
Step-by-Step Instructions to Make Your Own Perfect Flatbread
Simply follow these easy steps to prepare this delicious meal:
**Step 1: Activate the Yeast for a Foamy Beginning.** In a large bowl, pour in the warm water, ensuring it’s between 105-115°F (40-46°C). Gently stir in the active dry yeast and the granulated sugar. Give it a gentle stir to combine, then let this mixture rest undisturbed for 5-10 minutes. You’ll know it’s ready when a distinct foamy layer appears on the surface, indicating the yeast is active and eager to work.
**Step 2: Combine Dry Ingredients for a Well-Blended Base.** While your yeast is bubbling away, take a separate, medium-sized bowl. Into this, whisk together the gluten-free all-purpose flour blend (which includes xanthan gum), the baking powder, and the salt. Make sure these dry ingredients are thoroughly combined, removing any lumps, so they distribute evenly throughout your dough.
**Step 3: Bring Wet and Dry Together to Form a Shaggy Dough.** Once your yeast mixture is foamy, add the whisked dry ingredients directly to it, along with the 2 tablespoons of olive oil. Using a sturdy spoon or your clean hands, mix everything until a “shaggy” dough begins to form. At this stage, it won’t be perfectly smooth, but rather a cohesive, somewhat rustic mixture.
**Step 4: Knead Gently for a Smooth, Cohesive Dough.** Lightly flour a clean work surface using gluten-free flour. Turn the shaggy dough out onto this surface. Knead the dough gently for just 2-3 minutes. You’ll notice it transform into a smooth and cohesive mass. Remember, gluten-free dough will naturally be softer than traditional wheat dough, so don’t be alarmed by its tender feel.
**Step 5: Allow the Dough to Rise and Double in Size.** Lightly oil a clean bowl. Place your kneaded dough into this bowl, turning it once to ensure it’s lightly coated with oil all around. Cover the bowl securely with a clean kitchen towel or plastic wrap. Find a warm spot in your kitchen and let the dough rise for 45-60 minutes, or until it has visibly doubled in size, plump and ready for the next stage.
**Step 6: Divide and Shape into Smooth Dough Balls.** Once the dough has proudly risen, gently punch it down to release the air. Transfer the dough back to your lightly floured surface. Carefully divide the dough into 6 to 8 equal pieces. Take each individual piece and roll it between your palms to form a smooth, uniform ball.
**Step 7: Roll Each Ball into a Perfect Flatbread Round.** On your lightly floured surface, take one of the dough balls. Using a rolling pin, gently roll it out into a round flatbread shape, aiming for approximately 1/4 inch thick. Repeat this process for all remaining dough balls, ensuring they maintain their round form and consistent thickness.
**Step 8: Prepare Your Pan for Cooking.** Place a cast-iron skillet or a non-stick pan over medium-high heat on your stovetop. Lightly oil the pan, ensuring an even, thin layer of olive oil covers the cooking surface. Allow the pan to heat sufficiently before adding your first flatbread.
**Step 9: Cook Each Flatbread Until Golden and Puffed.** Once the pan is hot, carefully place one rolled-out flatbread into it. Cook for 1-2 minutes on the first side, until you see golden brown spots starting to appear and the pita begins to puff up like a delightful balloon. Flip it over and cook for another 1-2 minutes on the second side, until it’s also beautifully golden brown.
**Step 10: Keep Warm and Soft While You Finish Cooking.** As each pita bread finishes cooking, remove it from the pan and immediately place it on a clean plate. Crucially, cover the plate with a clean kitchen towel. This clever step traps the steam, ensuring that each flatbread remains wonderfully warm, moist, and soft as you cook the remaining pitas. Garnish with your favorite fresh herbs or serve simply alongside a savory dip to enjoy the incredibly soft texture.
Nutritional Value of This Delightful Flatbread
Beyond its amazing taste and versatility, this flatbread also offers a balanced nutritional profile. Each serving provides approximately 180 Calories, making it a satisfying addition to any meal. With 4g of Protein, 35g of Carbs, and just 3g of Fat, these gluten-free pitas offer a wholesome and energizing option for everyone to enjoy. It’s a testament that delicious, homemade food can also be good for you.
Final Thoughts on Enjoying Your Homemade Flatbread
There you have it, folks! A recipe for the softest homemade flatbread you’ll make that’s not just practical and utterly delicious, but also genuinely fun to create. There’s something deeply satisfying about making bread from scratch, especially when the results are this spectacularly soft and flavorful. This gluten-free pita bread is so adaptable, it can elevate almost any meal, from a simple snack with hummus to serving as the base for a hearty wrap.
Whether you’re a seasoned baker or just dipping your toes into the dough-making world, this recipe is designed for success. The joy of pulling that perfectly puffed, golden flatbread from the skillet, knowing you made it yourself, is truly special. So, gather your ingredients, follow these straightforward steps, and get ready to experience the magic. Don’t be surprised if this becomes your new favorite go-to recipe. Happy baking, and happy eating!
Perfecting the Cooking Process
To achieve the ideal outcome for The Softest Homemade Flatbread You’ll Make, ensure your skillet is adequately hot before adding the dough. Cook each pita for 1-2 minutes per side, looking for those beautiful golden-brown spots and a slight puff. Immediately cover them with a towel once off the pan to keep them wonderfully soft and warm.
Add Your Personal Touch
Customize The Softest Homemade Flatbread You’ll Make by experimenting with your chosen fats. For cooking, consider using a neutral oil like grapeseed or sunflower oil in the skillet instead of olive oil. You could also substitute the granulated sugar in the dough with an equal amount of raw cane sugar for a subtle flavor variation.
Storage & Reheating
Store these delightful flatbreads in an airtight container at room temperature for up to two days. To maintain their signature softness, wrap them tightly or freeze between parchment layers. Reheat gently in a dry skillet or microwave for quick warmth, ensuring they regain that perfectly pliable, fresh-baked feel.
Helpful Chef Tips
The first time I made this flatbread, my kitchen filled with such a comforting aroma, instantly transporting me. Serving them warm, everyone agreed: this recipe truly creates the softest homemade flatbread, a memorable bite every time.
Final Thoughts
Imagine the aroma of freshly cooked bread filling your kitchen, a scent that promises warmth and comfort. These delightful gluten-free flatbreads deliver on that promise, offering a perfect balance of a chewy interior and a gently crisp exterior, dotted with golden-brown perfection. They are truly the softest homemade flatbread you’ll make, incredibly pliable and versatile. Don’t just dream of perfect pita; embrace the simple joy of creating this wonderful bread yourself. Whip up a batch tonight and transform any meal into something special!
Print
The Softest Homemade Flatbread You’ll Make
- Total Time: 0 hours
- Yield: 6-8 pitas 1x
Description
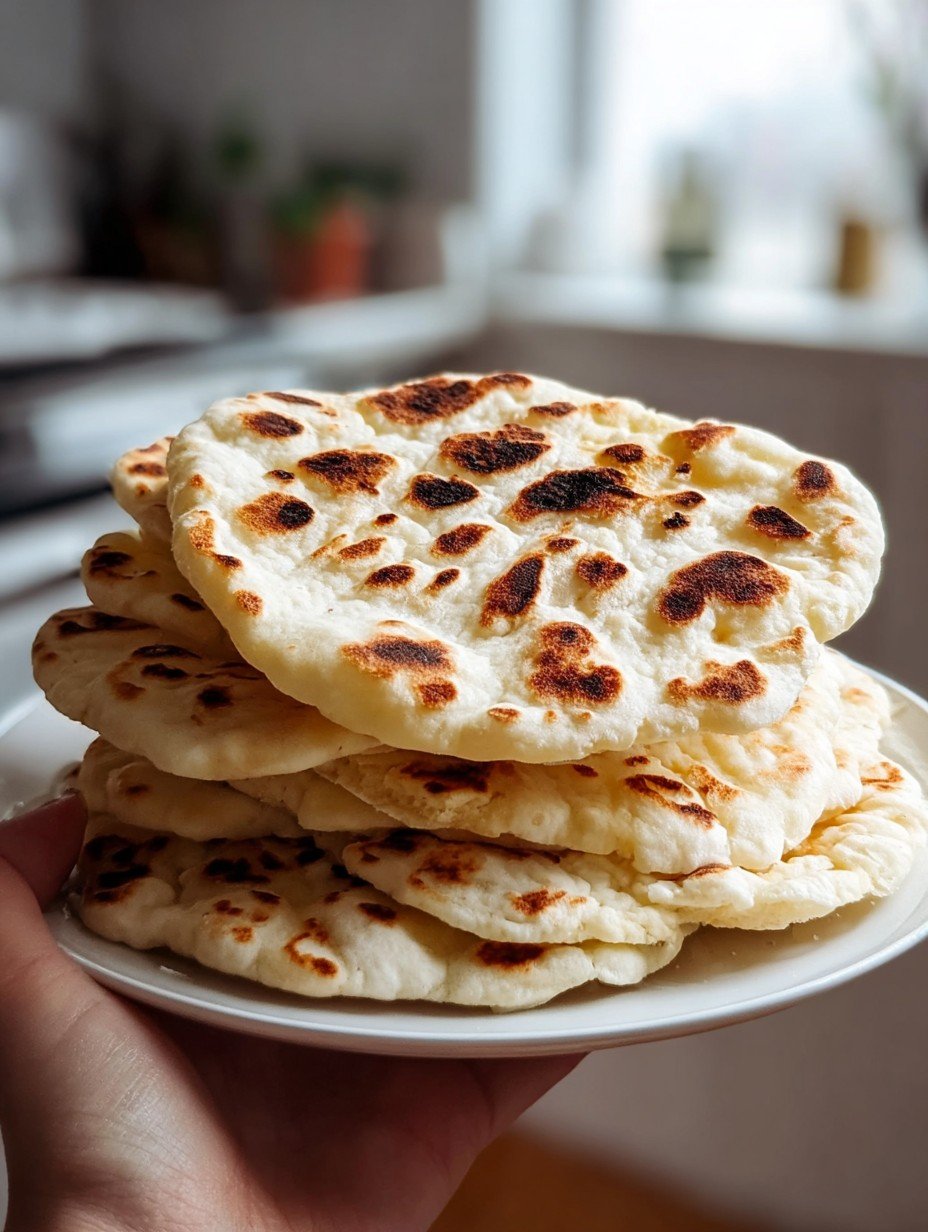
This image presents a stack of freshly prepared flatbreads, showcasing their inviting golden-brown spots and soft, pliable texture. These gluten-free pita breads offer a subtly yeasty flavor, making them an ideal accompaniment for various dishes. They are typically cooked on a hot griddle or skillet, resulting in a delightful balance of chewiness and a gently crisp exterior.
Ingredients
- 1 cup warm water (105-115°F / 40-46°C)
- 1 teaspoon active dry yeast
- 1 teaspoon granulated sugar
- 2 cups gluten-free all-purpose flour blend (with xanthan gum)
- 1 teaspoon baking powder
- 1/2 teaspoon salt
- 2 tablespoons olive oil, plus more for cooking
Instructions
- In a large bowl, combine the warm water, yeast, and sugar. Stir gently and let it sit for 5-10 minutes until a foamy layer appears on the surface.
- In a separate medium bowl, whisk together the gluten-free flour blend, baking powder, and salt until well combined.
- Add the dry ingredients and 2 tablespoons of olive oil to the yeast mixture. Mix with a spoon or your hands until a shaggy dough forms.
- Turn the dough out onto a lightly floured surface (using gluten-free flour) and knead gently for 2-3 minutes until the dough is smooth and cohesive. Gluten-free dough will be softer than traditional wheat dough.
- Place the dough in a lightly oiled bowl, turning once to coat. Cover the bowl with a clean kitchen towel or plastic wrap and let it rise in a warm place for 45-60 minutes, or until it has visibly doubled in size.
- Gently punch down the risen dough and divide it into 6-8 equal pieces. Roll each piece into a smooth ball.
- On a lightly floured surface, roll each dough ball into a round flatbread, approximately 1/4 inch thick.
- Heat a lightly oiled cast-iron skillet or non-stick pan over medium-high heat.
- Place one pita bread in the hot pan. Cook for 1-2 minutes per side, until golden brown spots appear and the pita begins to puff up.
- Remove the cooked pita from the pan and place it on a plate, covering it with a clean kitchen towel to keep it warm and soft while you cook the remaining pitas.
Notes
Ensure your water temperature is within the specified range to properly activate the yeast.
Using a high-quality gluten-free all-purpose flour blend designed for baking will yield the best texture.
Avoid over-kneading gluten-free dough, as it can become tough; a gentle knead is sufficient.
Covering the cooked pitas with a towel helps them retain moisture and softness.
For optimal flavor and texture, serve the pita bread warm.
- Prep Time: 20 minutes
- Cook Time: 15-20 minutes
Nutrition
- Calories: 180
- Fat: 3g
- Carbohydrates: 35g
- Protein: 4g
FAQs
How important is the water temperature for activating yeast in this recipe?
Maintaining the correct water temperature is crucial for the success of these gluten-free pitas. The recipe specifies warm water between 105-115°F (40-46°C). This specific range is vital because it effectively activates the active dry yeast without harming it. Water that is too cold will not activate the yeast properly, leading to a dough that doesn’t rise. Conversely, water that is too hot can kill the yeast, preventing any rise at all. Ensuring your water is within this ideal temperature window is the first step to achieving wonderfully airy and soft flatbreads.
Why should I knead the gluten-free dough gently?
For this gluten-free flatbread recipe, gentle kneading is key to achieving the desired soft and pliable texture. The instructions advise kneading the dough for only 2-3 minutes. Unlike traditional wheat doughs that require extensive kneading to develop gluten, gluten-free dough benefits from a lighter touch. Over-kneading can actually make gluten-free dough tough and less tender. A gentle knead is sufficient to bring the ingredients together, creating a smooth and cohesive dough ready for its rise, ensuring your finished pitas are wonderfully soft and enjoyable.
What type of gluten-free flour blend is best for this recipe?
The recipe specifies using a gluten-free all-purpose flour blend that includes xanthan gum. This type of blend is specifically designed to mimic the structure and elasticity that gluten provides in traditional baked goods. Xanthan gum acts as a binder, helping to create a cohesive dough that holds together well and produces the characteristic pliable texture of pita bread. While many blends are available, selecting a high-quality all-purpose blend intended for baking will yield the best results for your homemade flatbreads, ensuring they are light, soft, and delicious.
Why is it important to cover the cooked pitas with a towel?
Covering the freshly cooked flatbreads with a clean kitchen towel immediately after removing them from the pan is an important step to maintain their quality. This simple action helps to trap steam and moisture, preventing the pitas from drying out. By keeping them warm and soft, the towel ensures that each subsequent flatbread remains as delightful as the first. This method contributes significantly to the overall soft and pliable texture, which is a hallmark of these wonderfully tender gluten-free flatbreads.