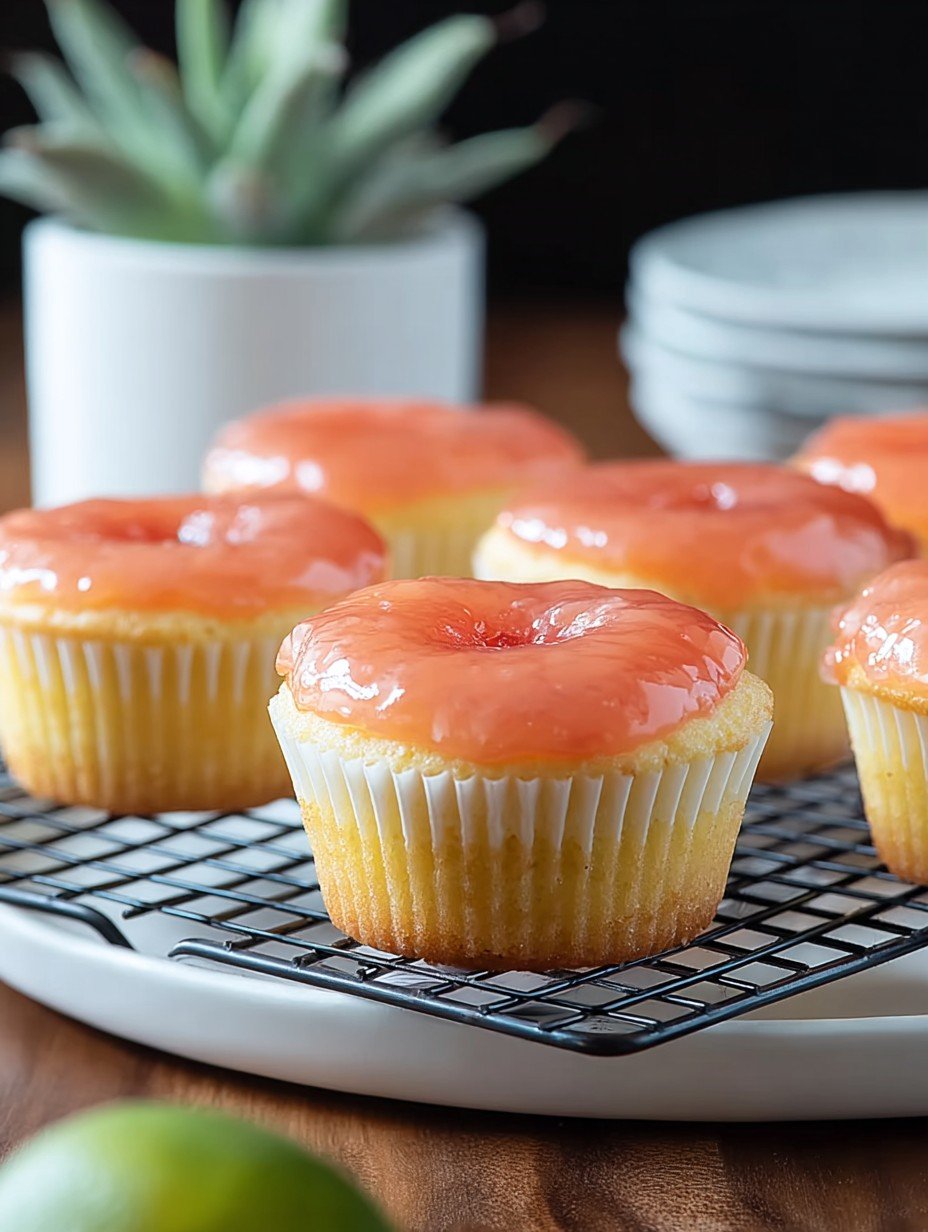
Imagine biting into a fluffy cloud, infused with sunshine and the sweet, tangy kiss of exotic fruit, all wrapped up in a perfectly adorable mini cake. These tender morsels of pure joy offer a delightful escape to a warm, sandy beach, right from your kitchen.
My very first attempt at baking these charming treats was a comical disaster, involving a flurry of flour and a suspicious-looking “guava cloud” clinging to the ceiling fan. But even then, the promise of that unique tropical taste kept me laughing and determined.
Why You’ll Love This Recipe
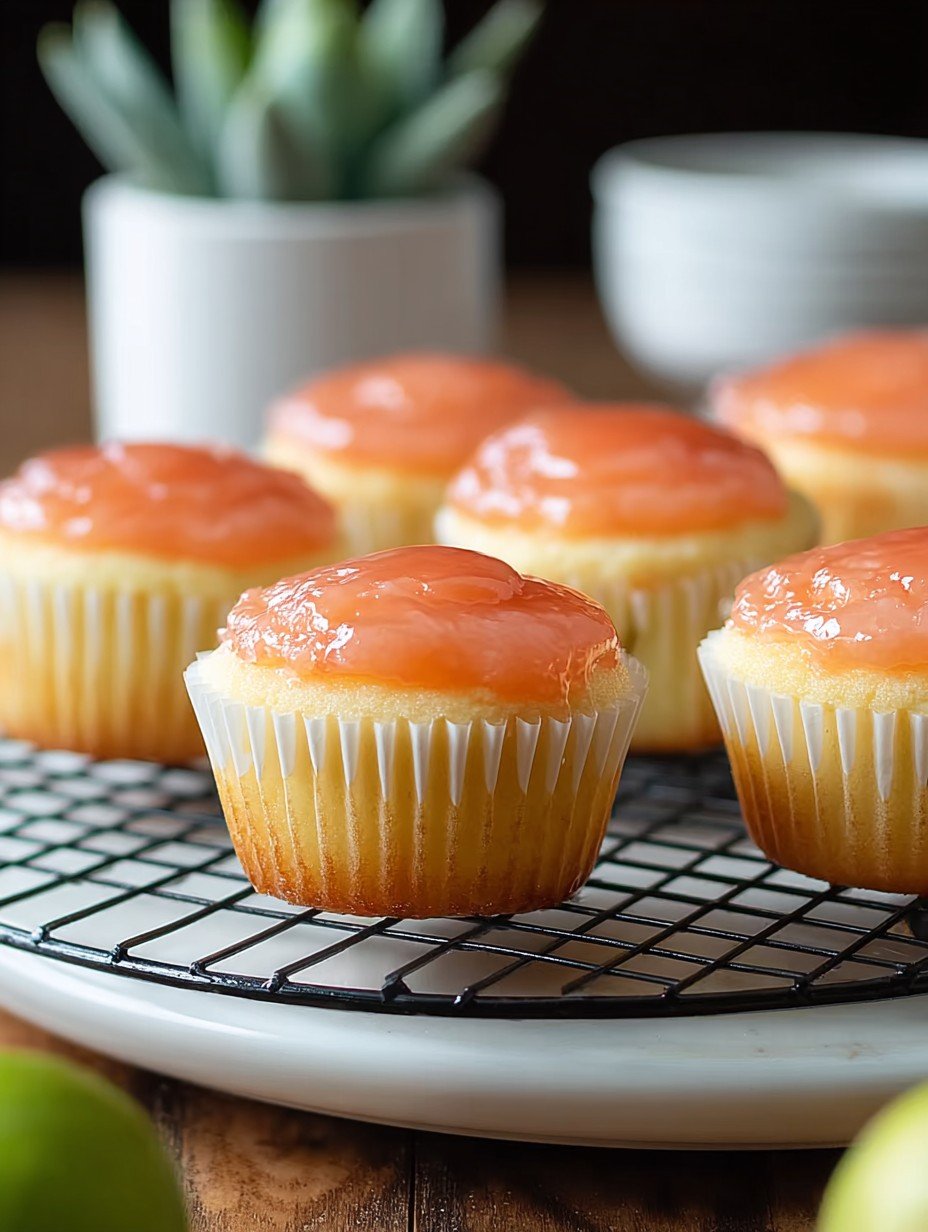
You are about to discover your new favorite dessert, one that makes baking feel less like a chore and more like a delightful adventure. This recipe for Hawaiian Guava Cupcakes is incredibly simple to follow, yielding consistently delicious results even for novice bakers. Beyond its ease, the unique tropical flavor profile, dominated by the fragrant guava and a hint of lime, sets these mini cakes apart from any ordinary sweet treat. Their vibrant appearance, with a glossy, colorful glaze, makes them absolutely stunning on any dessert table, transforming any occasion into a celebration. Plus, while they’re perfect as is, they offer subtle versatility, allowing for an extra touch of lime or a stronger guava essence based on your preference, making them truly your own tropical delight.
Ingredients
Here’s what you need for this delicious dish:
- **All-purpose flour** The fundamental building block for our tender cake crumb, providing structure and body to each mini cake.
- **Baking powder** This leavening agent ensures our cupcakes rise beautifully, creating that light and airy texture we all adore.
- **Salt** Just a pinch enhances all the other flavors, balancing the sweetness and making everything taste brighter.
- **Unsalted butter, softened** Crucial for a rich, moist crumb and helps achieve that wonderfully fluffy texture when creamed with sugar. Ensure it’s at room temperature for the best results.
- **Granulated sugar** Provides sweetness and helps create a tender crumb in the cake batter, essential for a delightful treat.
- **Large eggs** Bind the ingredients together, add richness, and contribute to the cake’s structure and moisture. Have them at room temperature for better emulsion.
- **Whole milk** Adds moisture and richness to the batter, contributing to a soft, delicate texture.
- **Vanilla extract** A classic flavor enhancer that complements the guava beautifully, adding warmth and depth to the mini cakes.
- **Lime zest (optional)** This tiny addition packs a bright, citrusy punch, elevating the “tropical treat” experience and offering a fragrant counterpoint to the sweet guava.
- **Guava nectar or puree** This is the star of our show, delivering the distinctive, sweet, and tangy essence that defines these Hawaiian Guava Cupcakes. Opt for a high-quality product for the most authentic flavor.
- **Powdered sugar** The base for our smooth, pourable glaze, dissolving easily to create that appealing, glossy finish.
- **Fresh lime juice (optional)** A splash of this adds a zesty brightness to the guava glaze, cutting through the sweetness and enhancing the overall tropical flavor profile.
The complete ingredient list, including quantities, can be found directly under the recipe card.
Unlocking Tropical Bliss: The Art of Hawaiian Guava Cupcakes
Baking is more than just following steps; it’s about crafting moments, infusing love, and sometimes, letting your inner chef dance to a tropical beat. These Hawaiian Guava Cupcakes are precisely that – a mini celebration in every bite. They’re a reminder that even on the busiest days, you can whisk yourself away to a sun-drenched paradise, one perfectly glazed treat at a time. The simple, practical approach of this recipe makes it accessible for anyone eager to bring a little aloha spirit into their home.
Creating these delightful mini cakes is surprisingly straightforward. Think of it as a guided tour to deliciousness, where each step builds towards a spectacular tropical treat. Whether you’re a seasoned baker or just starting your culinary journey, these instructions are designed to lead you to success. You’ll be preheating the oven and lining your muffin tin, the anticipation building for the aromatic magic about to unfold. The careful creaming of butter and sugar ensures a light foundation, while the alternating addition of wet and dry ingredients promises a perfectly balanced batter.
The distinct flavor of the guava is what truly makes these Hawaiian Guava Cupcakes shine. It’s a taste that transports you, evoking images of lush landscapes and gentle ocean breezes. The optional addition of lime zest and fresh lime juice doesn’t just add a touch of brightness; it amplifies the natural fruitiness of the guava, creating a harmonious blend that’s both invigorating and comforting. This careful balance of flavors is key to achieving that authentic tropical experience.
Getting Started: Preparing Your Baking Haven
Before any serious baking adventure begins, a little preparation goes a long way. First things first, preheat your oven to 350°F (175°C), ensuring it’s perfectly warmed and ready to embrace our beautiful mini cakes. Next, line a standard 12-cup muffin tin with paper liners. This simple step not only makes for easy cleanup but also gives our cupcakes that professional, grab-and-go appeal. In a medium bowl, take a moment to whisk together your all-purpose flour, baking powder, and salt. This ensures all the dry ingredients are evenly distributed, leading to a consistently textured cake. Set this mixture aside for now; it will join the party soon.
Crafting the Cake Batter: A Blend of Sunshine
Now, let’s bring the wet ingredients to life, forming the heart of our Hawaiian Guava Cupcakes. In a large bowl, using an electric mixer, combine the softened unsalted butter and granulated sugar. Beat them together until the mixture transforms into a light and fluffy cloud – this aeration is crucial for a tender crumb. Next, incorporate the large eggs one at a time, ensuring each egg is fully absorbed into the mixture before adding the next. This methodical approach ensures a smooth, well-emulsified batter. Finally, stir in the vanilla extract, and if you’re leaning into that extra tropical zing, add the lime zest here. The aroma alone is enough to get your taste buds tingling!
Assembling and Baking Your Tropical Treasures
The moment of truth arrives as we bring our wet and dry elements together. Gradually add the dry ingredients to your wet mixture, alternating with the whole milk. Remember to start and end with the dry ingredients. Mix until everything is just combined, being careful not to overmix, as that can lead to tough cupcakes. Once your batter is ready, divide it evenly among the prepared muffin cups, filling each about two-thirds full. They need space to rise and become those perfect tropical treats. Pop them into your preheated oven and bake for 18-22 minutes, or until a wooden skewer inserted into the center of a cake comes out clean. This indicates they are baked through and ready for their next transformation.
The Guava Glaze: A Sweet, Tangy Crown
While your mini cakes cool, it’s time to prepare their vibrant crown – the guava glaze. This glossy topping is what truly elevates these Hawaiian Guava Cupcakes. In a small bowl, whisk together the guava nectar or puree, powdered sugar, and if using, the fresh lime juice. Keep whisking until the mixture is beautifully smooth and boasts a pourable consistency. If you find it too thick, a tiny splash more guava nectar will thin it out; if it’s too thin, a bit more powdered sugar will thicken it. This step is all about achieving that perfect balance between sweetness and a delightful tang, complementing the cake below.
The Finishing Touch: Glazing and Serving
Patience is a virtue, especially when it comes to glazing. It’s absolutely crucial that your mini cakes are completely cool before you even think about applying the glaze. Warm cakes will cause the glaze to melt into a runny mess, rather than set into that beautiful, glossy finish we’re aiming for. Once your Hawaiian Guava Cupcakes have reached room temperature, spoon or pour the guava glaze generously over the top of each one, allowing it to drip slightly down the sides for a rustic, appealing look. Let the glaze set for a bit, giving it time to firm up and create a lovely protective shell of tropical flavor. For an even stronger guava flavor, consider using a high-quality guava paste melted with a small amount of water or nectar for the glaze. Store these mini cakes in an airtight container at room temperature for up to 3 days to maintain freshness. Creating a slight indentation in the center of the cooled cakes before glazing can also help the glaze pool beautifully, as often seen in traditional guava cakes. Serve these delightful treats and watch them disappear!
Frequently Asked Questions About These Guava Mini Cakes
You might have a few questions bubbling up as you prepare these luscious treats. Let’s tackle some common curiosities to ensure your baking journey is as smooth as our guava glaze.
Can I make these cupcakes ahead of time?
Absolutely! These mini cakes are perfect for making in advance. You can bake the cakes a day or two before your event and store them in an airtight container at room temperature. Prepare the glaze just before you plan to serve, or you can even glaze them the day before and let the glaze set completely. The notes suggest storing them in an airtight container at room temperature for up to 3 days to maintain their freshness, making them excellent for meal prep or party planning.
What if I can’t find guava nectar?
While guava nectar or puree is key to the authentic flavor of these Hawaiian Guava Cupcakes, if you’re in a pinch, you might find guava paste. As mentioned in the recipe notes, for an even stronger guava flavor, consider using a high-quality guava paste melted with a small amount of water or nectar for the glaze. For the cake batter, you might explore other tropical fruit purees, though the flavor profile will, of course, shift from the original guava essence. Look for specialty stores or international aisles in larger supermarkets for guava products.
How do I get a perfectly smooth glaze?
The secret to a smooth, pourable guava glaze lies in diligent whisking and proper ingredient ratios. Ensure your powdered sugar is sifted if it’s lumpy. When whisking together the guava nectar or puree, powdered sugar, and lime juice (if using), start with the suggested quantities and adjust slowly. If the glaze is too thick, add a tiny bit more guava nectar or puree, a quarter teaspoon at a time. If it’s too thin, incorporate a little more powdered sugar until you reach your desired consistency. The goal is a glaze that coats the back of a spoon and pours easily but isn’t watery.
Can I freeze these mini cakes?
Yes, you can! To freeze the unglazed mini cakes, ensure they are completely cool. Wrap each cupcake individually in plastic wrap, then place them in a freezer-safe airtight container or bag for up to 2-3 months. Thaw them at room temperature before glazing and serving. If you’ve already glazed them, freezing is still possible, but the glaze might become slightly sticky or change texture upon thawing. It’s generally best to glaze after thawing for the freshest results.
Final Thoughts on Your Tropical Baking Adventure
Baking these Hawaiian Guava Cupcakes: A Tropical Treat isn’t just about mixing ingredients; it’s about infusing a little bit of island sunshine into your day. Each bite is a testament to simple ingredients coming together to create something truly extraordinary. Whether you’re making them for a special occasion or just to brighten an ordinary afternoon, the tender crumb and vibrant guava glaze are sure to bring smiles. So go ahead, whisk, bake, and enjoy your very own slice of paradise. You’ve earned this delicious escape!
Recipe Card
**Yields: ** 12 mini cakes
**Prep time: ** 20 minutes
**Bake time: ** 18-22 minutes
Ingredients
**For the Mini Cakes: **
- 1 1/2 cups all-purpose flour
- 1 teaspoon baking powder
- 1/4 teaspoon salt
- 1/2 cup unsalted butter, softened
- 1 cup granulated sugar
- 2 large eggs
- 1/2 cup whole milk
- 1 teaspoon vanilla extract
- 1 tablespoon lime zest (optional)
**For the Guava Glaze: **
- 1/2 cup guava nectar or puree
- 2 cups powdered sugar
- 1 tablespoon fresh lime juice (optional)
Instructions
1. Preheat your oven to 350°F (175°C). Line a 12-cup muffin tin with paper liners.
2. In a medium bowl, whisk together the all-purpose flour, baking powder, and salt. Set aside.
3. In a large bowl, using an electric mixer, cream together the softened unsalted butter and granulated sugar until the mixture is light and fluffy.
4. Beat in the eggs one at a time, ensuring each is fully incorporated before adding the next. Stir in the vanilla extract and lime zest, if using.
5. Gradually add the dry ingredients to the wet ingredients, alternating with the milk, beginning and ending with the dry ingredients. Mix until just combined, being careful not to overmix the batter.
6. Divide the batter evenly among the prepared muffin cups, filling each about two-thirds full.
7. Bake for 18-22 minutes, or until a wooden skewer inserted into the center of a cake comes out clean.
8. Remove the cakes from the oven and let them cool in the muffin tin for a few minutes before transferring them to a wire rack to cool completely.
9. While the cakes cool, prepare the guava glaze. In a small bowl, whisk together the guava nectar or puree, powdered sugar, and lime juice (if using) until the mixture is smooth and pourable. Adjust consistency by adding a little more powdered sugar for a thicker glaze or a tiny bit more guava nectar for a thinner glaze.
10. Once the cakes are completely cool, spoon or pour the guava glaze over the top of each mini cake, allowing it to drip slightly down the sides. Let the glaze set before serving.
Notes
- Ensure the mini cakes are completely cool before applying the glaze to prevent it from melting.
- For an even stronger guava flavor, consider using a high-quality guava paste melted with a small amount of water or nectar for the glaze.
- Store these mini cakes in an airtight container at room temperature for up to 3 days to maintain freshness.
- Creating a slight indentation in the center of the cooled cakes before glazing can help the glaze pool beautifully, as often seen in traditional guava cakes.
Nutrition Information (per mini cake)
- **Calories:** 250
- **Protein:** 3g
- **Carbs:** 45g
- **Fat:** 8g
Perfecting the Cooking Process
For truly perfect Hawaiian Guava Cupcakes, begin by thoroughly creaming your softened unsalted butter and granulated sugar until light and fluffy. Alternate adding dry ingredients with whole milk to prevent overmixing, ensuring a tender crumb. Crucially, let these delightful mini cakes cool entirely on a wire rack before applying that glorious guava glaze for optimal setting.
Add Your Personal Touch
Personalize your mini cakes with ease! For a richer crumb, swap whole milk for an equal amount of coconut milk. Alternatively, consider using orange zest and juice instead of lime in both the cake and the luminous guava glaze for a different citrus note.
Storage & Reheating
To preserve the tender crumb and glossy finish of these mini cakes, store them in an airtight container at room temperature. They will stay perfectly fresh for up to 3 days. Always ensure the vibrant guava glaze is completely set before packing to maintain its smooth, inviting texture.
Helpful Chef Tips
I once brought these Hawaiian Guava Cupcakes: A Tropical Treat to a potluck, and they vanished in minutes! Watching everyone’s faces light up with each bite was truly unforgettable; pure sunshine in a tiny cake.
Final Thoughts
So there you have it – a delightful escape to paradise in every bite. These delightful mini cakes, truly a tropical treat, bring together a tender crumb with vibrant, sweet-tangy guava notes. They are not just visually appealing with their glossy glaze, but also incredibly satisfying. Imagine the aroma filling your kitchen! Picture the joy of sharing these perfectly portioned delights. Don’t just dream of the islands; bake your own slice of heaven. Try making these individual treats today. Let your taste buds embark on an unforgettable tropical journey!
Print
Hawaiian Guava Cupcakes: A Tropical Treat
- Total Time: 40 minutes
- Yield: 12 mini cakes 1x
Description
These delightful mini cakes offer a taste of the tropics with their tender crumb and vibrant guava glaze. Each bite delivers a delicate balance of sweet and tangy notes, characteristic of ripe guava, complemented by the moist cake base. Baked to a golden perfection, these individual treats are finished with a smooth, glossy topping that adds both flavor and an appealing visual.
Ingredients
- For the Mini Cakes:
- 1 1/2 cups all-purpose flour
- 1 teaspoon baking powder
- 1/4 teaspoon salt
- 1/2 cup unsalted butter, softened
- 1 cup granulated sugar
- 2 large eggs
- 1/2 cup whole milk
- 1 teaspoon vanilla extract
- 1 tablespoon lime zest (optional)
- For the Guava Glaze:
- 1/2 cup guava nectar or puree
- 2 cups powdered sugar
- 1 tablespoon fresh lime juice (optional)
Instructions
- Preheat your oven to 350°F (175°C). Line a 12-cup muffin tin with paper liners.
- In a medium bowl, whisk together the all-purpose flour, baking powder, and salt. Set aside.
- In a large bowl, using an electric mixer, cream together the softened unsalted butter and granulated sugar until the mixture is light and fluffy.
- Beat in the eggs one at a time, ensuring each is fully incorporated before adding the next. Stir in the vanilla extract and lime zest, if using.
- Gradually add the dry ingredients to the wet ingredients, alternating with the milk, beginning and ending with the dry ingredients. Mix until just combined, being careful not to overmix the batter.
- Divide the batter evenly among the prepared muffin cups, filling each about two-thirds full.
- Bake for 18-22 minutes, or until a wooden skewer inserted into the center of a cake comes out clean.
- Remove the cakes from the oven and let them cool in the muffin tin for a few minutes before transferring them to a wire rack to cool completely.
- While the cakes cool, prepare the guava glaze. In a small bowl, whisk together the guava nectar or puree, powdered sugar, and lime juice (if using) until the mixture is smooth and pourable. Adjust consistency by adding a little more powdered sugar for a thicker glaze or a tiny bit more guava nectar for a thinner glaze.
- Once the cakes are completely cool, spoon or pour the guava glaze over the top of each mini cake, allowing it to drip slightly down the sides. Let the glaze set before serving.
Notes
Ensure the mini cakes are completely cool before applying the glaze to prevent it from melting.
For an even stronger guava flavor, consider using a high-quality guava paste melted with a small amount of water or nectar for the glaze.
Store these mini cakes in an airtight container at room temperature for up to 3 days to maintain freshness.
Creating a slight indentation in the center of the cooled cakes before glazing can help the glaze pool beautifully, as often seen in traditional guava cakes.
- Prep Time: 20 minutes
- Cook Time: 20 minutes
Nutrition
- Calories: 250
- Fat: 8g
- Carbohydrates: 45g
- Protein: 3g
FAQs
Why is it important to cool the mini cakes completely before glazing?
Ensuring your mini cakes are completely cool before applying the guava glaze is a crucial step for the best results. The recipe specifically advises this to prevent the glaze from melting. If the cakes are still warm, their heat will cause the delicate glaze to thin out. It will run off the sides excessively and may not set properly. This could result in a messy presentation and a less effective coating. Allowing them to cool fully on a wire rack ensures the glaze adheres beautifully. It will set to a smooth, glossy finish, as intended for these delightful tropical treats.
Can I omit the lime zest and fresh lime juice from this recipe?
Yes, you can certainly omit both the lime zest in the cake batter and the fresh lime juice in the guava glaze. The recipe lists these as optional ingredients. The lime components are included to add a subtle, bright, zesty counterpoint. This particularly enhances the tropical flavors and the sweetness of the guava. If you prefer a simpler, purely sweet guava profile, feel free to leave them out. You can also omit them if you do not have fresh limes available. The cakes will still be delicious and moist, maintaining their delightful tropical essence.
How can I adjust the consistency of the guava glaze?
Adjusting the consistency of your guava glaze is quite straightforward, as the recipe’s instructions outline. After whisking together the guava nectar, powdered sugar, and lime juice (if using), you can easily modify it. If the glaze is too thin and watery, gradually whisk in a little more powdered sugar. Continue until it reaches your desired pourable thickness. Conversely, if the glaze seems too thick and difficult to pour, add a tiny bit more guava nectar. Do this until it becomes smooth and more fluid. This flexibility ensures your glaze will perfectly coat each mini cake.
What is the best way to store these Hawaiian Guava Cupcakes?
To maintain the freshness and delightful texture of your mini cakes, the recipe recommends storing them in an airtight container. Keep the container at room temperature. They will stay fresh for up to 3 days. This method helps preserve their tender crumb and prevents the glaze from drying out or becoming sticky. Ensure you store them away from direct sunlight or excessive heat. Proper storage allows you to enjoy these vibrant tropical treats over several days. This makes them perfect for preparing a little in advance.