Imagine sinking your teeth into a cloud of tender sweetness, its golden hue promising warmth, a delicate crust giving way to a creamy, melt-in-your-mouth interior. These charming Japanese sweet potato delights are a whisper of comfort in every single bite.
My own sweet potato saga began one blustery afternoon when I desperately craved something wholesome yet utterly indulgent; thankfully, these unassuming tubers came to the rescue, transforming my kitchen into a cozy bakery with minimal fuss.
Reasons Why You’ll Love This Recipe
You are about to fall head over heels for these wonderful treats! Their preparation is surprisingly easy, making them perfect for even the busiest home cook looking for a rewarding project. The flavor profile is truly unique, offering a natural, comforting sweetness from the Japanese sweet potatoes, beautifully complemented by the subtle nutty notes of black sesame seeds. Visually, they are absolutely stunning, boasting a gorgeous golden-brown exterior and charming individual shapes that will impress anyone you share them with. Plus, their versatility shines through as they make an ideal snack, a light dessert, or a delightful addition to any brunch spread.
Ingredients
Here’s what you need for this delicious dish:
- **Japanese Sweet Potatoes** Select firm, blemish-free sweet potatoes, as they are the star of these delightful golden Japanese sweet potato baked treats. Their inherent sweetness and creamy texture are what give these buns their signature flavor and substantial body.
- **Unsalted Butter** Use softened unsalted butter to ensure it blends seamlessly into the mashed sweet potato mixture, contributing a rich, smooth consistency and a touch of indulgent flavor without adding extra salt.
- **Granulated Sugar** This helps to enhance the natural sweetness of the Japanese sweet potatoes, creating a perfectly balanced flavor profile. Adjusting the amount to your taste is easy, based on the natural sweetness of your chosen potatoes.
- **Egg Yolks** We use two egg yolks: one to enrich the sweet potato mixture, adding moisture and binding qualities, and the remaining yolk, whisked with water, creates the beautiful “golden” egg wash that gives these treats their inviting color and sheen.
- **Salt** Just a pinch of salt is crucial here; it helps to balance the sweetness and brings out the full, vibrant flavor of the sweet potatoes, elevating the overall taste of your baked treats.
- **Milk** Gradually add milk, one tablespoon at a time, to achieve the perfect soft and pliable consistency for shaping the buns. It ensures the mixture isn’t too dry or too sticky, making it wonderfully easy to work with.
- **Black Sesame Seeds** These tiny powerhouses are sprinkled on top before baking, providing a lovely visual contrast, a delicate crunch, and a subtle, earthy, nutty flavor that beautifully complements the sweet potato.
- **Water** A small amount of water is whisked with one of the egg yolks to create a smooth, easy-to-brush egg wash, which is responsible for the glorious golden-brown finish of your baked treats.
All ingredients with their exact quantities can be found in the recipe card below.
The Allure of Golden Japanese Sweet Potato Baked Treats
There’s something truly magical about Japanese sweet potatoes. Unlike their orange-fleshed counterparts, these beauties boast a paler skin and a distinctive, often purplish, interior that transforms into a wonderfully vibrant yellow upon cooking. But it’s their flavor that truly captivates: a deep, almost caramelized sweetness that needs little embellishment. These golden Japanese sweet potato baked treats celebrate that natural elegance, transforming humble ingredients into something truly extraordinary.
I remember the first time I introduced these to my niece. She’s usually a tough critic, preferring anything dipped in chocolate or smothered in sprinkles. I watched nervously as she took a bite, her brow furrowed in concentration. Then, a slow smile spread across her face. “It’s like sunshine in a bun!” she declared. Mission accomplished. That’s the power of these treats; they appeal to everyone, bridging the gap between wholesome and utterly delicious. They are simply comforting, a warm hug on a plate, ready to brighten any day.
From Humble Tuber to Heavenly Treat: A Culinary Journey
Crafting these delightful golden Japanese sweet potato baked treats isn’t just about following a recipe; it’s about appreciating the transformation. You take a simple, earthy vegetable and, with a little love and a few pantry staples, turn it into a show-stopping delicacy. It’s a journey that speaks to the heart of home cooking – creating something wonderful from basic components. Think of it as your culinary superpower, turning everyday items into extraordinary bites.
This recipe is incredibly forgiving, allowing you to focus on the joy of creation rather than stressing over complex techniques. It’s perfect for those moments when you want to bake something satisfying without spending hours in the kitchen. Whether you are an experienced baker or just starting your culinary adventures, these sweet potato buns will quickly become a cherished favorite in your repertoire. The subtle sweetness, creamy texture, and inviting golden crust make them irresistible.
Step-by-Step Instructions
Here’s a simple guide to help you prepare this delicious recipe:
Step 1: Preparing Your Sweet Potatoes for Perfection
Begin by thoroughly washing your Japanese sweet potatoes. You can steam them whole until they are very tender, which typically takes about 20-30 minutes, or opt to bake them at 200°C (400°F) for 45-60 minutes until they can be easily pierced with a fork. Ensure they are fully cooked to achieve the best texture for your golden Japanese sweet potato baked treats.
Step 2: Mashing for a Smooth Foundation
Once your sweet potatoes are cooked, carefully peel them while they are still warm. Transfer the tender flesh to a large mixing bowl and mash it thoroughly until it is completely smooth. For an exceptionally fine and creamy texture, you might want to push the mashed sweet potato through a potato ricer or a fine-mesh sieve.
Step 3: Bringing the Flavors Together
Add the softened unsalted butter, granulated sugar, one egg yolk, and a pinch of salt to your mashed sweet potatoes. Mix these ingredients very well until everything is fully incorporated and the mixture looks smooth and consistent. Now, gradually add milk, one tablespoon at a time, mixing thoroughly after each addition until your sweet potato mixture reaches a soft, pliable consistency that is easy to shape by hand.
Step 4: Shaping Your Charming Buns
Divide the sweet potato mixture into 8-10 equal portions. Take each portion and gently shape it into an appealing oval or round bun. Carefully place these shaped buns onto a baking sheet that has been lined with parchment paper, or alternatively, you can use individual foil baking cups if you prefer.
Step 5: The Golden Egg Wash and Sesame Sprinkle
In a small separate bowl, whisk the remaining egg yolk together with 1 teaspoon of water to create your shimmering egg wash. Using a pastry brush, generously brush the tops of each sweet potato bun with this egg wash. Immediately after, sprinkle black sesame seeds evenly over the tops of all the buns for a delightful visual and textural contrast.
Step 6: Baking to Golden Perfection
Preheat your oven to 180°C (350°F). Once heated, place your baking sheet with the prepared sweet potato buns into the oven. Bake them for 15-20 minutes, or until the tops have achieved a beautifully rich golden-brown color, indicating they are perfectly cooked and ready.
Step 7: Serving Your Sweet Potato Delights
Allow the golden Japanese sweet potato baked treats to cool slightly on the baking sheet before moving them. They are wonderfully delicious when served warm, or you can enjoy them at room temperature. Garnish with a few extra sesame seeds if desired and savor the comforting sweetness!
Beyond the Plate: Storage and Variations for Your Treats
One of the great things about these golden Japanese sweet potato baked treats is their versatility and how well they keep. If you happen to have any leftovers – a rare occurrence in my house – simply store them in an airtight container at room temperature for up to two days. For longer freshness, pop them in the refrigerator, where they will stay delightful for up to four days. A quick reheat in the microwave or oven can bring them back to their initial warmth and tenderness.
For those who enjoy a little extra aromatic flair, a small amount of vanilla extract, perhaps half a teaspoon, can be added to the sweet potato mixture in Step 3 for an enhanced flavor profile. This simple addition can subtly deepen the overall richness, making these already irresistible treats even more compelling. Experimenting with these small tweaks ensures your kitchen creations are always tailored perfectly to your taste.
Why Japanese Sweet Potatoes Are Your New Best Friend
Japanese sweet potatoes are more than just delicious; they are incredibly versatile and packed with natural goodness. Their inherent sweetness means you don’t need to add much sugar, keeping these baked treats on the healthier side without sacrificing flavor. They provide a wonderful source of fiber and vitamins, making these golden Japanese sweet potato baked treats a treat you can feel good about enjoying. Imagine indulging in something so comforting and delicious, knowing it’s also nourishing your body.
Their unique texture, once mashed, creates a wonderfully smooth and pliable dough, making the shaping process an absolute breeze. This ease of handling is a major win for busy home cooks who want impressive results without the hassle. Whether you are whipping up a batch for an afternoon snack, a light dessert, or even a unique breakfast pastry, these sweet potato buns fit the bill perfectly. They offer a delightful departure from typical baked goods, bringing an exotic touch to your table with familiar comfort.
The Golden Glow: A Visual Feast
Let’s talk about that “golden” aspect of our golden Japanese sweet potato baked treats. It’s not just a descriptor; it’s a promise of the delightful experience awaiting you. The beautiful golden-brown crust, achieved through that simple egg wash and careful baking, is truly captivating. It signals warmth, flavor, and a perfectly cooked interior. This visual appeal is what makes these treats so inviting, instantly drawing in anyone who catches a glimpse of them.
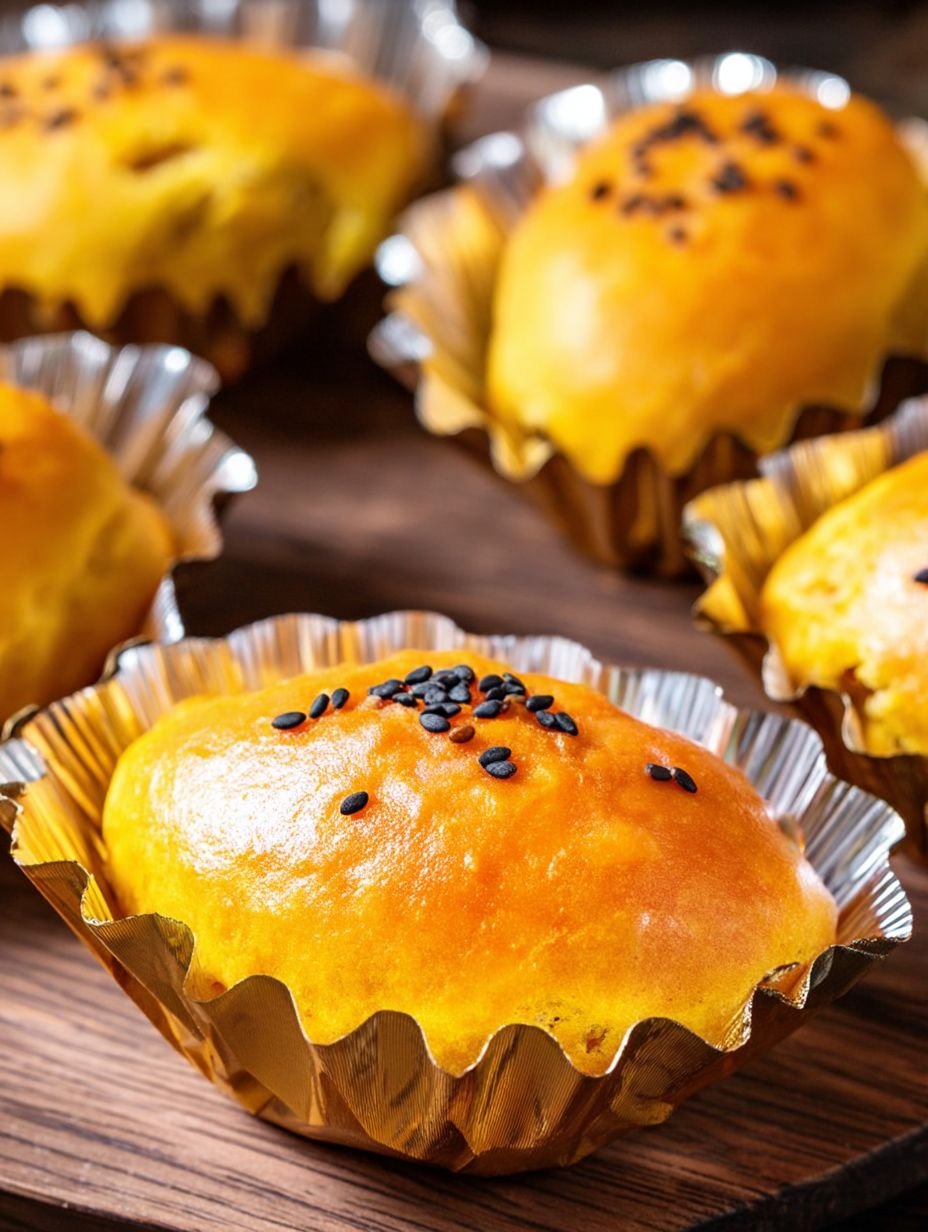
There’s a real satisfaction in pulling a tray of these perfectly golden buns from the oven. The aroma alone is enough to get stomachs rumbling, but the sight of their uniformly browned tops, dotted with black sesame seeds, is simply irresistible. They are rustic yet elegant, humble yet luxurious. It’s this balance that makes them so special, a true testament to the beauty of simple ingredients coming together to create something spectacular.
So, go ahead and embark on this delicious adventure. Your taste buds and your loved ones will thank you for bringing these incredible golden Japanese sweet potato baked treats into your life.
**Servings: ** 8-10 buns
**NUTRITION (per bun, based on 10 buns): **
Calories: 180 kcal
Protein: 3g
Carbs: 30g
Fat: 6g
Improving the Cooking Method
Achieving delightful sweet potato buns starts with method. Steaming sweet potatoes yields more moisture for mashing; baking them concentrates their natural sugars for richer flavor. Always mash the cooked potatoes thoroughly while still warm to prevent any lumps. Gradually adding milk allows precise control for that perfect pliable consistency.
Decorate Your Dish with Your Personal Touch
To personalize your golden Japanese sweet potato baked treats, customize the topping. Instead of black sesame seeds, consider white sesame seeds for a contrasting look or omit them entirely. You can also create fun patterns on the buns with the egg wash before baking, making each treat uniquely charming and appealing.
Smart Tips for Storage and Reheating
To preserve the delightful softness and creamy texture of these sweet potato buns, store them in an airtight container. They remain delicious at room temperature for up to two days, or refrigerated for up to four. Gently warm in the microwave for a minute to restore that fresh-baked warmth.
Practical Chef Advice

I remember once making a double batch of these golden Japanese sweet potato baked treats for a potluck; they vanished so fast, I barely got one! The joy of seeing everyone adore these soft, sweet treats made all the effort worthwhile.
Final Thoughts
These Japanese sweet potato buns are more than just a recipe; they are an invitation to a moment of comforting delight. With their natural sweetness, incredibly creamy texture, and inviting golden hue, these treats promise a truly satisfying experience. The subtle hint of black sesame adds an extra layer of flavor that complements the sweet potato beautifully. Imagine the aroma filling your kitchen as they bake, followed by that first tender bite. Don’t just read about this exquisite creation; gather your ingredients and let the warmth of these Golden Japanese Sweet Potato Baked Treats fill your home today.
Print
Golden Japanese Sweet Potato Baked Treats
- Total Time: 1 hour 5 minutes
- Yield: 8-10 buns 1x
Description
These Japanese Sweet Potato Buns offer a delightful balance of natural sweetness and creamy texture. Made from tender Japanese sweet potatoes, mashed and enriched with butter, a touch of sugar, and milk, they are shaped into charming individual portions. A delicate egg wash provides a golden sheen, while a sprinkle of black sesame seeds adds a subtle nutty flavor and visual appeal. Baked until lightly browned, these buns present a comforting and subtly sweet treat, perfect for a snack or light dessert.
Ingredients
- Japanische Süßkartoffeln (Menge nicht angegeben)
- Ungesalzene Butter (Menge nicht angegeben), weich
- Granulierter Zucker (Menge nicht angegeben)
- 2 Eigelb
- Eine Prise Salz
- Milch, esslöffelweise (nach Bedarf)
- Schwarzer Sesam (Menge nicht angegeben), zum Bestreuen
- 1 Teelöffel Wasser
Instructions
- **Prepare Sweet Potatoes:** Wash the Japanese sweet potatoes thoroughly. Steam them whole until very tender, about 20-30 minutes, or bake them at 200°C (400°F) for 45-60 minutes until easily pierced with a fork.
- **Mash:** Once cooked, peel the sweet potatoes while still warm. Transfer the flesh to a large bowl and mash thoroughly until smooth. For an extra fine texture, pass the mashed sweet potato through a potato ricer or fine-mesh sieve.
- **Combine Ingredients:** Add the softened unsalted butter, granulated sugar, 1 egg yolk, and a pinch of salt to the mashed sweet potatoes. Mix well until all ingredients are fully incorporated and the mixture is smooth. Gradually add milk, 1 tablespoon at a time, until the mixture reaches a soft, pliable consistency that can be easily shaped.
- **Shape Buns:** Divide the sweet potato mixture into 8-10 equal portions. Shape each portion into an oval or round bun. Place them on a baking sheet lined with parchment paper or in individual foil baking cups.
- **Egg Wash and Bake:** In a small bowl, whisk the remaining egg yolk with 1 teaspoon of water to create an egg wash. Brush the tops of each sweet potato bun with the egg wash. Sprinkle black sesame seeds evenly over the tops.
- **Bake:** Preheat your oven to 180°C (350°F). Bake for 15-20 minutes, or until the tops are beautifully golden brown.
- **Serve:** Allow the sweet potato buns to cool slightly before serving. They are delicious warm or at room temperature.
Notes
For an even smoother texture, ensure the sweet potatoes are mashed thoroughly while still warm.
Adjust the amount of sugar based on the natural sweetness of your sweet potatoes and personal preference.
These buns can be stored in an airtight container at room temperature for up to 2 days, or refrigerated for up to 4 days.
A small amount of vanilla extract (1/2 teaspoon) can be added to the sweet potato mixture for an enhanced flavor profile.
- Prep Time: 25 minutes
- Cook Time: 40 minutes
Nutrition
- Calories: 180 kcal
- Fat: 6g
- Carbohydrates: 30g
- Protein: 3g
FAQs
How should I prepare the Japanese sweet potatoes for the best texture in these buns?
For optimal texture, you have two excellent options detailed in the recipe. You can steam the Japanese sweet potatoes whole for about 20-30 minutes until they are very tender. Alternatively, you can bake them at 200°C (400°F) for 45-60 minutes, ensuring they are easily pierced with a fork. The key is to make sure they are thoroughly cooked and soft. Peeling them while still warm and mashing them immediately afterward also contributes significantly to achieving that wonderfully smooth, creamy consistency vital for these sweet potato treats.
What’s the best way to achieve a really smooth texture for the sweet potato mixture?
Achieving a silky-smooth texture is crucial for these delightful treats. After cooking, peel the Japanese sweet potatoes while they are still warm, then transfer the flesh to a large bowl and mash thoroughly. For an exceptionally fine and consistent texture, the recipe specifically recommends passing the mashed sweet potato through a potato ricer or a fine-mesh sieve. This extra step helps eliminate any lumps, ensuring your buns have that desired creamy mouthfeel. Remember to mix well with the butter, sugar, egg yolk, and milk until fully incorporated and smooth.
Can I prepare these sweet potato treats ahead of time, and how should I store them?
Yes, these delicious Japanese sweet potato buns are excellent for preparing in advance! The recipe notes provide clear guidance on storage. You can keep them in an airtight container at room temperature for up to two days. If you need to store them for a longer period, they will last wonderfully in the refrigerator for up to four days. This makes them a perfect make-ahead snack or light dessert for busy schedules or entertaining. Just allow them to come to room temperature or gently warm them before serving for the best experience.
How can I adjust the sweetness of these delightful Japanese sweet potato buns?
The natural sweetness of Japanese sweet potatoes varies, so the recipe includes a helpful note about adjusting the sugar content to suit your taste. When combining the ingredients, you add granulated sugar to the mashed sweet potatoes. You can slightly reduce or increase the amount of sugar specified in the recipe based on how sweet your particular batch of sweet potatoes tastes and your personal preference. Always taste a small portion of the mixture before shaping the buns, if comfortable, to ensure it meets your desired sweetness level for these enjoyable baked treats.
What temperature and duration are recommended for baking these sweet potato buns?
For perfectly golden Japanese sweet potato treats, preheating your oven is an essential first step. The recipe advises preheating your oven to 180°C (350°F). Once the oven reaches the correct temperature, bake the shaped buns for approximately 15 to 20 minutes. Keep a close eye on them during the final minutes, as you want their tops to achieve a beautiful, appealing golden-brown color. Baking them to this shade ensures they are cooked through and have a lovely caramelized exterior, making each bite even more delicious.