Oh, that first bite! Imagine a symphony of textures: a gloriously golden, audibly crunchy shell giving way to a tender, fluffy interior, each morsel subtly savory and begging for another. I swear these crispy rice bites take me straight back to my college days, attempting gourmet on a budget – turns out, cold rice and a hot pan were my culinary superpowers, leading to many a late-night feast.
Why You’ll Love This Recipe
This recipe for Simple Crispy Rice Bites: Your New Favorite Snack isn’t just food; it’s a revelation. You’ll adore how effortlessly these come together, transforming humble ingredients into something truly extraordinary with minimal fuss. Each bite offers a uniquely satisfying flavor profile, a delicate balance of savory notes elevated by the optional hint of sweetness. Visually, they’re a stunning golden-brown, a testament to their irresistible crunch, making them an elegant appetizer or a fun side dish. Plus, their incredible versatility means they’re the perfect canvas for your culinary imagination, adapting to any dipping sauce or flavor twist you dream up.
Ingredients
Here’s what you need for this delicious dish:
: The foundation for our crispy rice bites, day-old rice is key for its firm texture, which crisps beautifully when fried. Its reduced moisture content prevents mushiness, ensuring that coveted individual crunch.
: Essential for binding the rice together and creating that irresistible golden crust during frying. Choose a neutral oil so it doesn’t overpower the delicate rice flavor.
: This foundational seasoning elevates the savory profile, ensuring perfect flavor balance in every crispy rice bite. Don’t underestimate its power to bring out the best in the rice.
: A subtle addition that acts as a flavor enhancer, subtly rounding out the saltiness and assisting in achieving that beautiful golden crust during frying. It’s optional, but highly recommended for a more complex taste.
: These vibrant green flecks aren’t just for show! They add a fresh, pungent aromatic kick and a delightful contrast in color and flavor, cutting through the richness of the fried rice and making these golden rice snacks truly pop.
You’ll find the complete ingredient list with precise measurements and instructions further below, ready for your kitchen adventure.
Before we dive into the steps for these incredible simple crispy rice bites, know this: transforming humble leftover rice into a gourmet experience is surprisingly easy. It’s about creating maximum flavor and texture with minimal effort, proving that culinary magic often lies in simplicity. Get ready to discover your new favorite snack that will have everyone asking for your secret!
Step-by-Step Instructions
Follow these simple steps to prepare this delicious dish:
**Step 1: The Flavor Foundation**
In a large bowl, combine your cooked short-grain rice – remember, day-old is your best friend here for those truly crispy rice bites – with 1 tablespoon of neutral oil, the salt, and that optional touch of sugar for balance. Gently mix everything together until it’s well combined. We’re not mashing here; think tender persuasion to ensure every grain is coated with flavor and ready for its transformation into a savory treat. This initial mix sets the stage for a truly savory experience.
**Step 2: Shaping Perfection**
Grab a baking sheet and line it with parchment paper; this little trick will save you a lot of sticky situations later. Now, firmly press the seasoned rice mixture into a square or rectangular shape directly onto the parchment. Aim for a thickness of about 1/2 to 3/4 inch. You can be fancy with a mold or just use your hands – embrace the tactile joy of cooking! The key here is firmness; a well-pressed block means resilient rice bites that won’t crumble under pressure.
**Step 3: Chill Out, Bites!**
Once your rice block is perfectly formed, it’s time for a little beauty rest. Cut the pressed rice into individual bite-sized squares or rectangles. The size is up to you, but remember, we’re aiming for simple crispy rice bites, so manageable portions are key. Place these shaped wonders back onto the baking sheet and pop them into the refrigerator for at least 30 minutes. This chilling period is vital; it allows the rice to firm up properly, ensuring they hold their shape beautifully when they hit the hot skillet. Patience, my friend, is a virtue that pays off in crispiness!
**Step 4: Golden Sizzle Time**
Now for the main event! Heat 2-3 tablespoons of neutral oil in a large non-stick skillet over medium heat. You want the oil shimmering – a clear sign it’s ready to work its magic. Carefully, and I mean *carefully*, place the firmed-up rice bites into the hot skillet. Don’t overcrowd the pan; give them space to breathe and brown evenly. If you have too many, cook them in batches. This step is where the “crispy” in crispy rice bites truly comes to life.
**Step 5: The Flip and Finish**
Let those beautiful bites cook for 3-5 minutes per side, or until each side develops a gorgeous golden-brown hue and a satisfyingly crisp texture. Use a thin spatula to gently flip them over. Resist the urge to poke and prod too much; let them do their thing. The patience you showed in chilling will be rewarded with a perfect flip and even browning. Keep an eye on them; every stovetop is a little different, so adjust your heat if necessary to prevent burning.
**Step 6: Drain, Garnish, and Devour**
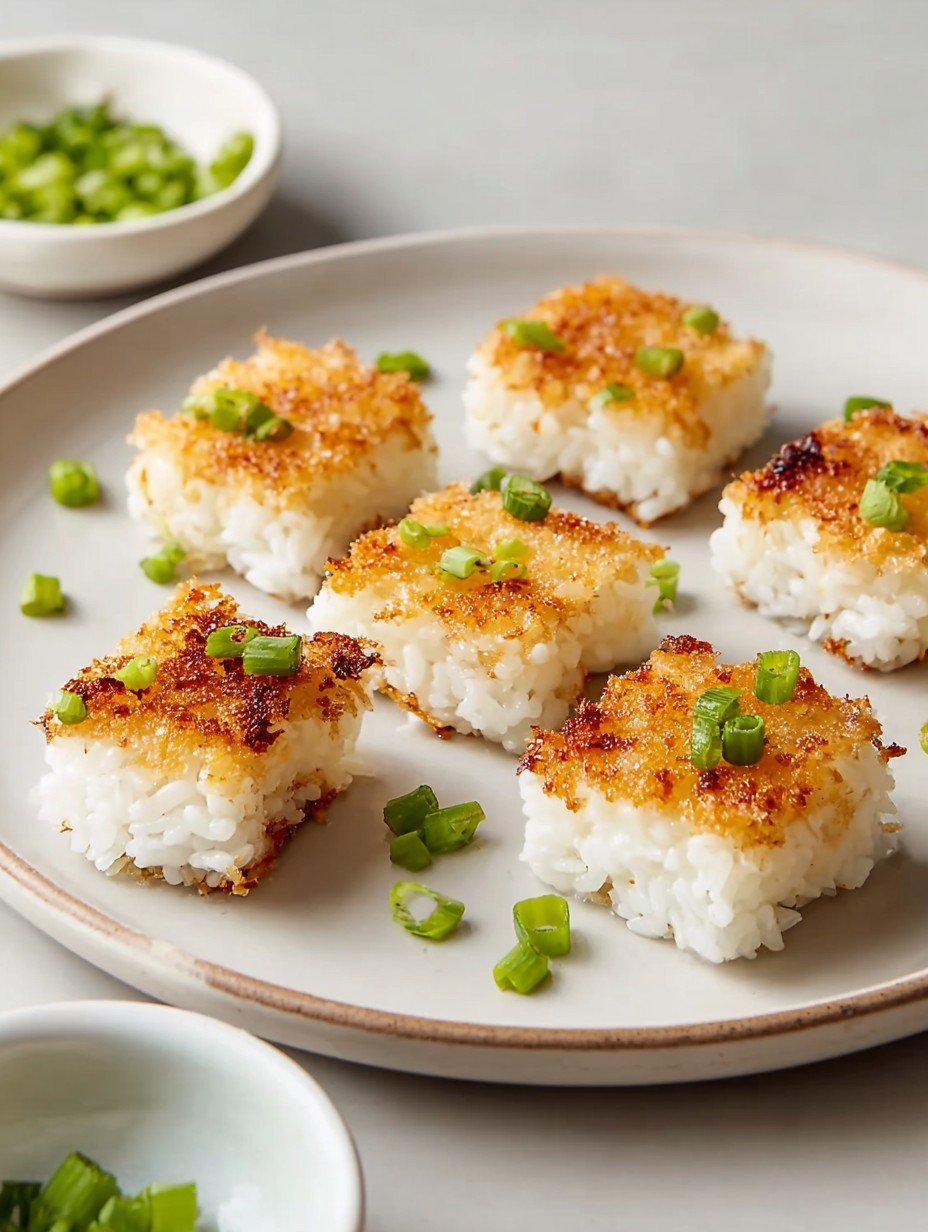
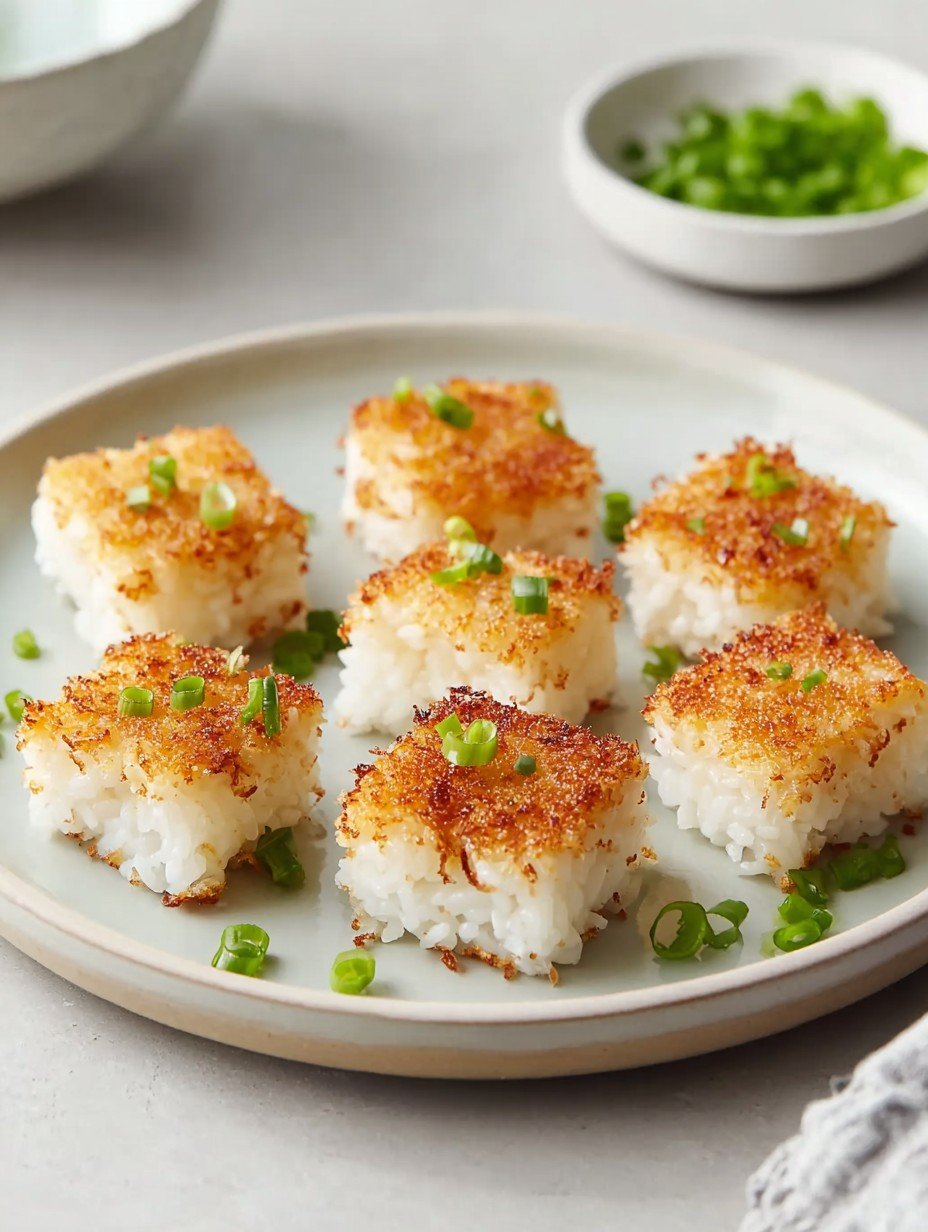
Once your golden rice snacks have achieved peak crispiness and color on all sides, transfer them to a plate lined with paper towels. This crucial step allows any excess oil to drain away, ensuring maximum crunch and preventing sogginess. Immediately after draining, shower your simple crispy rice bites with the fresh, vibrant chopped green onions. The heat of the rice will slightly warm the onions, releasing their aromatic charm. Serve them warm and prepare for a symphony of textures and flavors. These are truly your new favorite snack!
Expert Tips and Delicious Variations
To truly master these simple crispy rice bites, a few insights go a long way, ensuring every batch is a resounding success.
Maximizing Crispiness
The magic truly starts with day-old cooked short-grain rice. Its reduced moisture content is crucial for achieving that incredible, shatteringly crisp exterior. If you’re using freshly cooked rice, spread it out on a baking sheet and let it cool completely, even chilling it in the fridge for an hour or two, to mimic the firmness of day-old rice. Always ensure your rice is firmly pressed into shapes; this prevents crumbling during frying. For the perfect golden crust, keep an eye on your oil. Use enough neutral oil to create a shallow layer in the skillet, ensuring even browning without deep-frying. Adjust heat as needed – every stovetop varies – to avoid burning while still achieving that desired crunch.
Versatility in Every Bite
These crispy rice bites are a blank canvas for culinary creativity. Elevate them with a classic soy-ginger dipping sauce for an umami-rich experience, offering a salty, savory, and slightly piquant counterpoint. Or embrace a little heat with a creamy, spicy mayonnaise (think a simple Sriracha-mayo mix) for a zesty, satisfying kick that complements the warm, crunchy rice beautifully. For an extra crispy crust, consider lightly coating the chilled, shaped bites in panko breadcrumbs before frying. The panko adds another layer of delightful crunch, making these golden rice snacks even more irresistible. Whether as an appetizer, a side dish, or a fun easy rice recipe, these are endlessly adaptable to your cravings and perfect for any occasion, from casual gatherings to elegant cocktail parties.
Full Recipe Breakdown
To make your culinary journey as smooth as possible, here’s the complete breakdown for preparing these incredible simple crispy rice bites.
The Essentials: Ingredients
- 2 cups cooked short-grain white rice (preferably day-old)
- 1 tablespoon neutral oil (such as vegetable or canola), plus more for frying
- 1/2 teaspoon salt
- 1/4 teaspoon sugar (optional, for balance)
- 2 tablespoons chopped green onions, for garnish
Your Cooking Map: Instructions
1. In a large bowl, combine the cooked rice, 1 tablespoon of neutral oil, salt, and optional sugar. Mix gently until well combined.
2. Line a baking sheet with parchment paper. Firmly press the seasoned rice into a square or rectangular shape, about 1/2 to 3/4 inch thick, on the parchment paper. You can use a mold or your hands.
3. Cut the pressed rice into individual bite-sized squares or rectangles. Place the shaped rice bites on the baking sheet and refrigerate for at least 30 minutes to firm up. This helps them hold their shape during frying.
4. Heat 2-3 tablespoons of neutral oil in a large non-stick skillet over medium heat. Once the oil is shimmering, carefully place the rice bites into the skillet, ensuring not to overcrowd the pan. You may need to cook them in batches.
5. Cook for 3-5 minutes per side, or until each side is golden brown and crispy. Use a spatula to gently flip them.
6. Once cooked, transfer the crispy rice bites to a plate lined with paper towels to drain any excess oil.
7. Garnish immediately with chopped green onions and serve warm.
Quick Facts
- **Servings:** 4
Nutrition at a Glance
For those curious about the specifics, here’s the nutritional breakdown for these delightful simple crispy rice bites per serving:
- **Calories:** 250 kcal
- **Protein:** 4g
- **Carbs:** 45g
- **Fat:** 6g
Enjoy your new favorite snack knowing its balanced profile, making it a satisfying and relatively light option for any time of day!
Mastering the Secrets of Cooking
For perfectly crisp results, ensure your rice is well-chilled after shaping. This crucial step prevents crumbling during frying. Don’t overcrowd the pan; cooking the bites in batches allows each piece to achieve that irresistible golden crunch evenly and thoroughly.
Make Your Recipe Unique
While these bites are delightful as is, you can subtly shift their flavor profile. Swap out the green onions for fresh chives or finely chopped cilantro as a vibrant garnish. Experiment with different neutral oils for frying, such as avocado or grapeseed, to add a nuanced touch to the crispy exterior of this simple snack.
Smart Storage & Reheating
To keep your Simple Crispy Rice Bites at their best, store cooled leftovers in an airtight container in the refrigerator for up to three days. For optimal crispness when reheating, use an air fryer or pan-fry them again until golden and warm, avoiding the microwave to prevent sogginess.
The Chef’s Golden Tips
I once made these Simple Crispy Rice Bites for a potluck, and they vanished within minutes! A guest even tried to bribe me for the recipe. It’s a reminder that sometimes the simplest snacks are truly the most beloved.
Final Thoughts
We’ve journeyed through creating some truly remarkable bites, from the satisfying preparation to that first glorious crunch. These *Simple Crispy Rice Bites* are more than just a snack; they’re a symphony of textures—a golden, crispy shell giving way to a tender, fluffy interior, brightened by fresh green onions. They are the perfect little packages of savory delight, ideal as a unique appetizer or a delightful side. So, don’t just read about the magic; embrace it. Head to your kitchen and whip up a batch of these irresistible bites today. Your taste buds will thank you for discovering your new favorite snack!
Print
Simple Crispy Rice Bites: Your New Favorite Snack
- Total Time: 35 minutes
- Yield: 4 1x
Description
These crispy rice bites offer a delightful contrast of textures, featuring a golden, crunchy exterior that gives way to a tender, fluffy interior. Each bite is subtly seasoned, providing a savory foundation, and finished with fresh green onions for a hint of aromatic brightness. Prepared by pan-frying, these bites develop a satisfying crispness, making them an appealing appetizer or side dish.
Ingredients
- 2 cups cooked short-grain white rice (preferably day-old)
- 1 tablespoon neutral oil (such as vegetable or canola), plus more for frying
- 1/2 teaspoon salt
- 1/4 teaspoon sugar (optional, for balance)
- 2 tablespoons chopped green onions, for garnish
Instructions
- In a large bowl, combine the cooked rice, 1 tablespoon of neutral oil, salt, and optional sugar. Mix gently until well combined.
- Line a baking sheet with parchment paper. Firmly press the seasoned rice into a square or rectangular shape, about 1/2 to 3/4 inch thick, on the parchment paper. You can use a mold or your hands.
- Cut the pressed rice into individual bite-sized squares or rectangles. Place the shaped rice bites on the baking sheet and refrigerate for at least 30 minutes to firm up. This helps them hold their shape during frying.
- Heat 2-3 tablespoons of neutral oil in a large non-stick skillet over medium heat. Once the oil is shimmering, carefully place the rice bites into the skillet, ensuring not to overcrowd the pan. You may need to cook them in batches.
- Cook for 3-5 minutes per side, or until each side is golden brown and crispy. Use a spatula to gently flip them.
- Once cooked, transfer the crispy rice bites to a plate lined with paper towels to drain any excess oil.
- Garnish immediately with chopped green onions and serve warm.
Notes
Using day-old cooked rice helps achieve a firmer texture and better crispiness.
Press the rice firmly into shapes to prevent them from falling apart during cooking.
Adjust the amount of oil for frying to ensure even browning without deep-frying.
These bites are versatile; consider serving them with a soy-ginger dipping sauce or a spicy mayonnaise.
For an extra crispy crust, you can lightly coat the shaped rice bites in panko breadcrumbs before frying.
- Prep Time: 20 minutes
- Cook Time: 15 minutes
Nutrition
- Calories: 250 kcal
- Fat: 6g
- Carbohydrates: 45g
- Protein: 4g
FAQs
Why is using day-old rice recommended for these crispy bites?
Using day-old cooked short-grain white rice is a crucial tip for achieving the best texture in this recipe. When rice sits overnight in the refrigerator, it dries out slightly, becoming firmer and less sticky. This reduction in moisture content is key because it helps the rice hold its shape more effectively when pressed and cut. More importantly, it contributes significantly to developing that desirable golden-brown and extra crispy exterior during pan-frying, ensuring each bite delivers a satisfying crunch that contrasts beautifully with its tender interior.
How can I ensure the rice bites hold their shape and don’t fall apart during cooking?
There are a couple of essential steps to prevent your rice bites from falling apart. First, after combining the rice with oil, salt, and optional sugar, it’s vital to firmly press the mixture into a compact square or rectangular shape, about 1/2 to 3/4 inch thick. You can use your hands or a mold for this. The second critical step is refrigeration. Once shaped and cut, place the individual bites on parchment paper and chill them in the refrigerator for at least 30 minutes. This firming process helps them maintain their integrity when they hit the hot skillet.
What kind of oil should I use for frying the rice bites?
For frying your rice bites, it is recommended to use a neutral oil. The recipe specifically suggests neutral oils such as vegetable or canola oil. These types of oils have a high smoke point and a mild flavor, which means they won’t overpower the subtle seasoning of the rice bites and can withstand the medium heat required for frying without burning. Using a neutral oil ensures that the bites develop a beautiful golden-brown and crispy crust while allowing their inherent savory flavor to shine through beautifully.
Can I enhance the crispiness of these rice bites even further?
Absolutely! To achieve an even crispier crust, the recipe suggests an additional step. After you’ve shaped and firmed up your rice bites in the refrigerator, you can lightly coat them in panko breadcrumbs just before frying. This thin layer of panko will add an extra textural dimension, providing an intensified crunch when cooked. Remember to heat 2-3 tablespoons of neutral oil over medium heat in a non-stick skillet and cook them for 3-5 minutes per side until each side is golden brown and extra crispy.